Happy 2nd Anniversary to my Electric Pressure Cooker (Instant Pot)

The Wednesday after cyber-Monday two years ago, this badass appliance arrived and changed my kitchen life forever.

instant-pot

Things I now make in the Instant Pot:  

  • Hard boiled eggs–that come out perfect every. single. time.
  • Refried beans–I may never buy canned refried beans again.  They take minutes in the pressure cooker, instead of hours.
  • Burrito fillings–In one pot I can thaw, crumble and brown the meat and then cook it with the spices and beans, to fill a big batch of freezer burritos.
  • Yogurt–Using a gallon of milk and 1/2 cup of plain yogurt, I can make a big batch of yogurt to freeze in portions for smoothies on demand.
  • Applesauce–Apples + water + pressure cooker = applesauce in minutes, to be eaten and/or frozen in portions.
  • Soups— Some of my faves have simply been adapted from crock pot recipes.  Easy.
  • Wine!–My first batch of wine using these instructions came out fine, so I’ve got a second batch in progress.  I changed a couple of steps, to make it er, more drinkable.  Once I made the changes, I had something I would actually drink a glass of now and then.
  • Other foods–Cottage cheese, ricotta cheese, pumpkin puree, spaghetti squash.  All of these take just one or two ingredients and a few minutes of prep time.

Meals–I’ve seen some pictures of amazing beef, pork, seafood and poultry meals from pressure cookers by first-time and novice users.  If you have several mouths to feed, I think the Instant Pot meal possibilities are limitless.

Desserts–Lots of people make desserts in their pressure cooker.  I’ve seen scrumptious photos of cheesecakes and other goodies, but I haven’t tried my own yet.  It will happen, though.

Adapting recipes to the Pressure Cooker — I’ve had great luck adapting crock pot (aka slow cooker) recipes to the pressure cooker.  It has usually been as simple as reducing the cooking time from hours to minutes.  There are some helpful conversion charts that can be found online.  Food colors and textures are generally more fresh and bright with the pressure cooker than the same dish cooked in the crock pot.

Here are some handy pressure cooking time charts for lots of different foods. https://www.meredithlaurence.com/pressure-cooking-101/cooking-charts/

Now, a little demonstration.

LASAGNE SOUP!

This week, I made this Lasagne Soup recipe.  (The link is to a pdf download of the recipe.)  A few views from the soup preparation:

The meat in the steamy picture below is browning quickly on the ‘Sauté’ setting.  

instant-pot saute buttonSaute a

Assembled here are the remaining ingredients to add to the browned meat.  

Lasagne soup ingredients2 a

All ingredients are now in the pot, ready for pressure cooking on the Beans/Chili setting.  That big chunk in the middle is a cup of frozen V-8.  Frozen ingredients can be tossed in frozen.  The pressure cooker takes it from there. 

Lasagne soup ready for PC ainstant-pot bean chili button

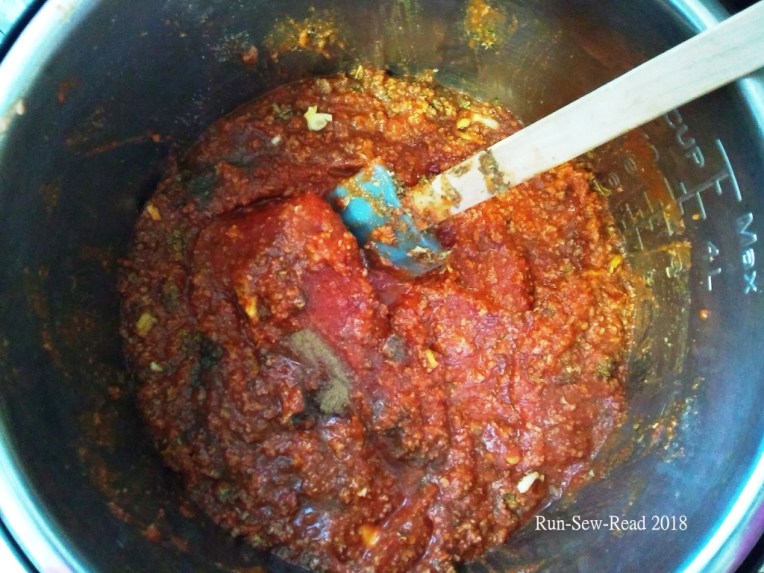
After the pressure has released, add the rest of the water and the dry pasta, and set on ‘Slow Cook’ for 30 minutes.

Pasta water

instant-pot slow cook button

Then the soup is ready to eat.  Ladle some soup into a bowl and add a scoop of Cheese Mixture, which will start melting.

Lasagne soup ready to eat w

More About Electric Pressure Cookers:

Other brands.  You don’t have to buy an ‘Instant Pot‘.  There are less expensive models that do most or all of the same functions.  A couple of weeks after getting my Instant Pot, and having realized how amazing it is, I spotted a display in Walmart of their Farberware electric pressure cookers left over from Black Friday.  The Farberwares were $39.  I got some of the Farberwares for gifts.  Turns out the Farberware is everything the Instant Pot is, but without a separate yogurt button.  (It can still do yogurt.)  Aldi occasionally offers an electric  pressure cooker for $39, and I’m guessing it is just as user-friendly as the Instant Pot and Farberware versions.

Scary?  No!  Pressure cookers have been around for several generations.  I too was terrified of my grandma’s stovetop pressure cooker when it would shoot steam out the top like a locomotive.  Rest assured, the electric pressure cookers now on the market aren’t scary.  You can release the pressure manually, but otherwise, the operation is well contained inside the pot, with easy labels on the control buttons–labels like “yogurt”, “saute”, and “keep warm”, that do exactly what the button says.

Where to get pressure cooker advice:

  • Facebook groups:  There are Instant Pot groups on Facebook that are full of recipes and tips for using your pressure cooker.  My favorite group is actually for the Farberware model.  From the Farberware group, I’ve gotten recipes, troubleshooting tips, and discount codes for pans and other accessories useful with the pressure cooker.
  • Useful Websites.  Here are two sites I consult regularly:
  • Cookbooks (lots of them):  Every day, there are free Instant Pot cookbooks available in the Amazon Kindle store.
  • YouTube:  Lots of recipe and instructional videos are available on YouTube.

This 1949 pressure cooker commercial is done as a cute sitcom.  Much of the dialogue is even funnier now, 70 years later.  Mixed into the fun story are some great basic explanations of how a pressure cooker cooks.

[Teenage Carol:  “I wanted to cook the first meal, with mother just helping.  Like most elderly people, she had doubts.  But she finally gave in.”  Haha!]

The ‘nuts and bolts’ pressure cooker segments are found here:

  • At 9:50 how pressure cooking works
  • At 16:50 more pressure cooker facts and tips

[I’m dying to know if Carol and Jack ended up together. ❤ ]


If you prefer to not download a document, here is the text of the Lasagne Soup recipe:

LASAGNE SOUP
1 lb. Italian sausage
1 (28 oz) can of crushed tomatoes
1 (6 oz) can of tomato paste
3 c. beef broth (I use 1 T. beef bouillon powder and 3 c. water)
3 cloves of garlic, minced
1 T. dried parsley
1 T. dried basil
½ c. chopped onion (2 T. if dehydrated)
1 c. V8 Juice
¼ t. pepper
¼ t. salt
2 c. uncooked shell pasta or rotini
1 c. of water
1. Brown meat in the pressure cooker, on the ‘Saute’ setting.  Drain.
2. Stir in the tomatoes and tomato paste.  Add the rest of the ingredients except 1 c. of water and the pasta.  Cook on ‘Bean/Chili’ or ‘Manual’ for 5-7 minutes.  Let the pressure release naturally.
3. After the pressure has released, open the cooker and add the remaining water and pasta. Stir to combine. Cover and cook on the ‘Slow Cook’ or ‘Keep Warm’ setting until pasta is tender (about more 30 minutes).
4. Ladle the soup into bowls.
5. Drop a 2T ball of Cheese Mixture (see below) into each bowl of hot soup.  Serve.
*Makes apx 20 ladles of soup.
*The soup can be frozen in individual portions for a microwavable bowl of soup on demand.
Cheese Mixture
4 oz. Shredded Mozzarella
1 c. Cottage Cheese
¼ c. Grated Parmesan
1. Mix cheeses together.
2. Spoon 2 T. of cheese mixture into each bowl of soup.
*Makes apx. 30 scoops.
*To freeze cheese mixture, scoop in 2 T. portions onto cookie sheet and freeze. When frozen, transfer the portions to a freezer bag and place in freezer for later use on demand.
[Adapted from a crock pot recipe found at onehundreddollarsamonth.com]


Myrtle the 4-month-old foster pup came to my house this week.  She was interested in being my sous chef, until she discovered the heated throw on the couch.  Now she’s just a cute puppy head sticking out of a warm blanket.  She will be with me for about a month while her skin condition is treated.  Soon she’ll have a pretty furry face, instead of bare skin.

Myrtle heated blanket

Jeans waist, not waste

I made an executive decision last week, to ban low-rise jeans from my person.  I despise the old low-rise trend; can’t stand wearing them.  They never feel right.

Low-rise jeans are also bad for the body, I think.  They ruin posture and cause expanding waistlines.  They promote slouching and spreading, because slouching and spreading the hips is what you have to do to keep them in place.

The pair of low-rise skinny jeans that caused this epiphany, still has some wear in them, and I like the color and weight.  When I endured the misery yet again of wearing them last week, I resolved to either fix the waist or be content to ruin them trying.

Result:  Waist is fixed!

The jeans before:

  • Low waistband in front;
  • High enough in back;
  • Tiny zipper.

Jeans before--RSR

Here’s how the process went:

  • Unzip the zipper.
  • Detach the front belt loops from the body of the jeans.  (They can probably stay attached to the top of the waistband.)
  • Cut the waistband off, from the center front to the side seam.

Jeans cut waist--RSR

Important:  Do not zip up the zipper.  With the waistband out of the way, there may not be a stop to keep the zipper pull from coming off at the top.  Instead, keep the zipper pulled down, and use pins to position the fly until the insert is sewn in place.

Pin the pockets and zipper to hold them in place.

Jeans cut waist full--RSR

Put the jeans on and identify where the waistband naturally feels right.

Jeans waistband fit--RSR

Cut two pieces of denim to insert in the open space across the front.  The pieces should be roughly the same shape as the open space, but slightly larger than the space on all sides.

Jeans insert--RSR

With the waistband moved out of the way, sew each insert piece to the body of the jeans, right sides together.

Jeans seam--RSR

Flip the insert piece over, and the seam looks like this.

Jeans seam after--RSR

Put the jeans on again, to identify the waistband placement on the insert, and pin the waistband in place.

Topstitch the waistband onto the insert fabric.  (Make sure the belt loops are out of the way of the stitching)

Jeans waistband placement--RSR

Trim the insert fabric even with the top of the waistband.  Fold the center front excess to the inside and topstitch in place.  Inside out, the insert will look like this:

Jeans finished inside--RSR

You will need something to close the gap where the zipper is too short.  I used velcro.  It was easy to place and stitch, and holds the gap closed.  I first added the long velcro shown next to the zipper.  That wasn’t effective.  The short piece above the zipper worked, and was actually easier to put on.

Jeans velcro--RSR

Finished look:

Jeans modeling after--RSR

The insert has a slight indented look, for some reason that I haven’t tried to figure out.  I don’t care.  The waistband feels great.

Jogging for Groceries

My grocery hike last week spurred me into action.  I’ve always wanted to combine my run with a trip to the grocery store.  But then how do you get the groceries home?  I’ve never seen a ‘grocery jogger’, like a baby jogger.  But then the thought struck me, why not just use a baby jogger?  So I went looking for one that is inexpensive, doesn’t look like a stroller, and is convertible to a bike trailer.  Found and ordered this one.

Grocery joggerOn the trip to the store, it was obvious that people thought I had a baby in there.  That felt a little awkward.   Also, the front wheel wobbled badly when I jogged.  It was fine when I walked.

At the store, I pulled the front cover back, and used the carrier as my grocery cart.  I got a few curious looks, but no negative reactions.  The produce lady loved it, and so did another lady who walked by as I was talking to the produce lady.

On the way home from the store, the front wheel didn’t wobble at all.  The carrier obviously needs the weight in order to operate properly as a jogger.

Distance each way is 1.35 miles.  Total trip time was 80 minutes, with a full load of groceries, including a 16 pound bag of dog food.

IMG_3872a
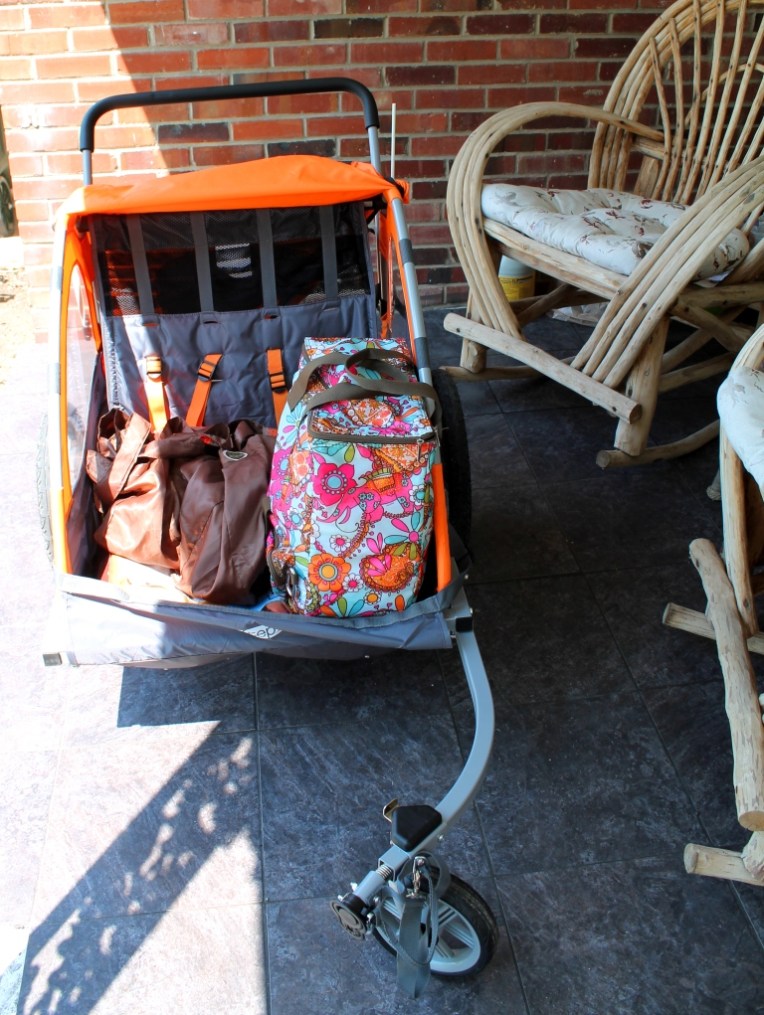
One concern I have is with the way the front wheel sticks out.  It could be a tripping hazard for someone at the store.  I tried to maneuver the cart so the front wheel was never sticking out in the aisle.  The front wheel extension is on a hinge, and can fold back underneath the cart for storage.  So, I’m going to try to fashion a front wheel position that doesn’t stick out so far, for use at the store.  Stay tuned…

Grocery hike

Today before it got too hot out, I walked to the grocery store and back,

using the trolley I bought in Amsterdam,

IMG_3858a

wearing my other new pair of Xeros barefoot sandals,

IMG_3855a

and listening to a library book on my Kindle.

IMG_3857a

The entire trip took 90 minutes, and was as enjoyable as an errand can be.

Dog Days

I’m trying this cool community workout program this summer:  Red Dog’s Dog Days.  They’ve started offering a program for people who have moved away, which I really appreciate.

Sample workout from last week:

Calisthenics:
  • Stretch
  • 30 seconds Jumping Jacks
  • 30 seconds Push Ups

Today’s Run:

  • Jog 100 yards forwards
  • Jog 100 yards backwards
  • High step 50 yards, Jog 50 yards
  • Side shuffle 30 yards, switch directions and shuffle 30 yards, skip 40 yards
  • Sprint 120 yards, straight into 7 narrow, 7 regular, and 7 wide pushups
  • Jog 4 laps, sprinting the last 110 yards of final lap

It has helped me to have an active, well-rounded daily workout while recovering from my 10k last weekend.  And the Dog Days are Buddy-approved.  LakeHouseClosetQuilt+Buddy

Recovery

Once again I underestimated how grueling that 10k is.  I did improve my finish time over last year, and I’m determined to try again next year for the half marathon.  But, I did the right thing to downgrade yesterday, no question.  The trip straight up the dam is beyond difficult.  It zaps every ounce of energy remaining after two previous steep hill climbs.  Then, the run along that flat, long stretch of dam is roughly a mile, which should allow one to make up some lost time.  But it is hot up there, and too much energy at that stretch is spent recovering from scaling the dam.  When I reached the top, I wanted to cry and throw up, both.  But that misery eventually passed, and it then was back down the dam at the other end, and back into the trees.  It is still one of the funnest events ever.  The trails through the trees are immensely enjoyable.

The awesome trails

06082013701a

The top of the dam

06082013708a

That’s the finish line down there.  So close, yet so far away.

06082013709a

Descending back down the dam. 

(Thanks to the race photographers for sharing these!)

Storm the Dam3a Storm the Dam2a

Back into the trees.

06082013715a

The river crossing.

06082013716a

Eventually, I did reach the finish, and enjoyed some delicious race food.

_____________________________________________

That night, in the rain, I stood just a couple of people back from the stage

and watched this group that I loved way back when.

Downgrade

I signed up for this half marathon trail run tomorrow morning, but I didn’t get enough training miles in, so I’ve downgraded my registration to the 10k.  I’m disappointed in having to downgrade, but it is much more difficult than a regular half or 10k on paved roads.  It will be a challenge, and very fun.  I’ve looked forward to it ever since I did this event for the first time last year.  So, tonight it was a high-carb sandwich for dinner, and then a mile walk to stay loose.  Good night!