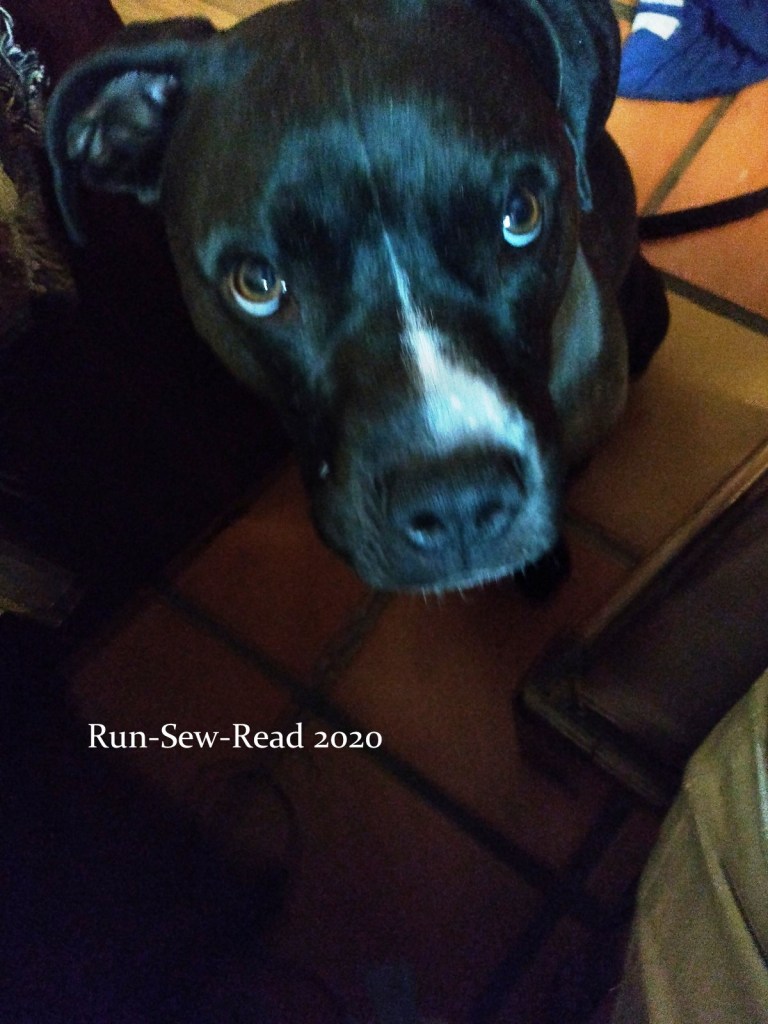
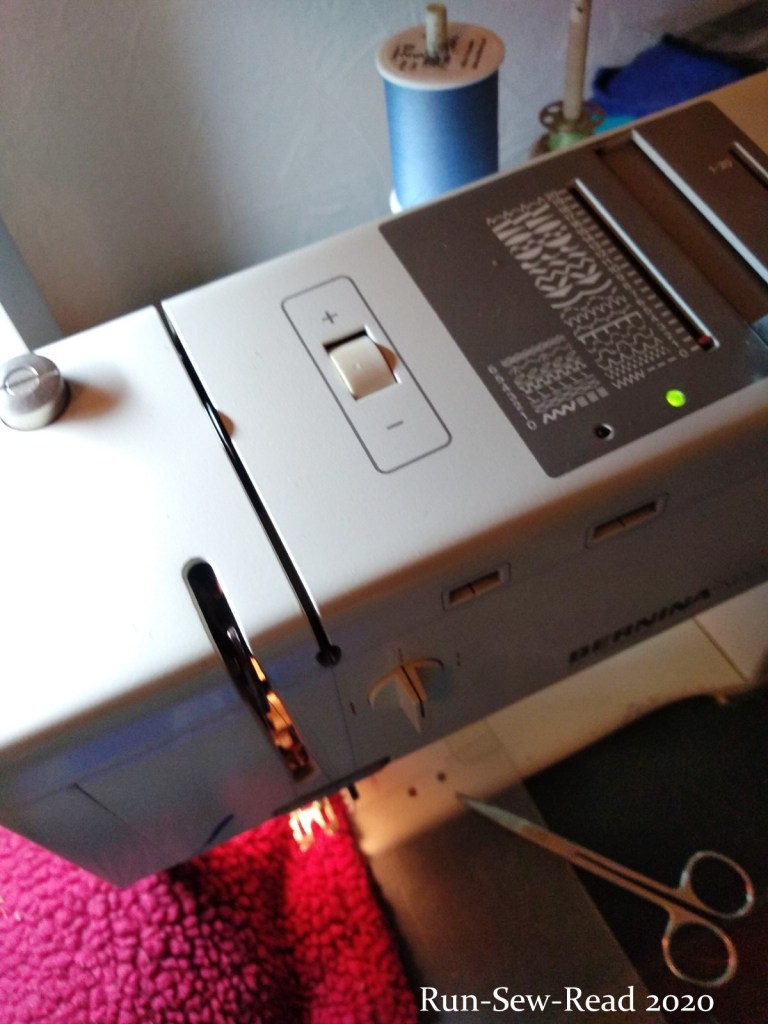
When Myrtle the two-year-old pup is being awful, and I need some peace, I can reach for the red plush fabric, and spend 5 minutes making her a squishy squeaky square.
When she sees me grab the red fabric, she calms down and sits as still as a statue by my sewing chair until I’m done. When I finish and hand it to her, her appreciation is a wonder.
THE PROCESS
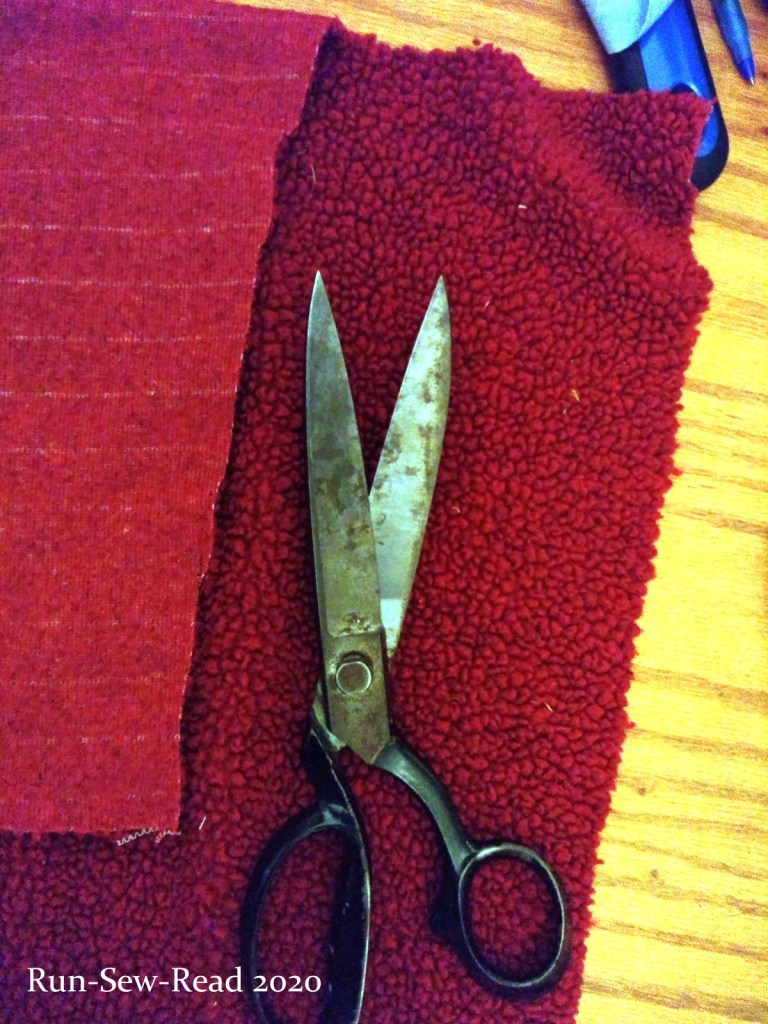
Cut out a rectangle approximately 12″ x 6″, of plush fabric.
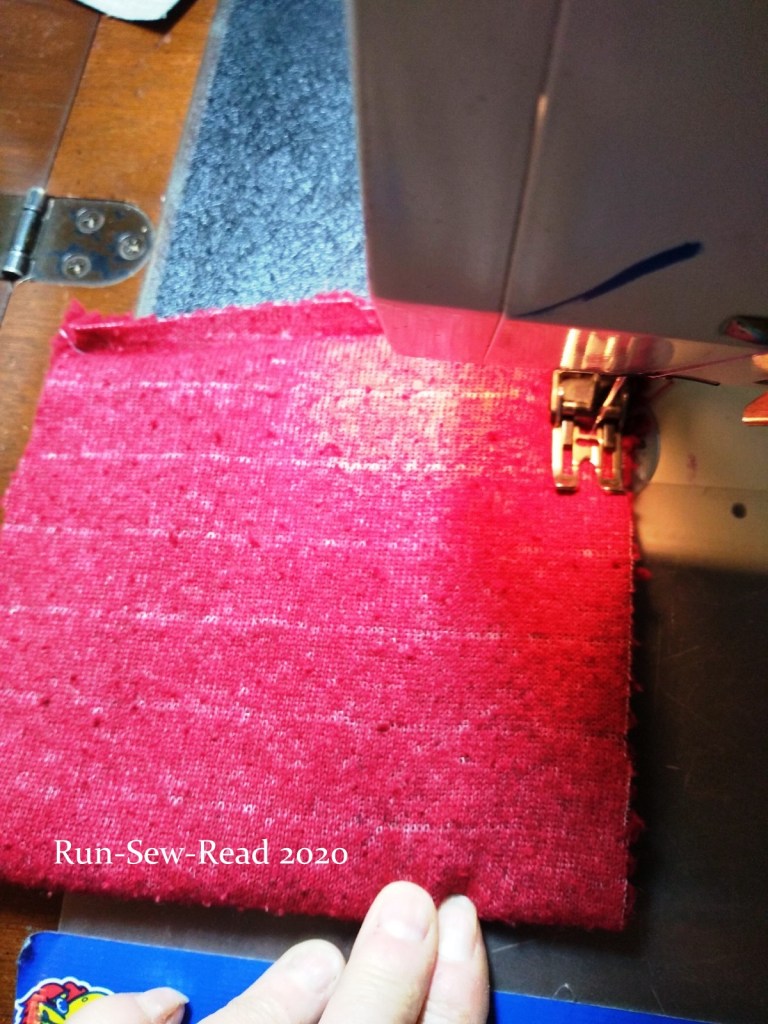
Fold in half, right sides together, to make a square shape. Sew two sides shut to make a little bag.
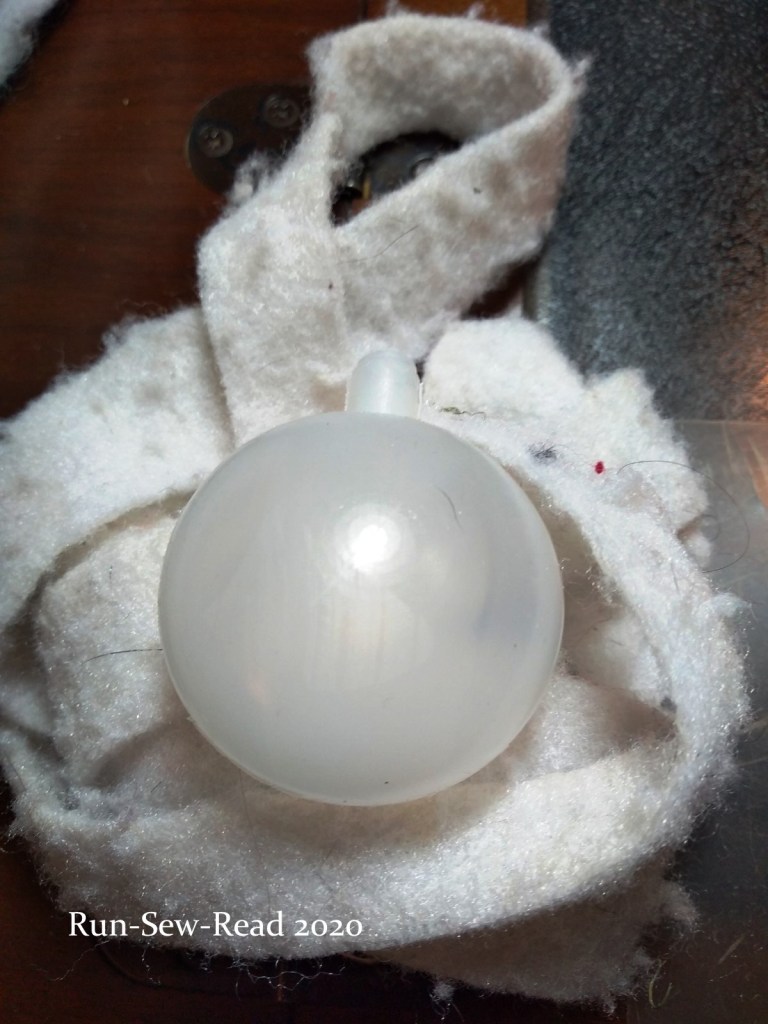
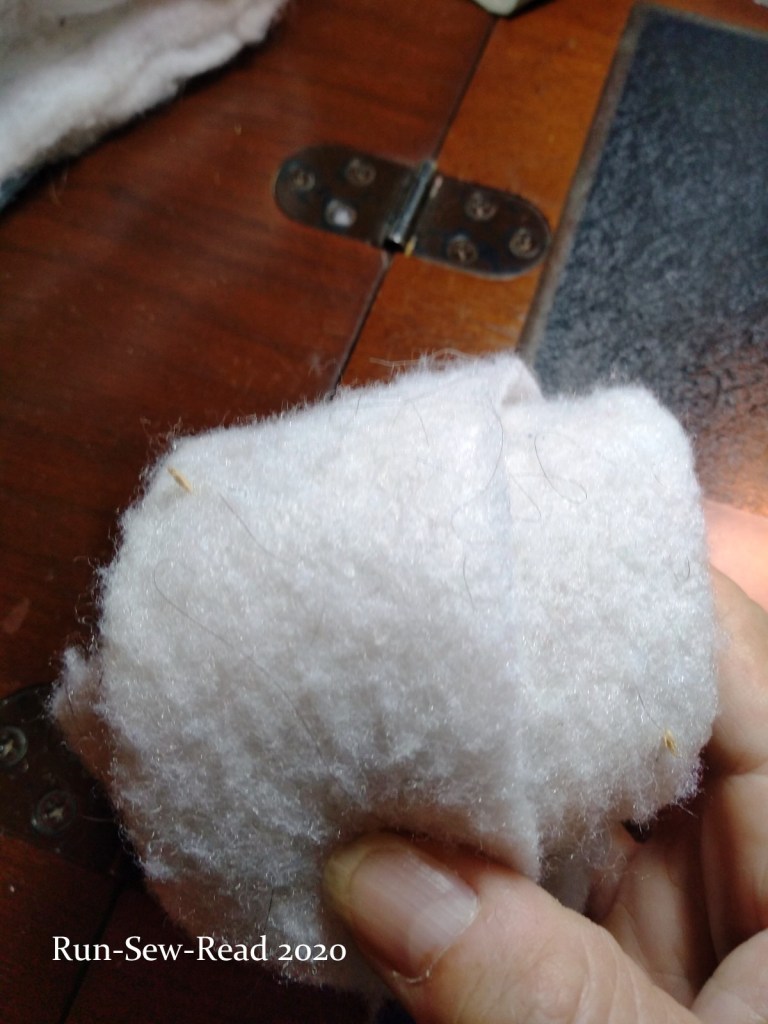
You need a dog squeaker and some fiberfill or batting scraps.
Wrap the squeaker in the fiberfill or batting.
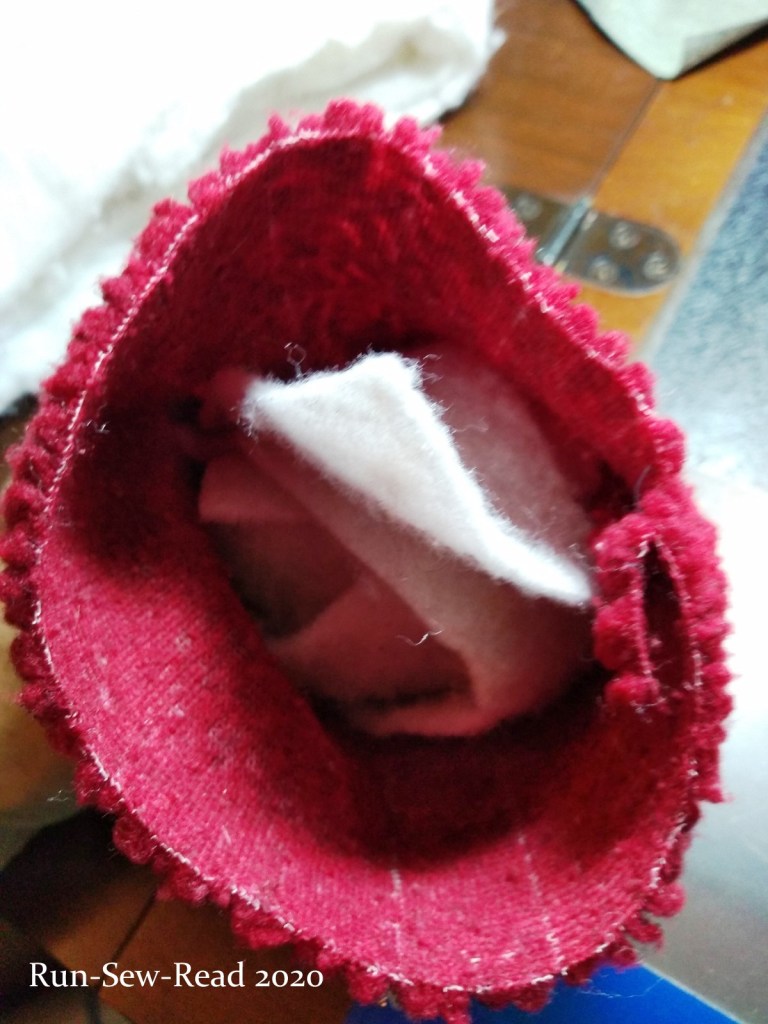
Turn the bag right side out and put the wrapped squeaker inside.
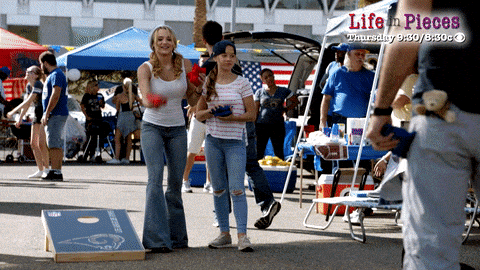
Yay, the season of outdoor get-togethers and yard games is upon us! (Memorial Day, Fourth of July, Labor Day, and more.) For my family, it started with Mother’s Day, when all of us sibs converged on Mom’s house for the weekend. One of my jobs was to bring bean bags for the Cornhole game. My brother made nice wood Cornhole boards, and I made a new set of bean bags.
Cornhole is a totally awesome game for tailgaters, festival goers, and family get-togethers. It is a bean bag toss where you try to toss the bag through the hole in a board 20+ feet away.
The boards can be purchased or custom made. Boards can have really lovely designs. Here is a monogrammed set available on Amazon.
The popularity of the game is evident from the range of products available on Amazon.
A set of Cornhole bags is eight (8) bags–4 in one color, and 4 in a different, contrasting color.
The bean bags are square, made of cotton duck, or similar heavy duty fabric, and filled with feed corn or a synthetic material that resembles corn in weight and consistency.
Each finished bag should be 6 inches x 6 inches, and weigh 16 ounces when filled.
The internet has numerous tutorials on making Cornhole bean bags. Do a search on Google and YouTube, and you’ll find some excellent instructions.
So, this post is less a tutorial, and more a compilation of tips I’ve picked up from making the bags.
Constructing the bags:
Start with 7″-7.5″ fabric squares. You’ll need 16 squares for 8 bean bags. Err on the side of cutting the squares larger, not smaller:
Stack two squares, right-sides together and sew all sides with a 1/2 inch seam allowance, leaving a minimum 3-inch opening on one side, for adding the corn.
[Stitching lines and opening:]
Reinforce the seams! Reinforce by adding a second row of stitching in the seam allowance. Then zig-zag or overlock the edges for even more reinforcement.
[Alternatively, reinforce by sewing the edges with French Seams. Tutorial here. ]
Then turn the bags right side out and get ready to fill them.
Filling the bags…
Whole corn for the filler can be purchased at a farm store or feed store. The price is usually less than $10 for a 40-50 lb bag of corn. I buy it at this regional store. https://www.atwoods.com/atwoods-whole-corn-40-lbs.html
Freeze the corn for 24-48 hours, to kill any little bugs and things that might be waiting to come out.
Before weighing, sift the corn through a colander to eliminate as much of the corn dust and other ‘stuff’ as you can. Then measure out 15 – 15.5 ounces of corn for each bag. The other .5 oz or so will come from the weight of the fabric.
With a funnel, load the measured corn into the bag.
A funnel made from a plastic gallon container works well because it has a big enough opening for the corn to pass through. A standard kitchen funnel doesn’t have a big enough opening.
To close off the bag, push the corn down in the bag as far as it will go, and then secure it there with pins or a long needle. For this, I prefer to use a long ‘doll needle’. The 5″ needle is easy to insert, and the one long needle holds everything in place. (Actually, a doll needle comes in handy for so many things, that I recommend keeping one in the sewing kit.)
The picture below shows how the doll needle holds the corn back from the stitching area, to give you room to maneuver the open end of the bag under the presser foot.
That little bit of extra room in the top of the bag is important not just for room to sew, but also for the finished bag. Bags stuffed too tight with corn can potentially burst on impact.
⇒Remember to reinforcetheclosure with a second row of stitching, and maybe even a third row.
Get creative with the bags! Try patterns and fabric paints.
Then, you are ready to play!
The bags (and extra corn) should be stored in a rodent-proof container.
Additional tips on bags and peace brought to you by John Lennon of Bag.
It was a drag, rolling out dough to fit my baking sheets. The sheets are ‘jelly roll’ style, which means they are rimmed with a raised edge. A regular rolling pin is too big to fit within the pan. My option was to treat it like pastry dough; i.e., roll the dough out on the counter and measure it to fit the sheet, then carefully lift the dough and place it in the sheet; or press the dough into the sheet with my fingers and then roll it with whatever cylindrical gadget I could find to fit the pan.
Some of the gadgets I’ve tried; none of which worked out very well:
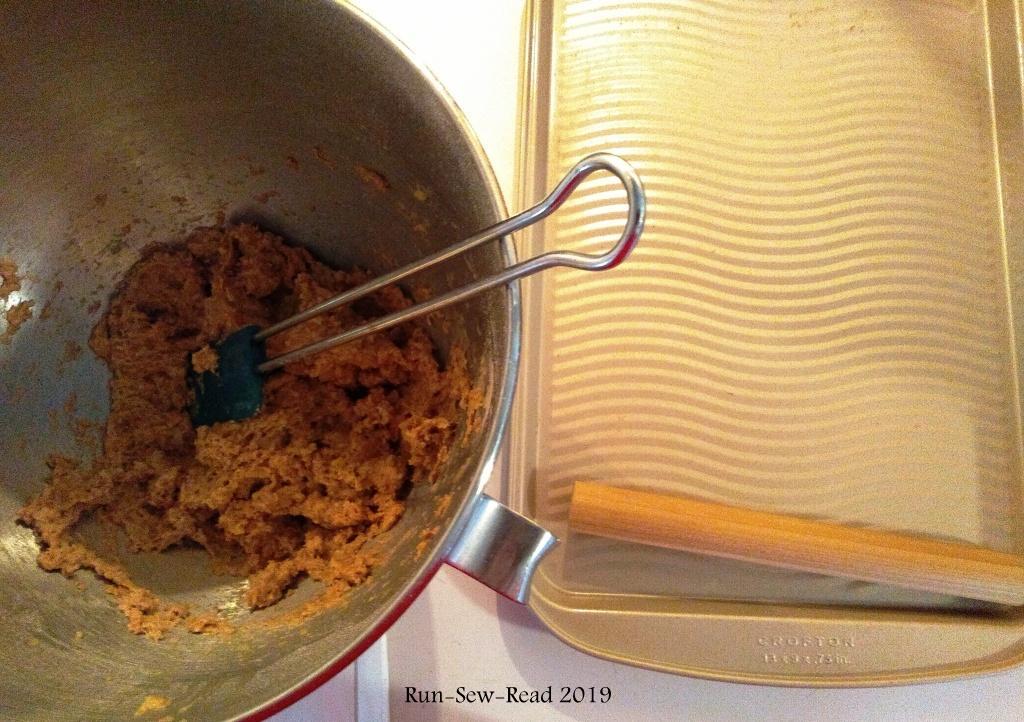
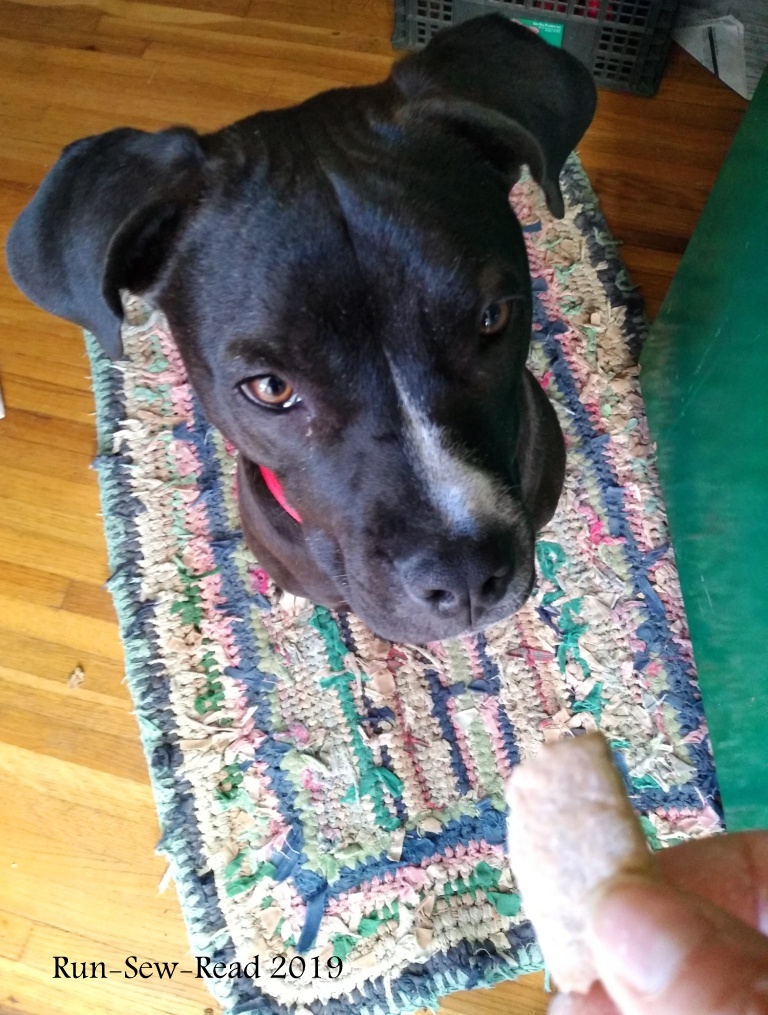
Myrtle-the-pup loves homemade dog treats, and I enjoy making them. So this issue of rolling out the dough was becoming an all-too-frequent annoyance.
The solution: I bought a 1.25-inch diameter wood dowel from the craft aisle of the store. It was $1.50. They are sold in 3-foot lengths. At home, with a little saw, I measured and cut a piece to the width of my baking sheet. Then washed the new little ‘rolling pin’ and coated it with mineral oil.
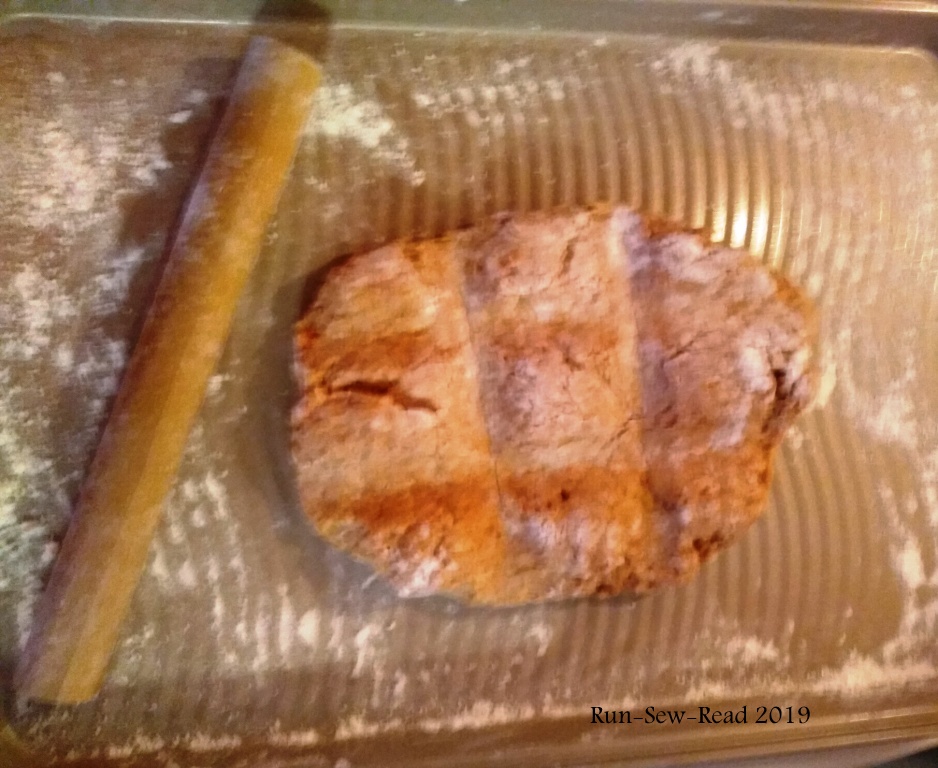
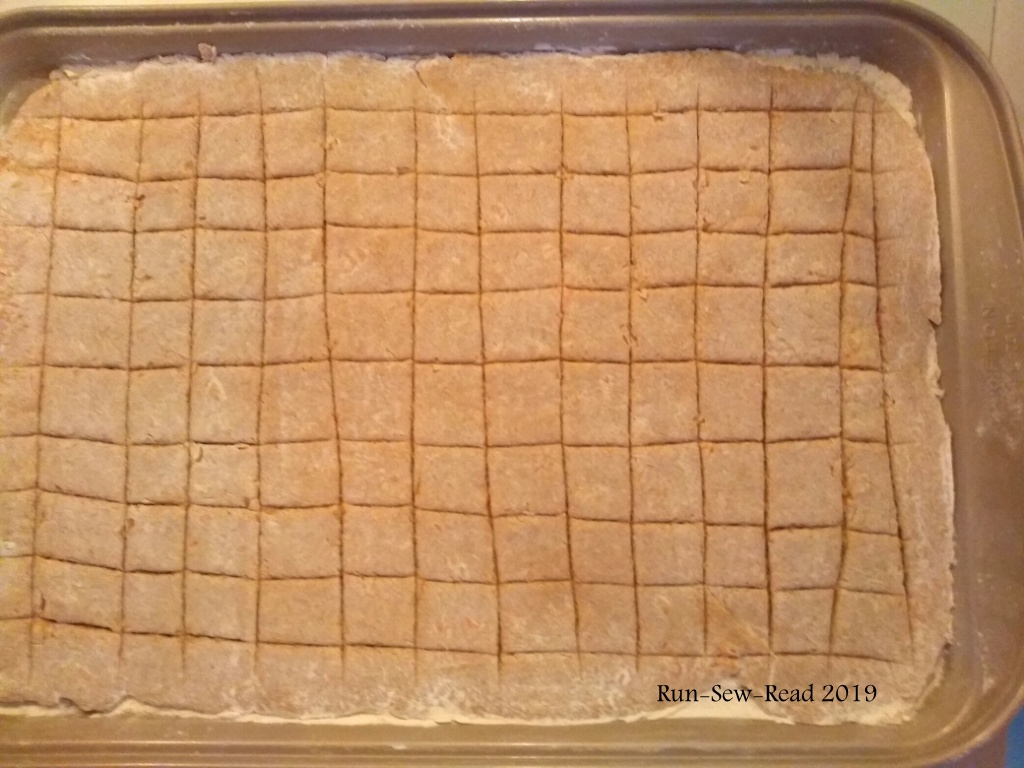
Now, a batch of dough goes from this…
to this…
to this with ease!
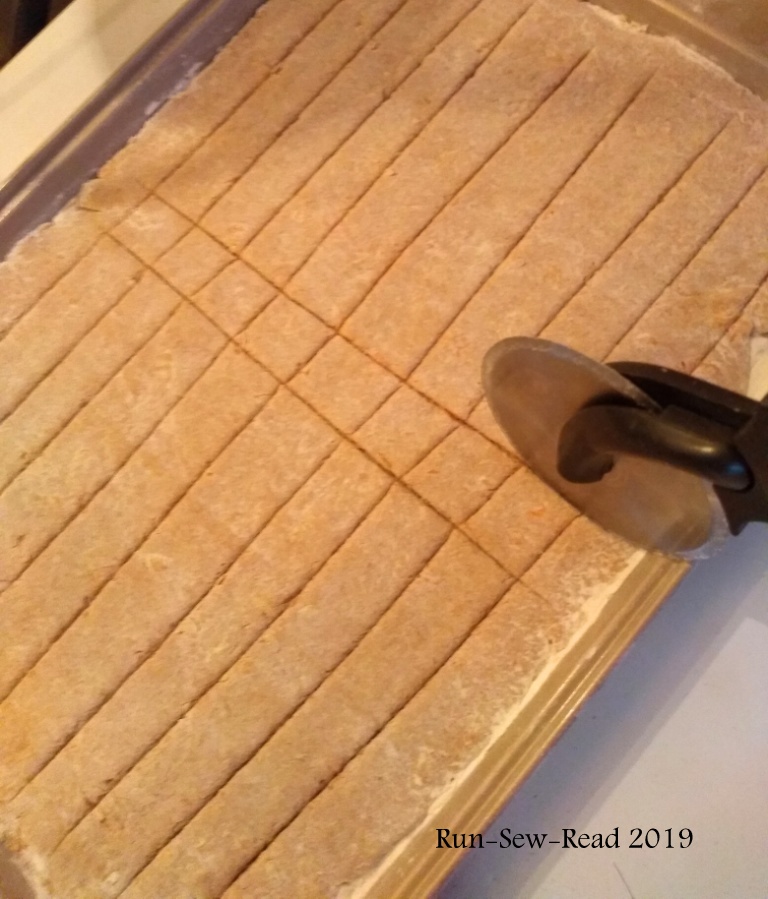
For Myrtle’s treats, I score the dough before baking, to be broken into little squares later. A pizza cutter works great for this.
Don’t make the scoring tedious. The pieces don’t have to be uniform in size or shape.
(Yes, I have a dog bone-shaped cookie cutter. But using it is a slow, tedious process. I do use it for special gifts for Myrtle’s dog friends and cousins, but that’s all.)
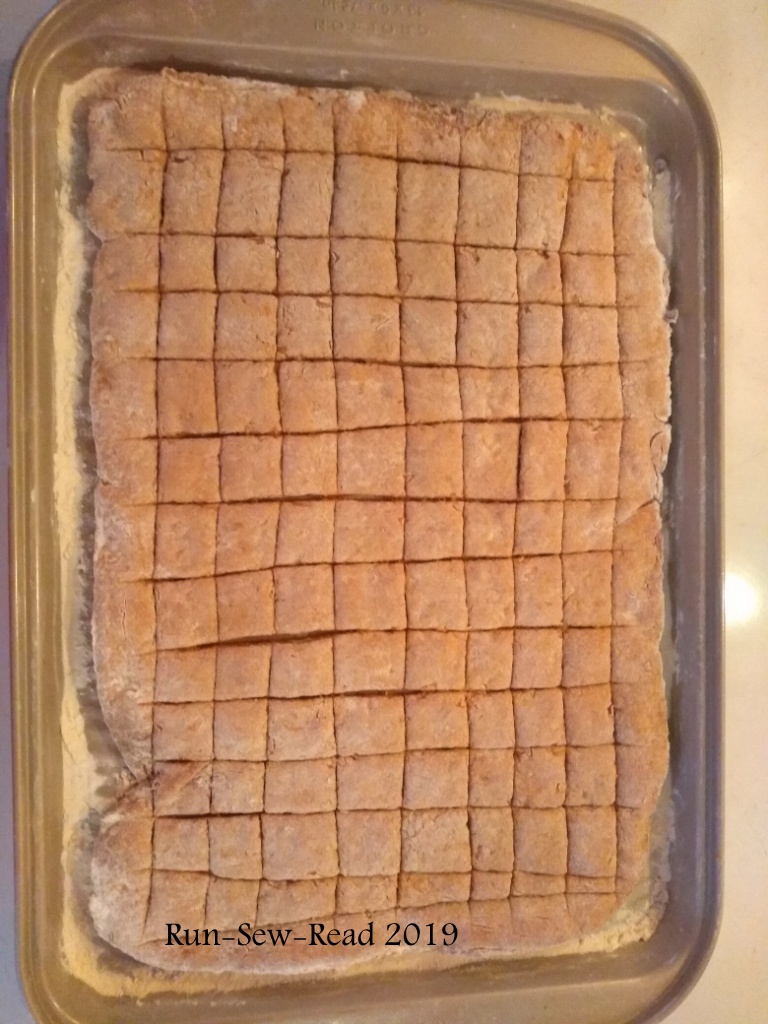
After baking, the treats come out of the oven looking like this.
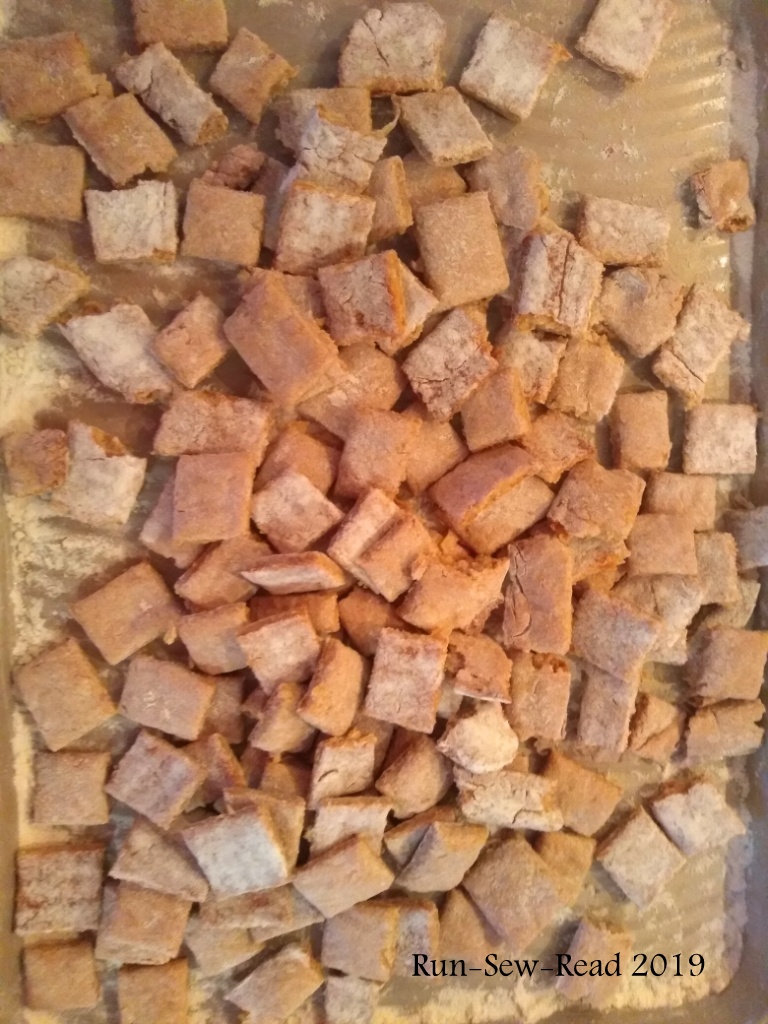
After cooling, it only takes a minute or two to break them all up.
I store the treats in an old Parmesan shaker, for easy dispensing.
The dog treat recipe I used for this batch is the Apple-Carrot Treats from this page:
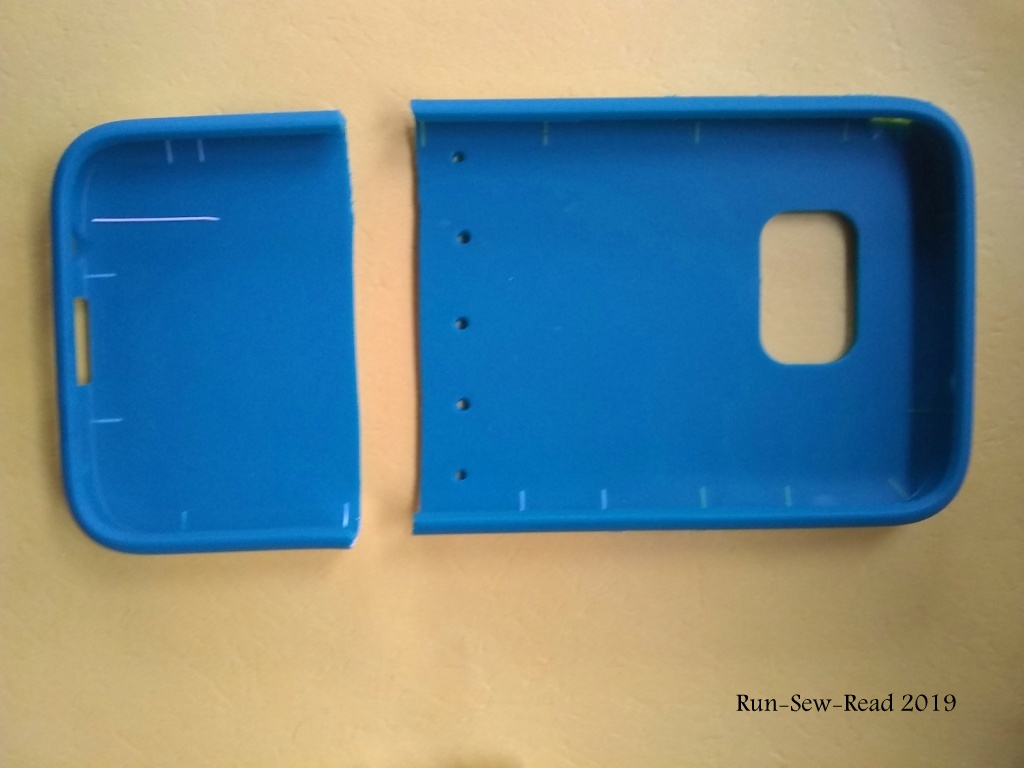
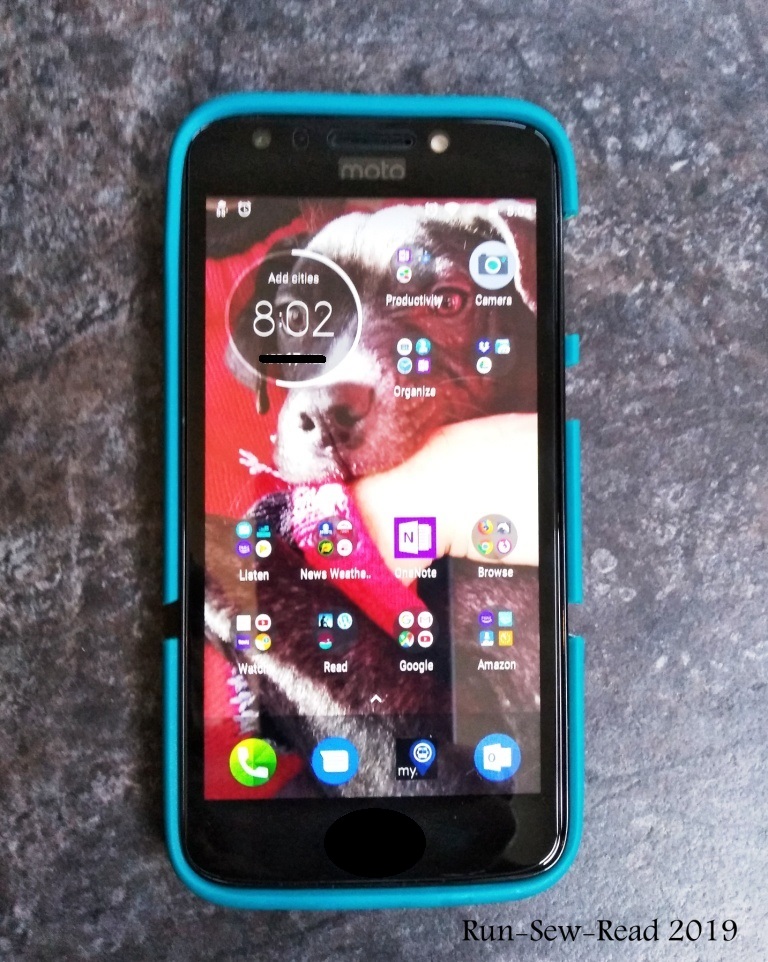
Last month I ordered a new phone and case. When they arrived, the case didn’t fit the phone. Dollar Store to the rescue. At the Dollar Store, I found some cases that were the correct width, but too short. They were flexible material, so I decided to try cutting one to make it fit. I bought two, in case I messed one up. Here’s how the process went.
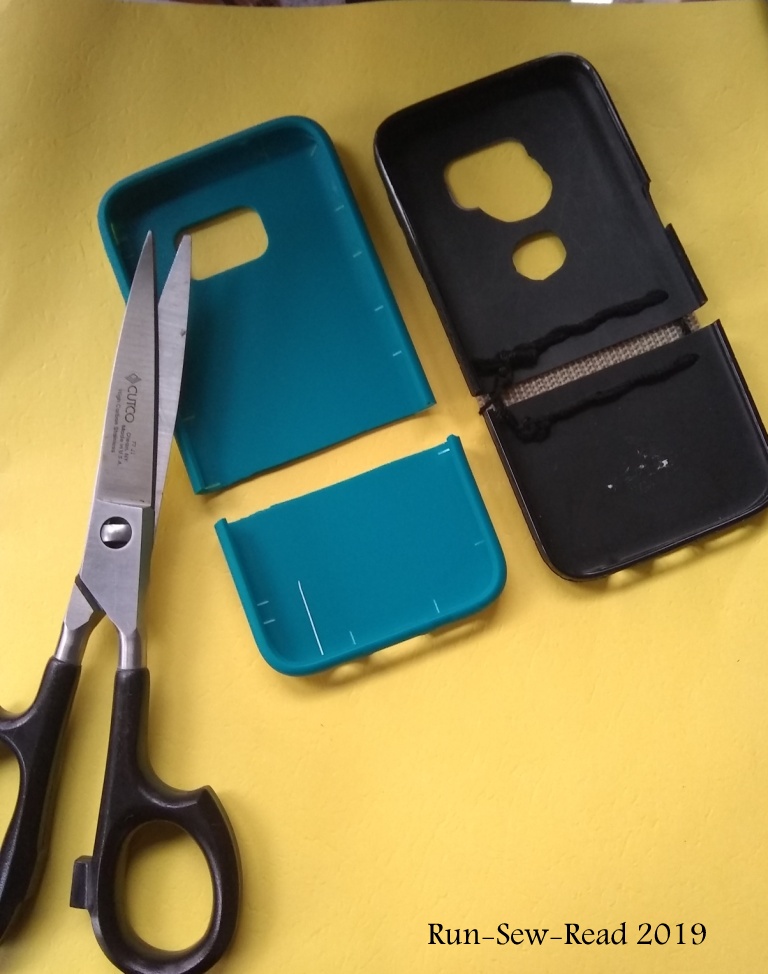
Cut the case in two, to increase the length. The case is a rubbery material, so strong shears are needed. I used kitchen shears. (The picture below shows the finished black case on the right, and next to it the turquoise one in progress.)
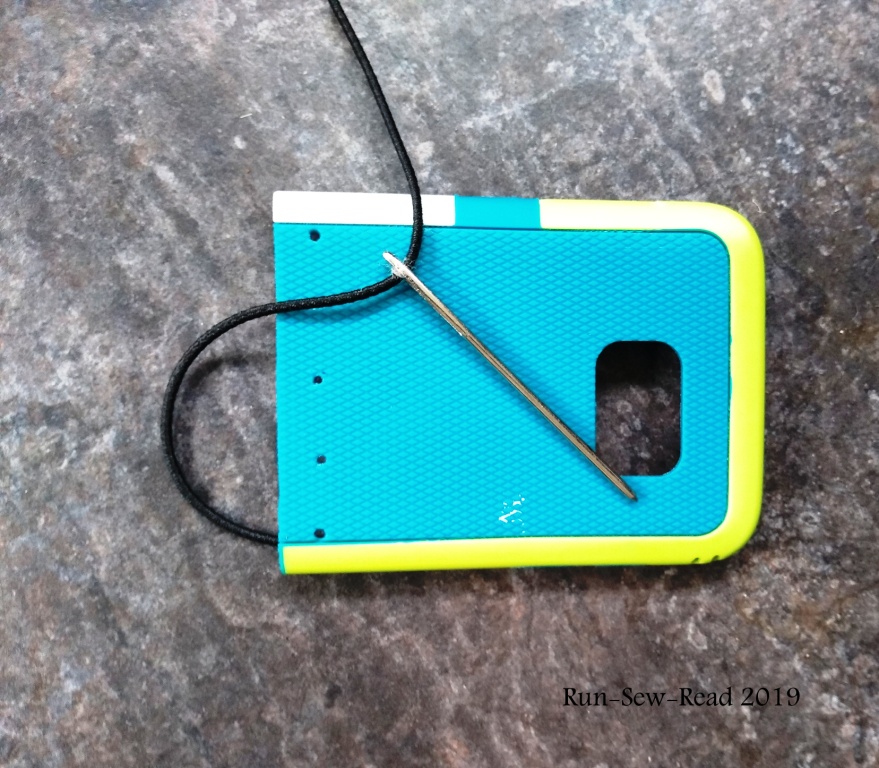
This shows the additional length needed to fit over the phone. Next I punched holes in both pieces, to stitch in a piece of fabric to bridge the gap.
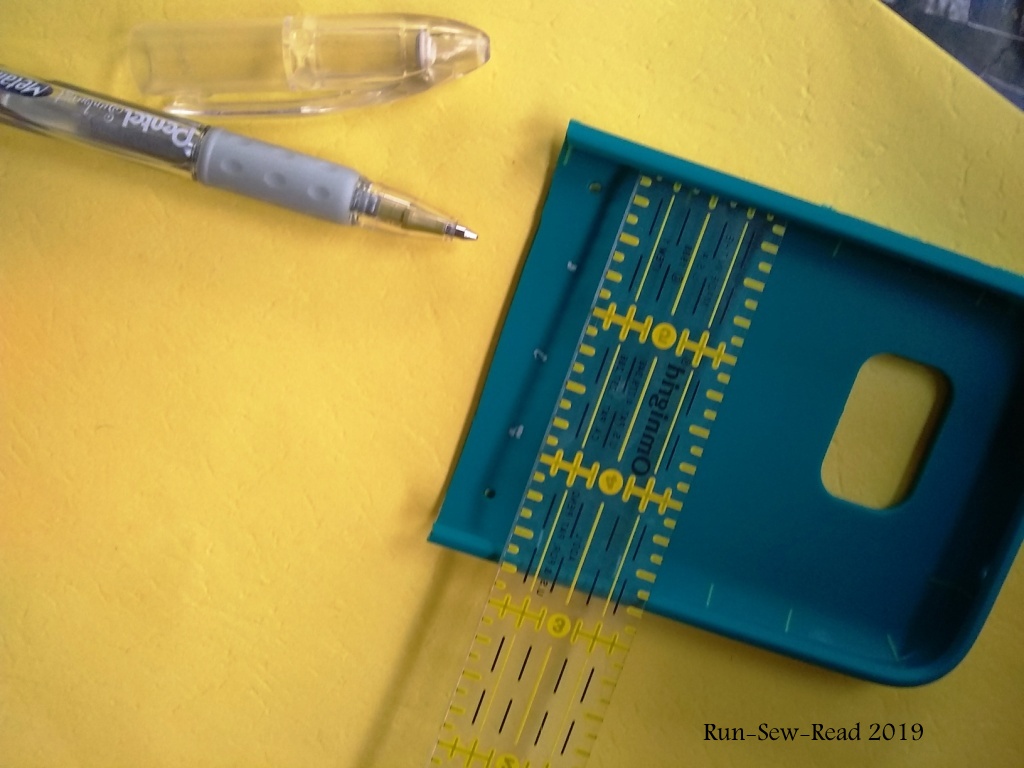
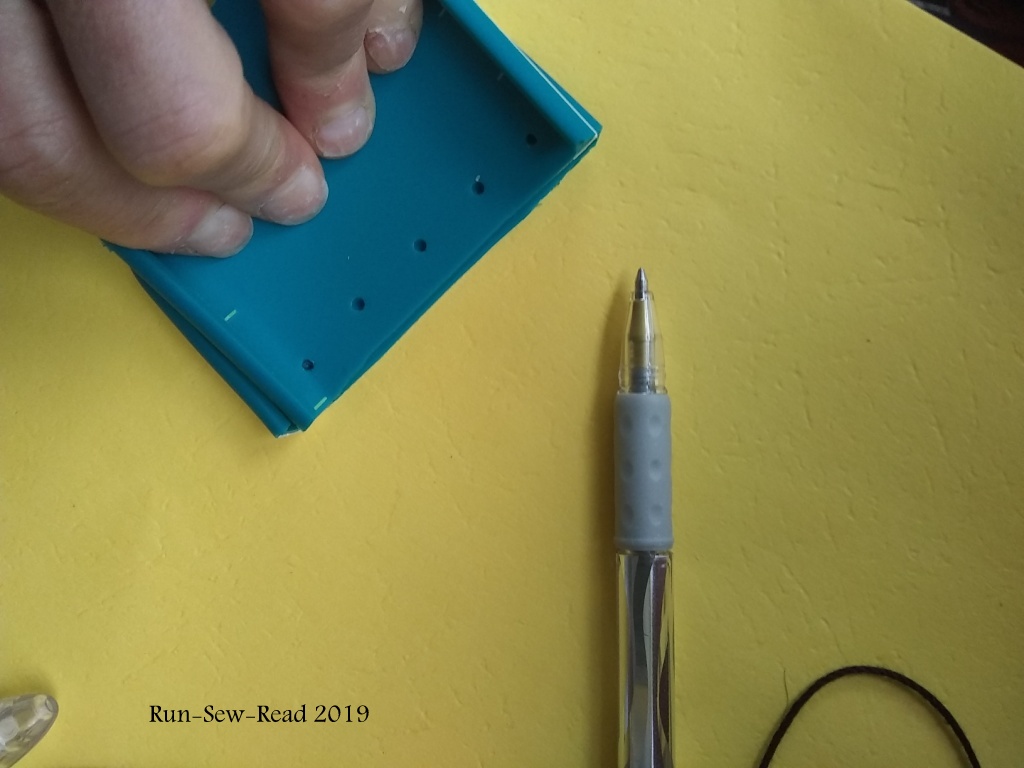
Marking and punching the holes:
The locations of the holes were first measured and marked, using a simple ruler and gel pen.
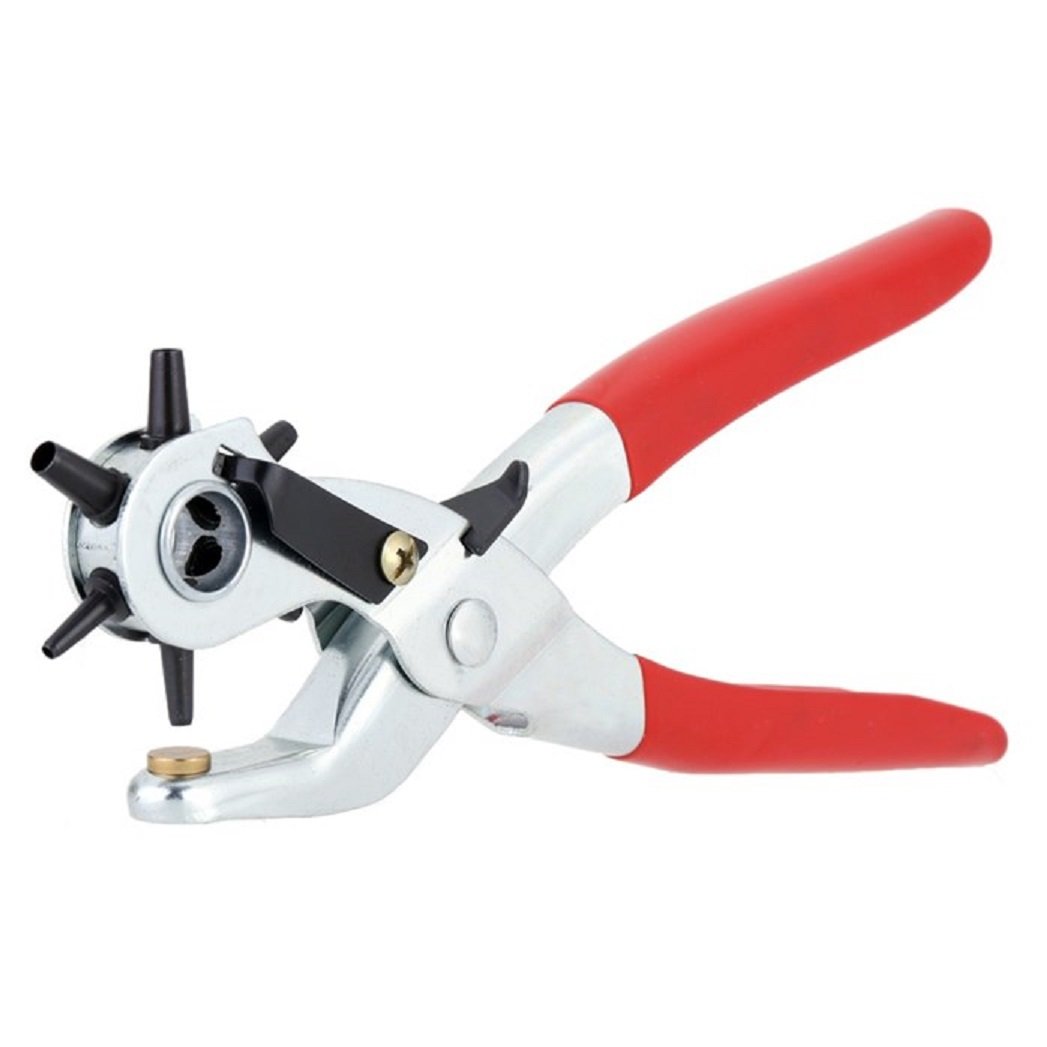
A leather punch worked great for punching the holes. My leather punch isn’t the exact one pictured, but is substantially similar. It was $7 well spent. I use the punch all the time for making belts fit, and numerous other ‘hacks’. Click the picture to go to the punch on Amazon.
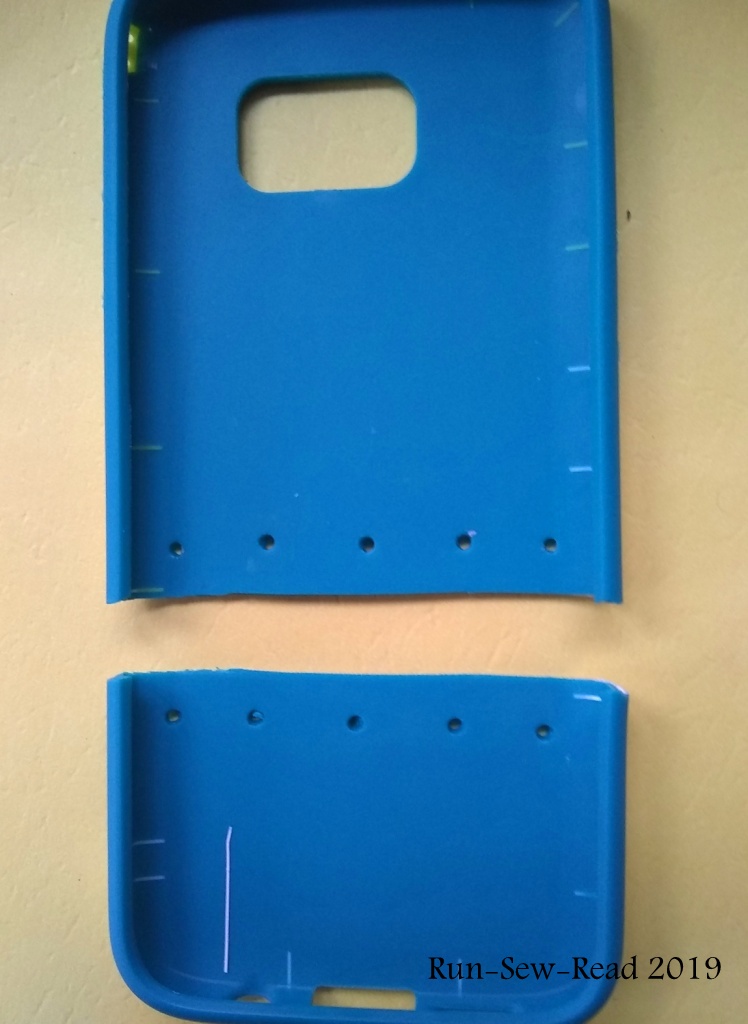
When one side was punched…
I used those holes to mark where to punch on the corresponding piece.
Then, using cotton yarn and a darning needle, I stitched a scrap of woven belting to each side, to bridge the gap. Almost any durable fabric could be used. Think denim, duck canvas, vinyl, etc. Just make sure the edges are bound to prevent raveling.
Using the kitchen shears again, I adapted the back holes for the photo lens and sensor. This first attempted adaptation wasn’t very pretty, but it did its job.
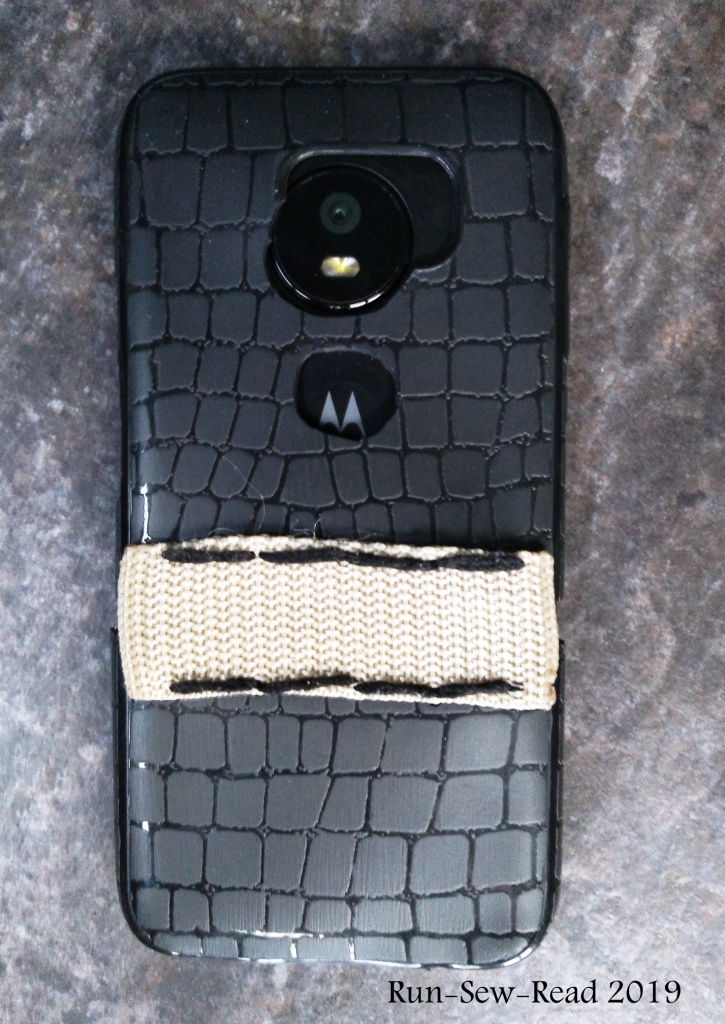
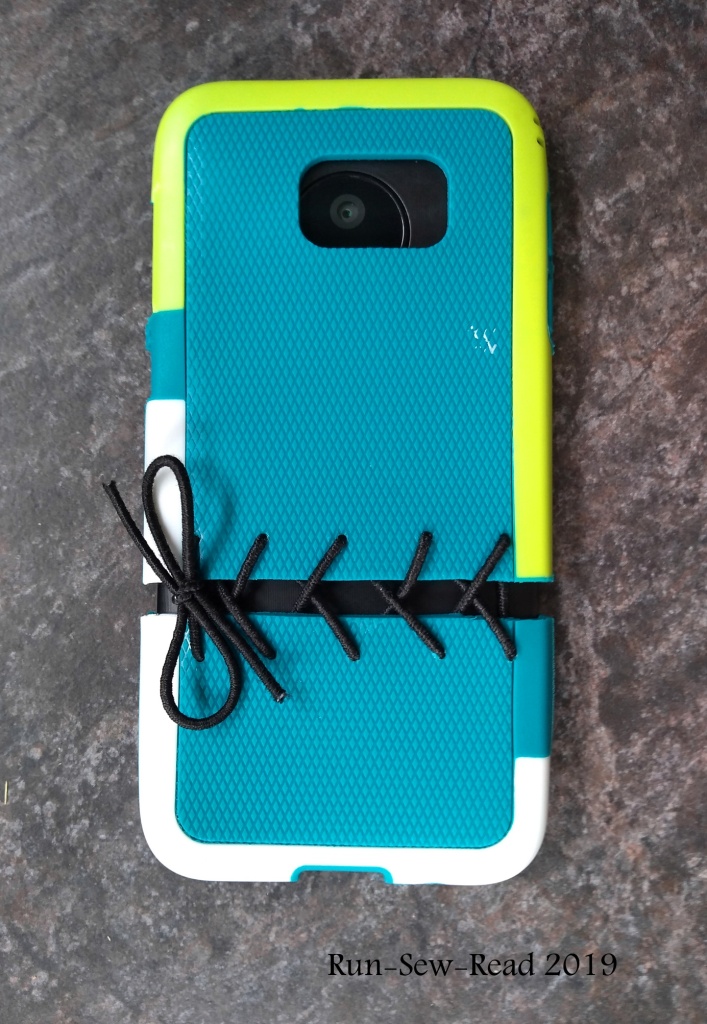
On the other case, I omitted the fabric, and simply laced the two pieces together with elastic cord.
The cord lacing fits as well as the fabric piece. It was easier to do, and came out looking a lot nicer than the fabric, I think.
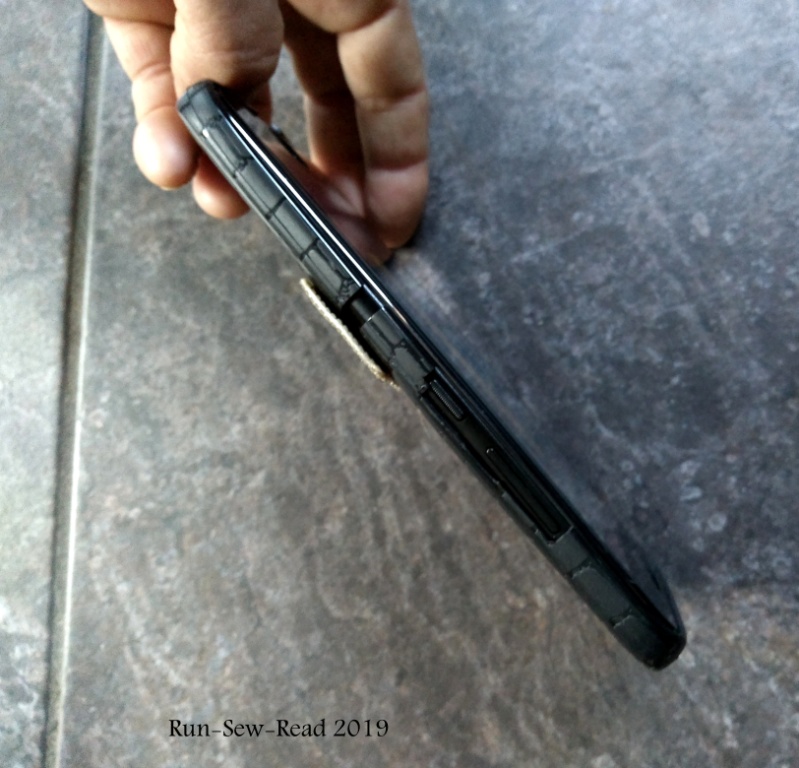
Here’s a side view. With the kitchen shears, I modified the side cutouts to match the control buttons on the phone.
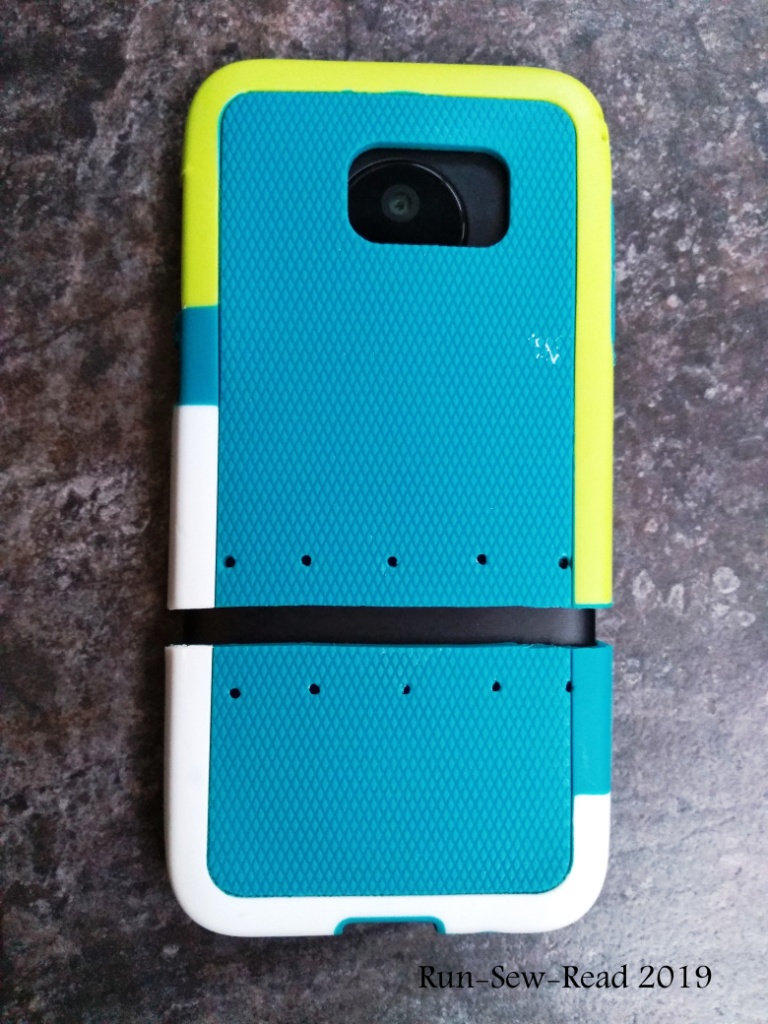
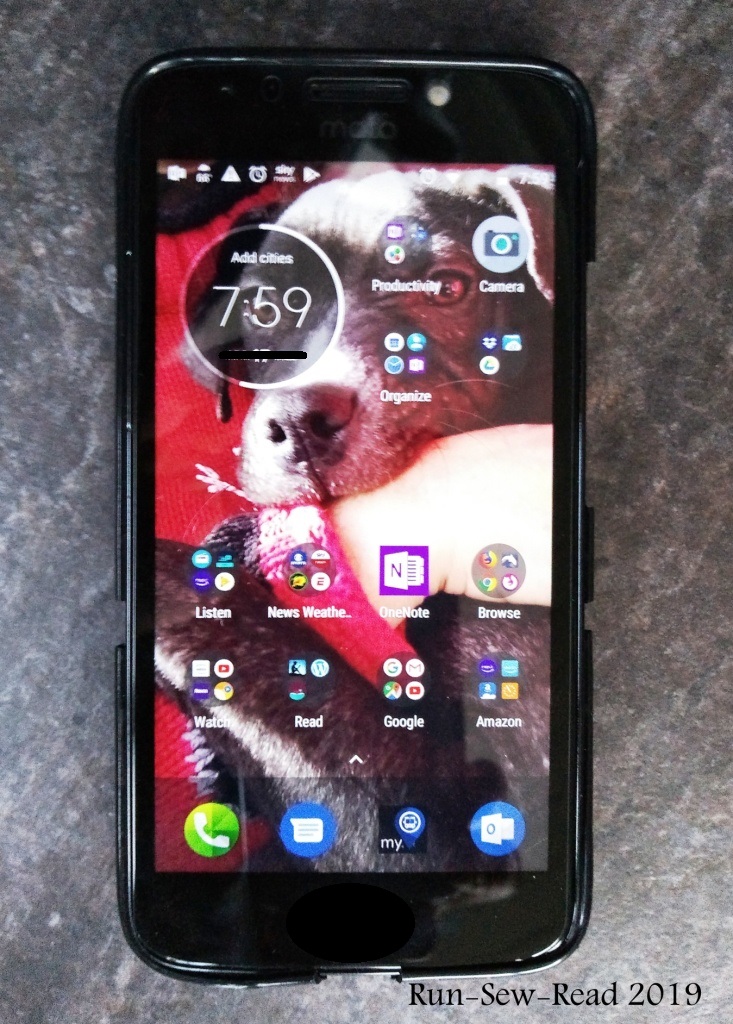
From the front, the cases look like this.
The verdict:
The DIY cases worked out great. They never came loose from the phone, and they did their job of protecting the phone while I ordered another case that was supposed to fit the phone. When that case didn’t fit, I ordered a third case. After three failed attempts to get a proper case, I gave up. There were other issues with the phone too, so the phone was returned, and I ordered a different phone and case. The DIY Dollar Store cases got me through while waiting for the ‘right’ phone and case to arrive, and they would have lasted a long time, if I’d kept that phone.
Have a lovely Easter. We sang this in church on Easter morning when I was little.
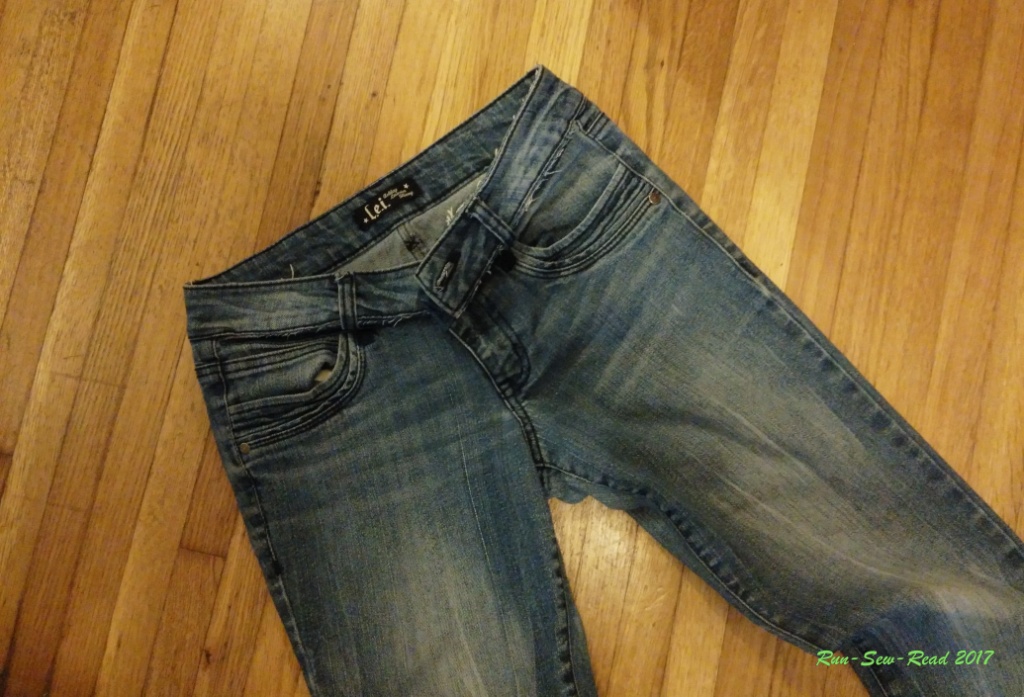
I made an executive decision last week, to ban low-rise jeans from my person. I despise the old low-rise trend; can’t stand wearing them. They never feel right.
Low-rise jeans are also bad for the body, I think. They ruin posture and cause expanding waistlines. They promote slouching and spreading, because slouching and spreading the hips is what you have to do to keep them in place.
The pair of low-rise skinny jeans that caused this epiphany, still has some wear in them, and I like the color and weight. When I endured the misery yet again of wearing them last week, I resolved to either fix the waist or be content to ruin them trying.
Result: Waist is fixed!
The jeans before:
Low waistband in front;
High enough in back;
Tiny zipper.
Here’s how the process went:
Unzip the zipper.
Detach the front belt loops from the body of the jeans. (They can probably stay attached to the top of the waistband.)
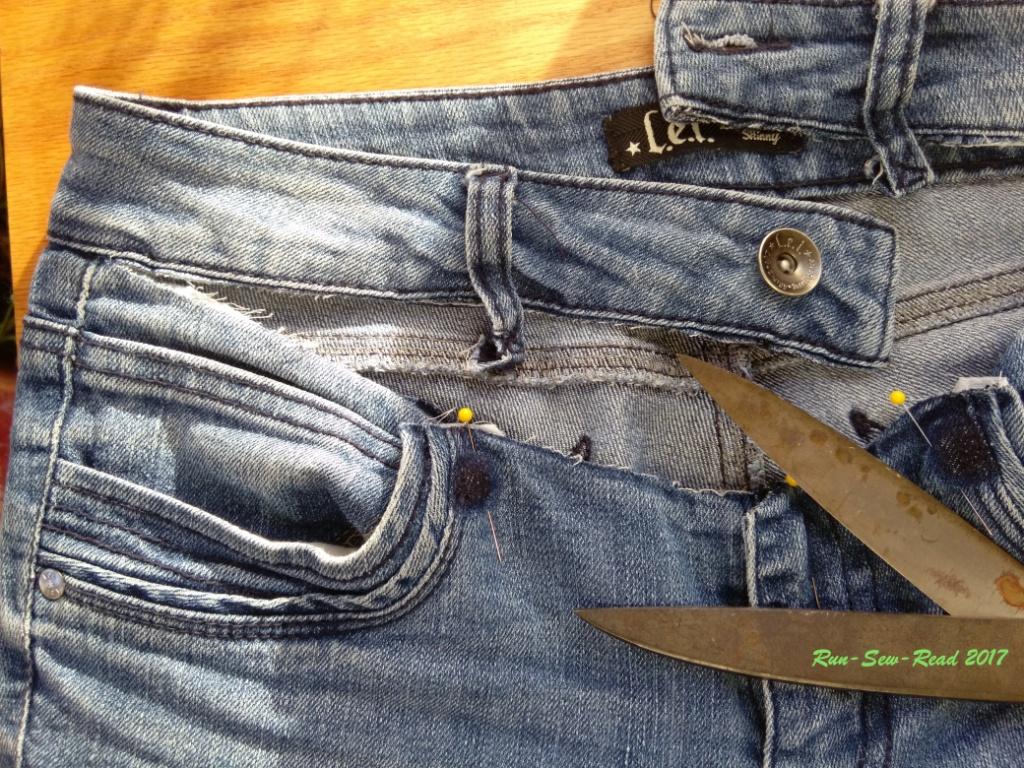
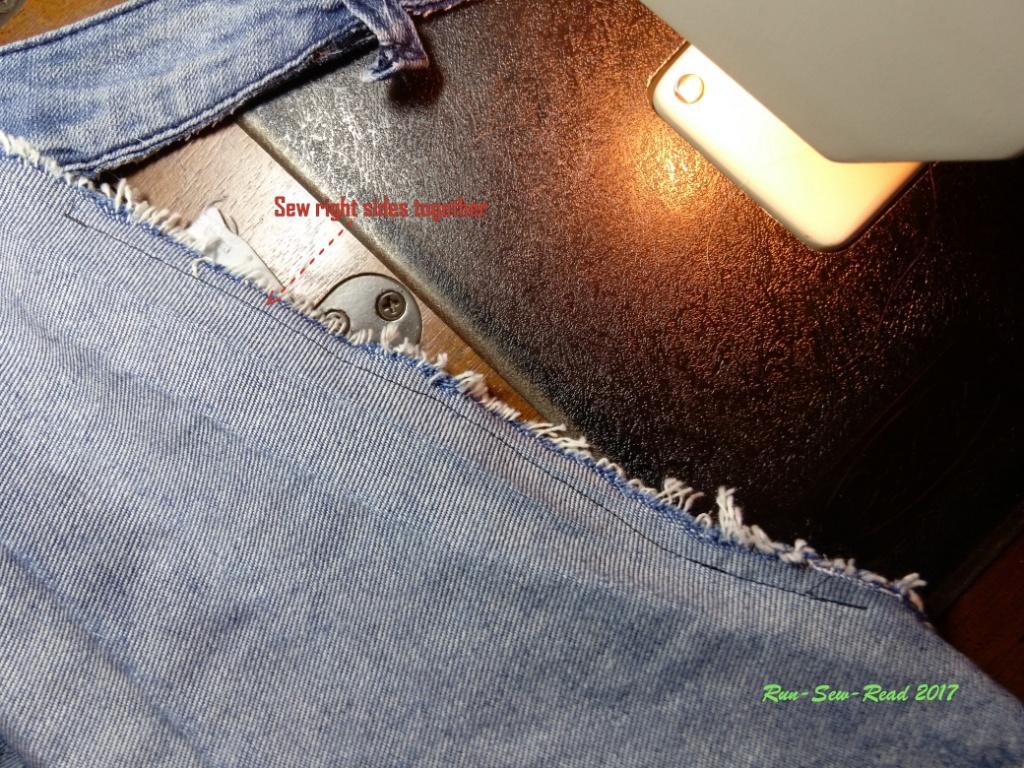
Cut the waistband off, from the center front to the side seam.
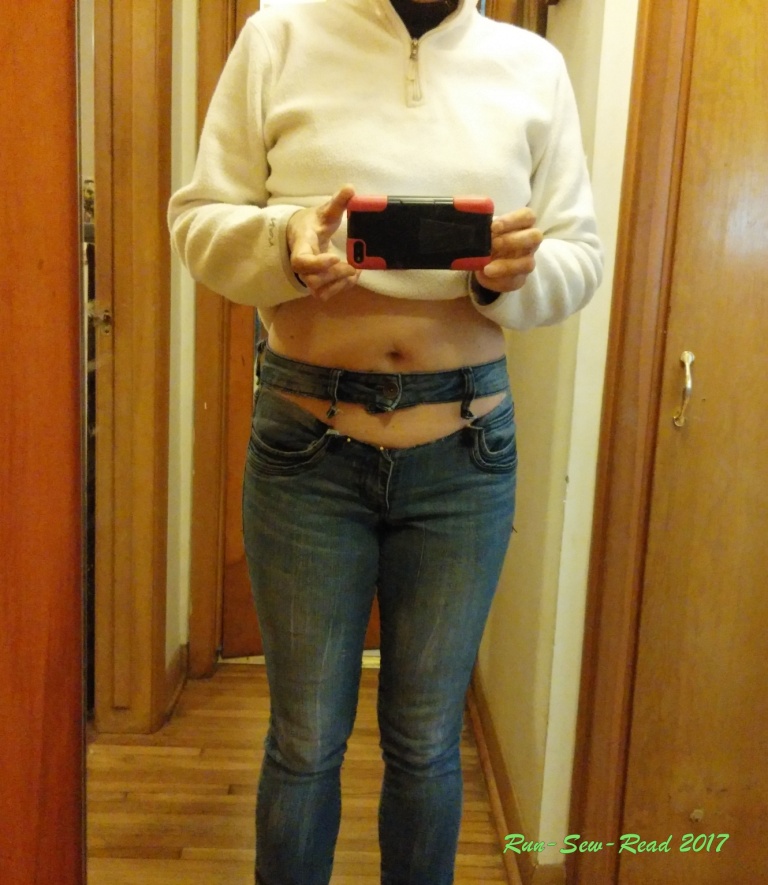
Important: Do not zip up the zipper. With the waistband out of the way, there may not be a stop to keep the zipper pull from coming off at the top. Instead, keep the zipper pulled down, and use pins to position the fly until the insert is sewn in place.
Pin the pockets and zipper to hold them in place.
Put the jeans on and identify where the waistband naturally feels right.
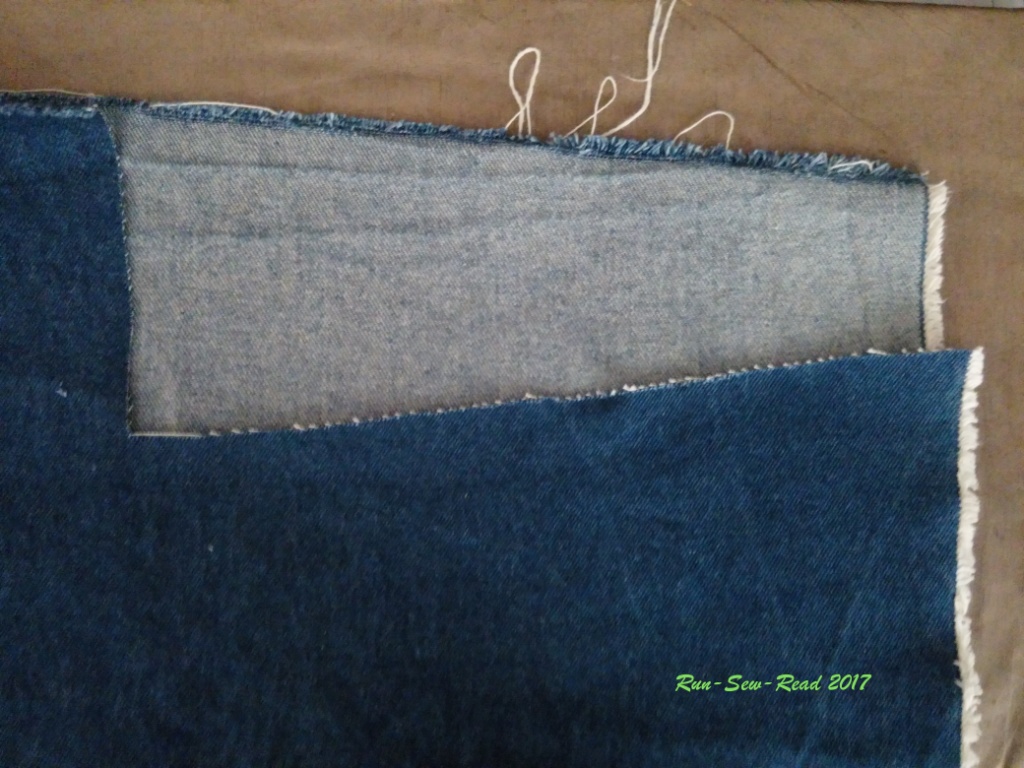
Cut two pieces of denim to insert in the open space across the front. The pieces should be roughly the same shape as the open space, but slightly larger than the space on all sides.
With the waistband moved out of the way, sew each insert piece to the body of the jeans, right sides together.
Flip the insert piece over, and the seam looks like this.
Put the jeans on again, to identify the waistband placement on the insert, and pin the waistband in place.
Topstitch the waistband onto the insert fabric. (Make sure the belt loops are out of the way of the stitching)
Trim the insert fabric even with the top of the waistband. Fold the center front excess to the inside and topstitch in place. Inside out, the insert will look like this:
You will need something to close the gap where the zipper is too short. I used velcro. It was easy to place and stitch, and holds the gap closed. I first added the long velcro shown next to the zipper. That wasn’t effective. The short piece above the zipper worked, and was actually easier to put on.
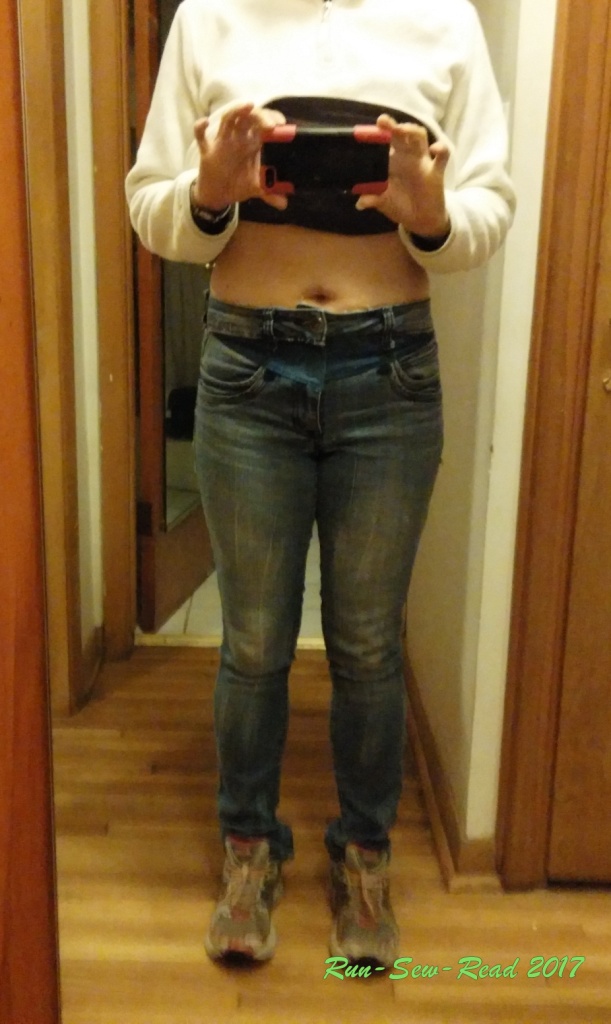
Finished look:
The insert has a slight indented look, for some reason that I haven’t tried to figure out. I don’t care. The waistband feels great.
My one coveted pair of touchscreen gloves, that came as swag in last year’s Run in the New Year 5k, were ‘accidentally’ carried off by my nephew at the end of that very cold but exciting night of college football back in November. I’ve put him on notice that I will be coming to retrieve them. But in the meantime, because I need to use my phone when bicycling and running in the cold, I experimented this week with diy options.
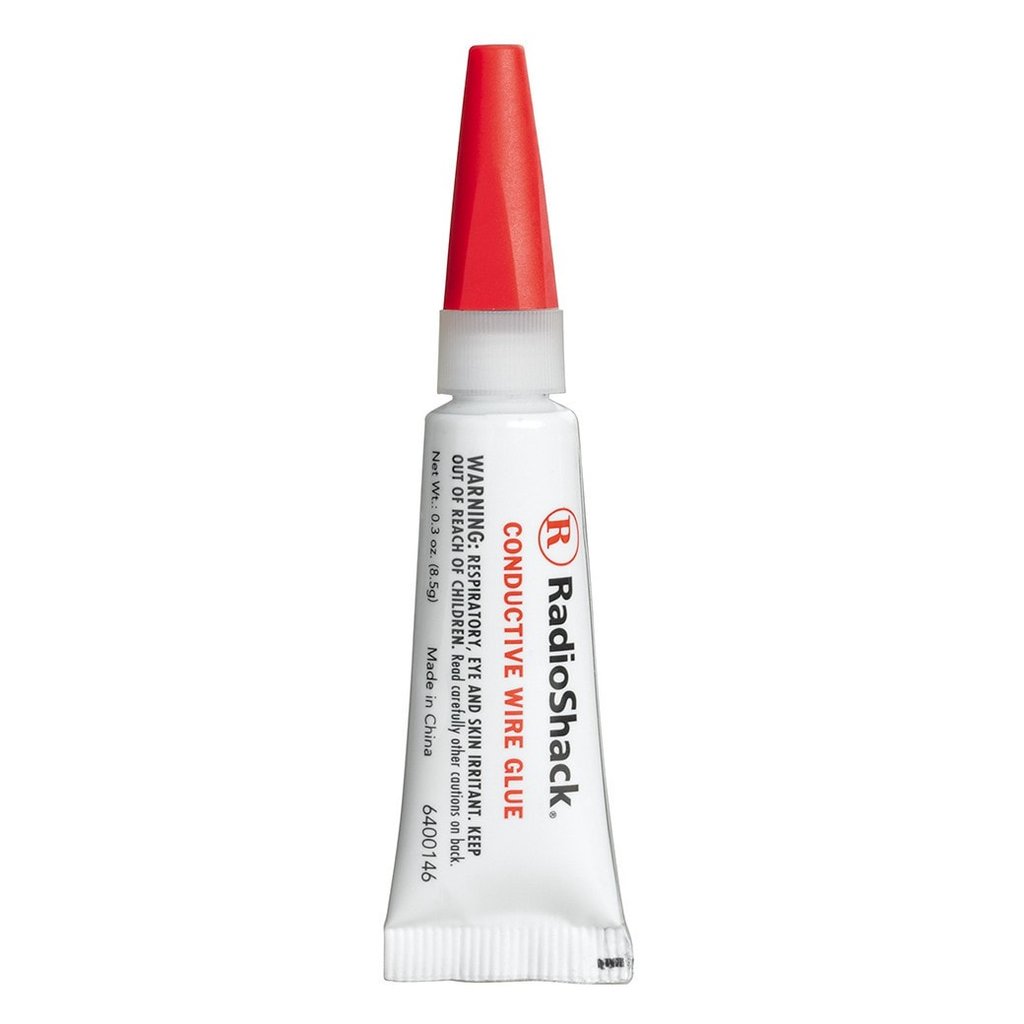
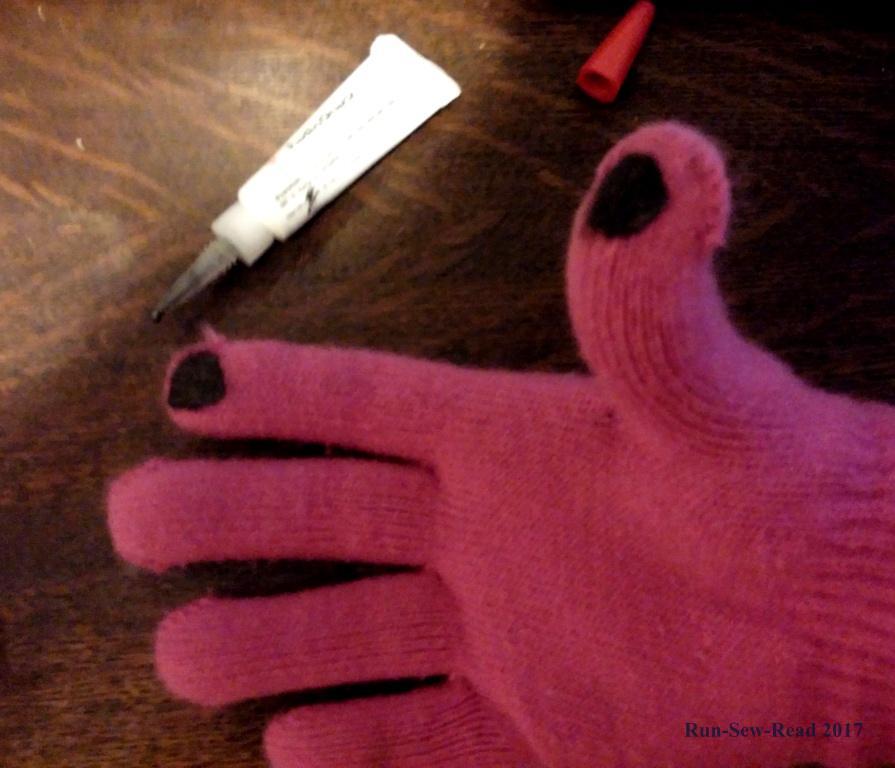
In searching online for diy touchscreen gloves, I learned about conductive thread, that can be purchased and knitted (or crocheted) onto the fingertips of an existing pair of gloves. The reviews are mixed. I have a hunch this is because people don’t make sure the thread goes all the way through to make good contact with both the fingertip and phone screen. I considered buying a spool of the conductive thread, which would have made a lot of touchscreen gloves. But then, I was at a Radio Shack store this past weekend, and happened to see this Graphite Conductive Glue.
I forked over $6 for the tiny tube, and came home to try it out. The result is, it was super easy and the gloves work great!
Here’s what I did:
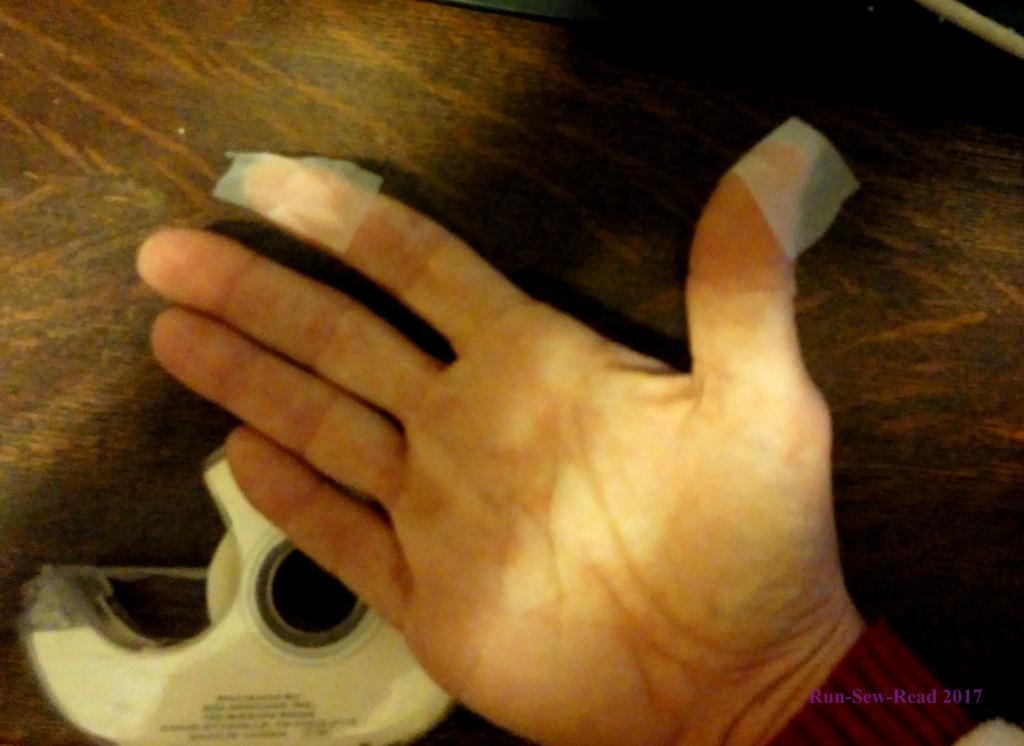
First, I protected my fingers with ordinary invisible tape, because the label says the glue can be a skin irritant.
Then I put the gloves on and carefully applied the glue in a circle on the forefinger and thumb contact points. I used a circular motion to embed the glue into the fibers and make sure it would go through to the other side of the knitted fabric. Conductivity from fingers to screen is the key, so a topical application of glue only on the outside of the glove won’t work.
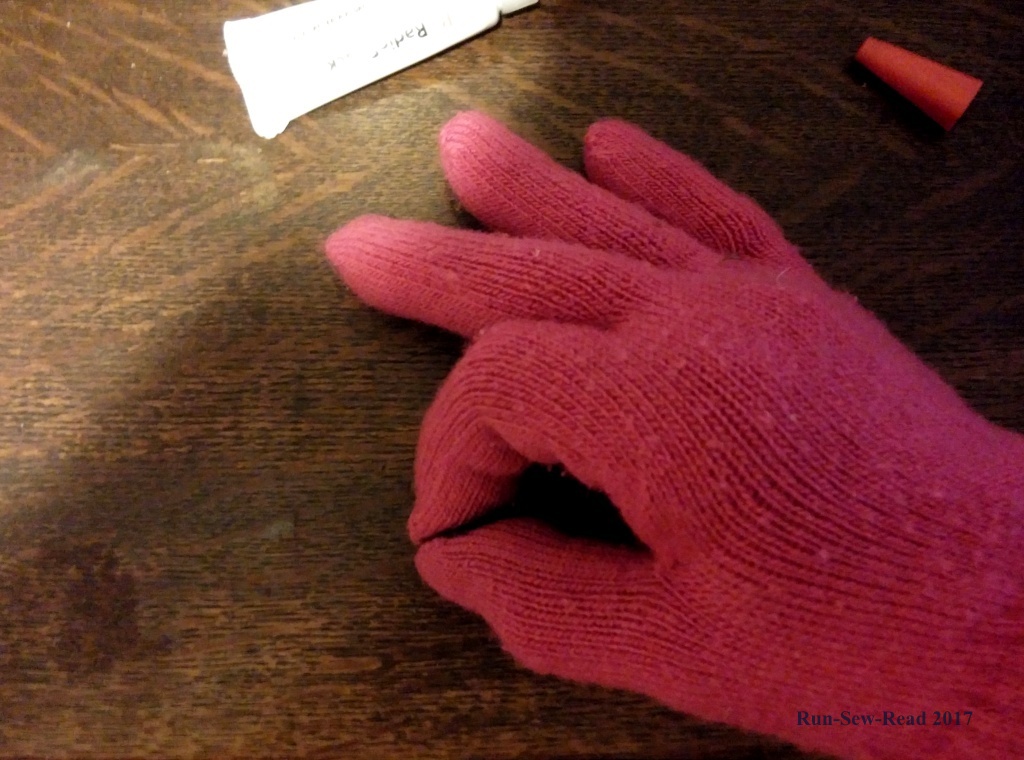
To further insure that the glue would penetrate to the other side of the fabric, I pressed my fingers together. I did this carefully, so as not to smudge the neat circles. (I did smudge them a bit on the first pair.)
Once I was confident in my technique, I applied the glue to my most favorite old pair of mittens. I’m happy with the result. The glue took about an hour to dry to the touch. Then I tested them on my tablet. They work very well! It’s now a few days later, and they are still working very well.
Here is a quick demo of my ‘new’ diy touchscreen gloves in action.
As you can see, I glued all of the fingers on the glove in the video. I think this was a waste of glue. I haven’t needed any fingers other than the thumb and forefinger for operating my phone and tablet.
About that skin irritation warning on the label…I suspect the warning applies only to the glue when wet. I’ve sensed no irritation from the dried glue whatsoever. But be careful; heed the warning and watch for signs of possible irritation on your own skin. And follow the label instructions. Here is the product MSDS sheet.
Additional notes:
The dried glue circles are hard, and not flexible. I was able to restore enough of the fabric’s flexibility by gently bending and curling the dried glue tips.
After doing a total of five gloves so far, I think there is still a lot of glue in the tube. So one $6 tube is enough to do quite a few gloves.
How the glue will hold up in rain, snow or the washing machine is still an open question. I’ll report back when my gloves have been tested in wet conditions and laundering.


 The glue took about an hour to dry to the touch. Then I tested them on my tablet. They work very well! It’s now a few days later, and they are still working very well.