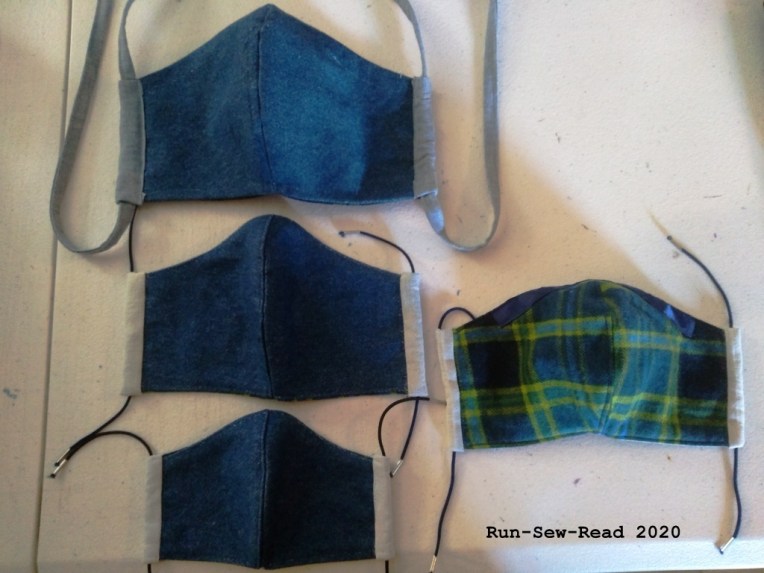
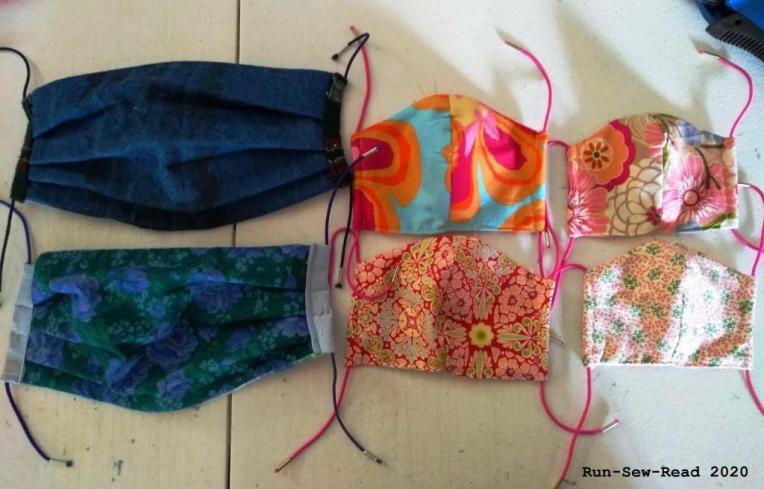
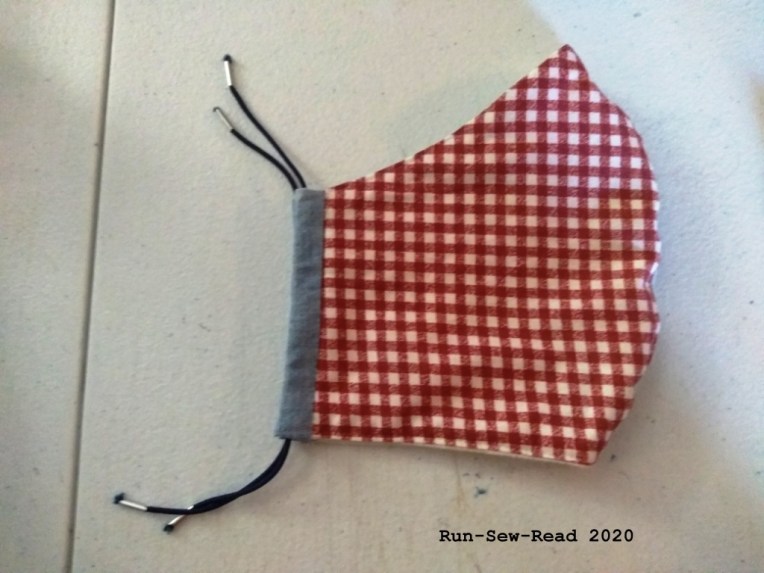
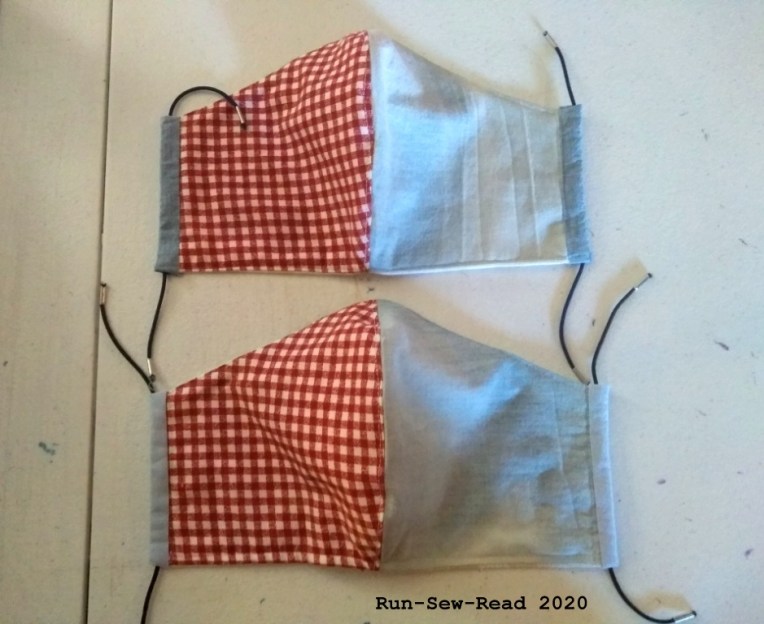
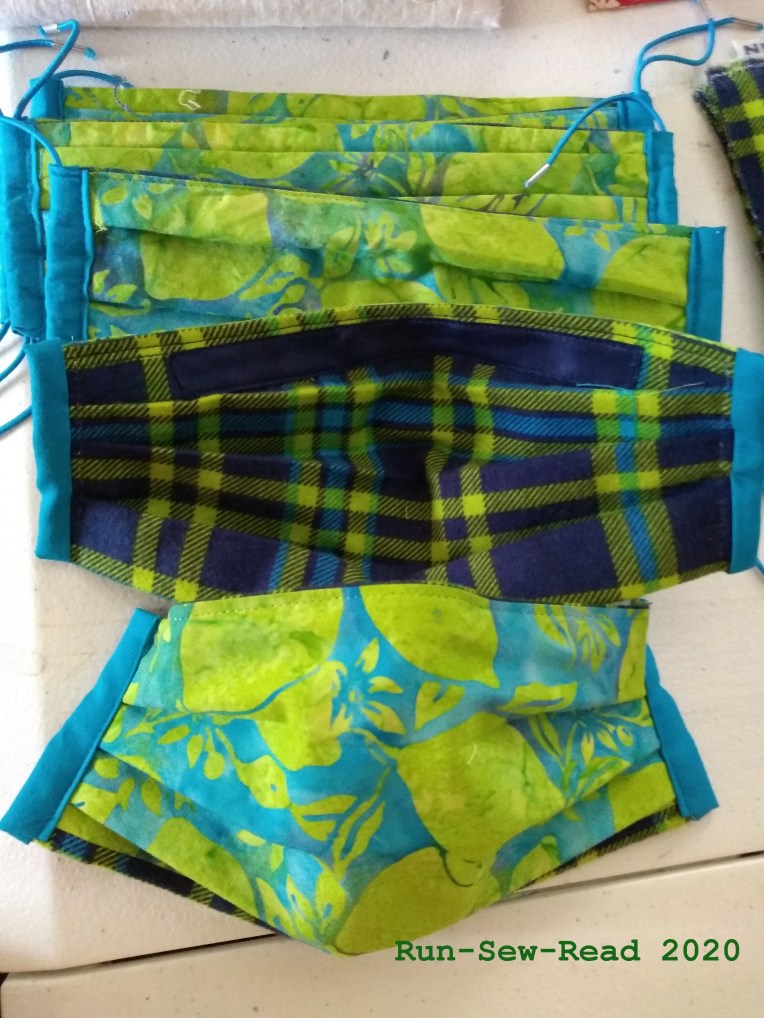
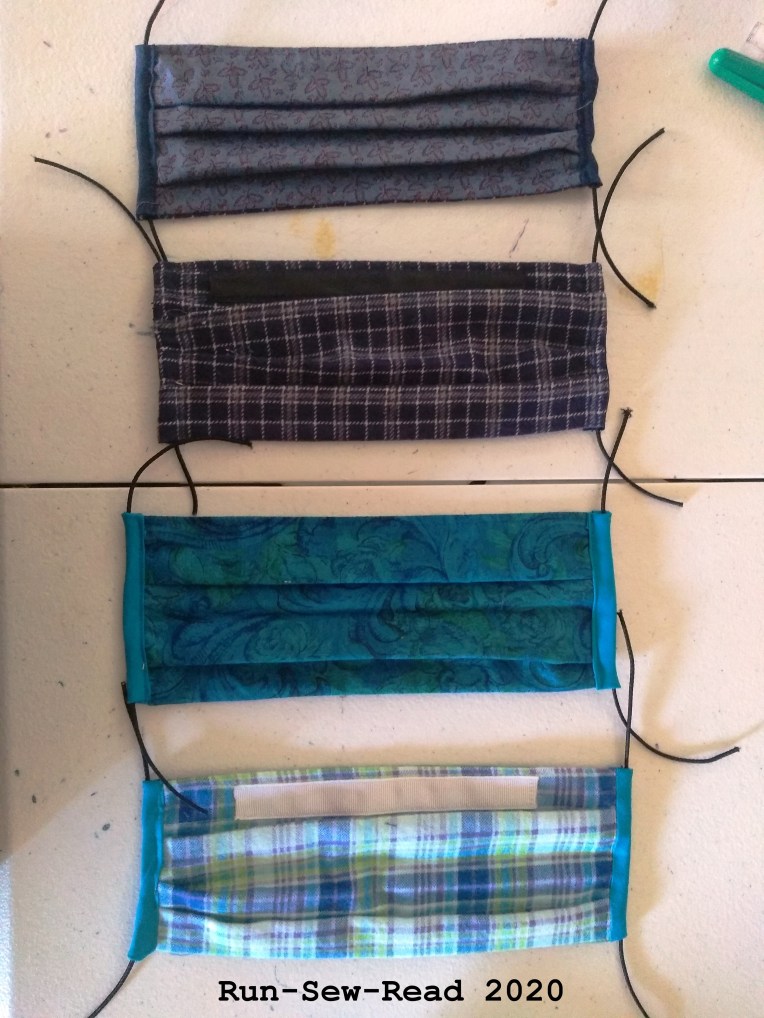
The mask-making frenzy is less of a frenzy now, but masks are still needed, and will be needed for months to come. I’m making a few masks each day, and trying out some of the other designs available on the internet. I had been making the pleated masks, but I now also love making the shaped mask version that doesn’t have pleats.
For the shaped masks, I’ve used the fitted mask pattern by Tina Elmore-Wright, downloaded from the Joann mask-making page.
The pattern has four different sizes, from infant to men’s/large. My brother the transit driver gave a thumbs-up to the men’s mask. The second largest size is for women/teens. That one fits me well.
Shown below are all but the infant size.
It makes it fun to do sets of family masks.
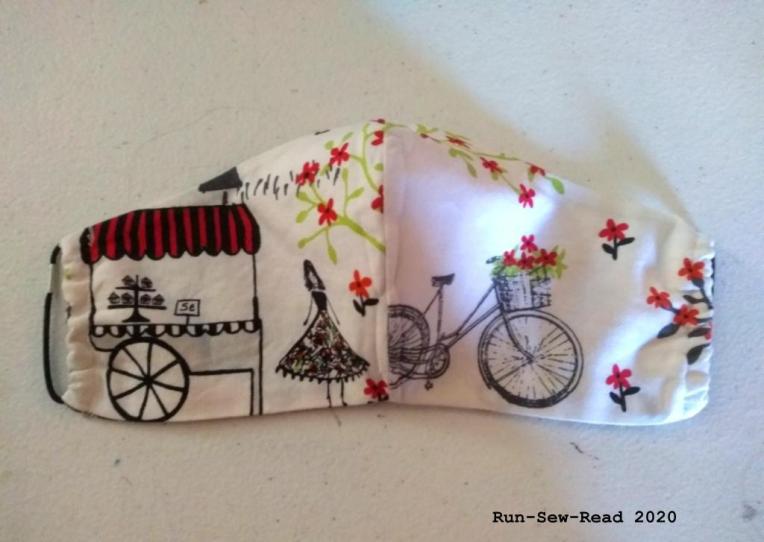
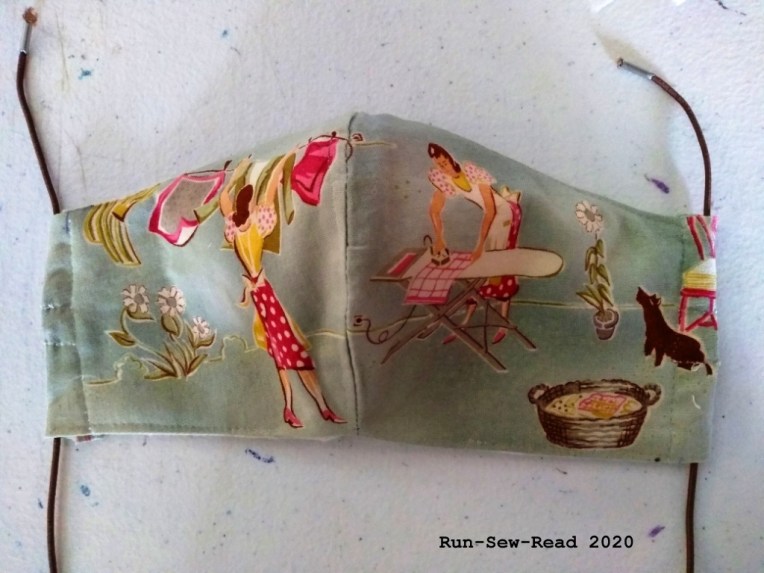
It’s fun to use with prints.
A word of caution: The pieces need to be cut in mirror images.
Otherwise, you’ll end up with two right or two left pieces, which can make for some er, unplanned combinations.
There is still a need for the masks in the health care and care home sectors. Then as businesses prepare to reopen in the coming weeks, they will need masks for staff, customers and visitors.
Thank you to health care workers, care home workers, and front line workers everywhere. You are keeping us going.
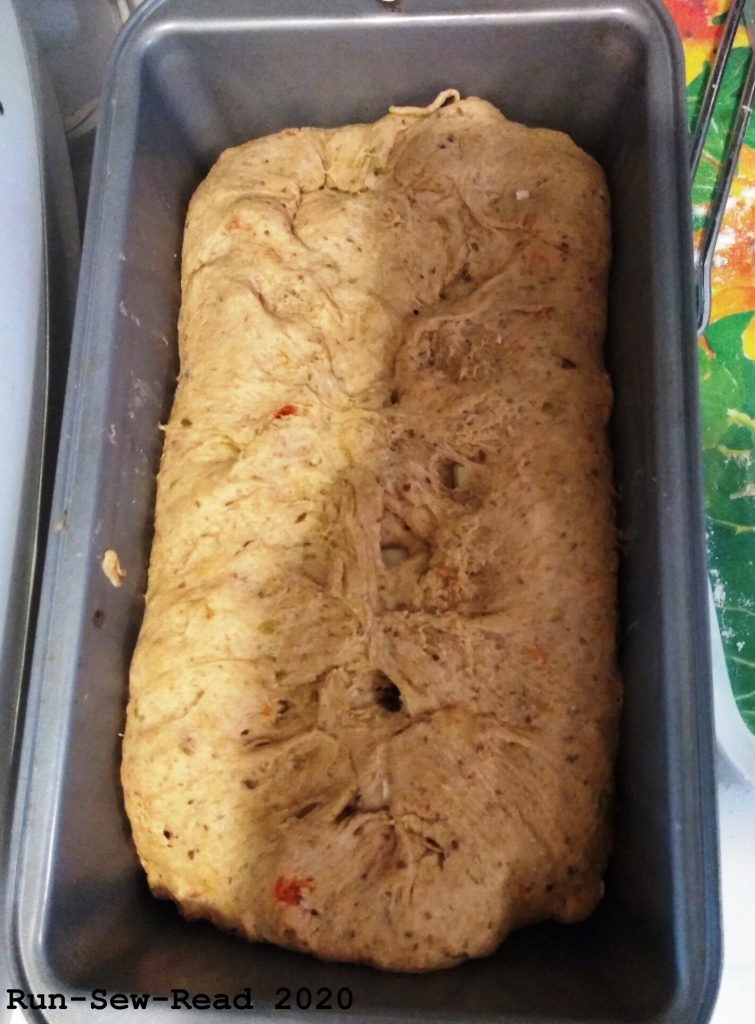
This savory yeast bread is something to make when you are going to be home all day. Seriously, it takes awhile. In the 1990s, it was a winner of the Pillsbury Bake-Off challenge. I clipped the recipe from a magazine back then, and am still making it to this day.
The bread has quite a variety of ingredients, and requires several steps in addition to the full yeast bread making process. It’s totally worth it.
This bread, is the reason I …
Roast, skin, and chop fresh Poblano peppers from the little grocery store around the corner.
Keep two bricks of Monterrey Jack cheese and two cans of black beans on hand. The recipe only calls for one of each, but I want extra on hand.
Keep frozen 1/2-cup portions of plain yogurt on hand.
(You can buy sun-dried tomatoes and canned chopped green chili peppers, which is actually what the recipe calls for.)
Here is a store-bought fresh Poblano (next to my pitiful attempt at home-grown), and after roasting for 15 minutes in the air fryer.
Home-grown, dehydrated chopped tomatoes
Now, about making the bread.
Here is the list of ingredients:
½ cup sun-dried tomato, without oil, chopped
1 (15-ounce) can black beans, drained
½ cup nonfat plain yogurt
2 teaspoons cumin
1 teaspoon dried oregano leaves
1 teaspoon dried parsley flakes
1 garlic clove, minced, or 1 teaspoon garlic powder
5 ½ to 6 ½ cups all-purpose flour
2 tablespoons sugar
1 tablespoon salt
2 packages fast-acting dry yeast
1 cup water
½ cup canola oil or other vegetable oil
1 egg
1 (4 ½ -ounce) can chopped green chili, drained, or 2 T. finely chopped jalapeño pepper
2 cups (8 oz.) Monterey Jack cheese, cut into ½ -inch cubes
The Southwest flavor steps in pictures:
Measure the spices and add to the food processor with the beans (drained) and yogurt.
Process until well-blended
Stir in the chopped pepper and dried tomato.
…
[Add the bean/spice, tomato and pepper mixture to your yeast sponge, then stir in the rest of the flour, knead, and set the dough up for its first rise.]
…
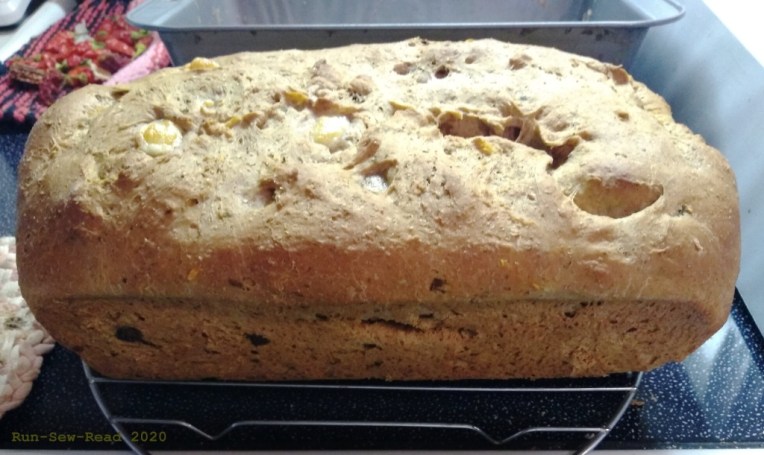
After the first rise, punch the dough down and shape into loaves. With a knife, slice into the dough loaves, and push the cheese cubes into the cuts.
Pinch the dough shut around the cheese.
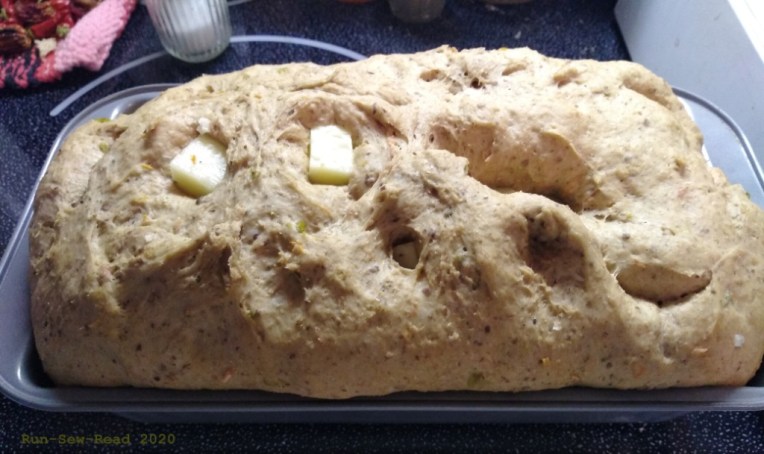
Let rise until double in size. If some of the cheese becomes exposed, it’s okay. (If you do want to pinch it back into the dough, be very gentle about it so as not to deflate that part of the loaf. )
Bake 30-40 minutes, depending on loaf size.
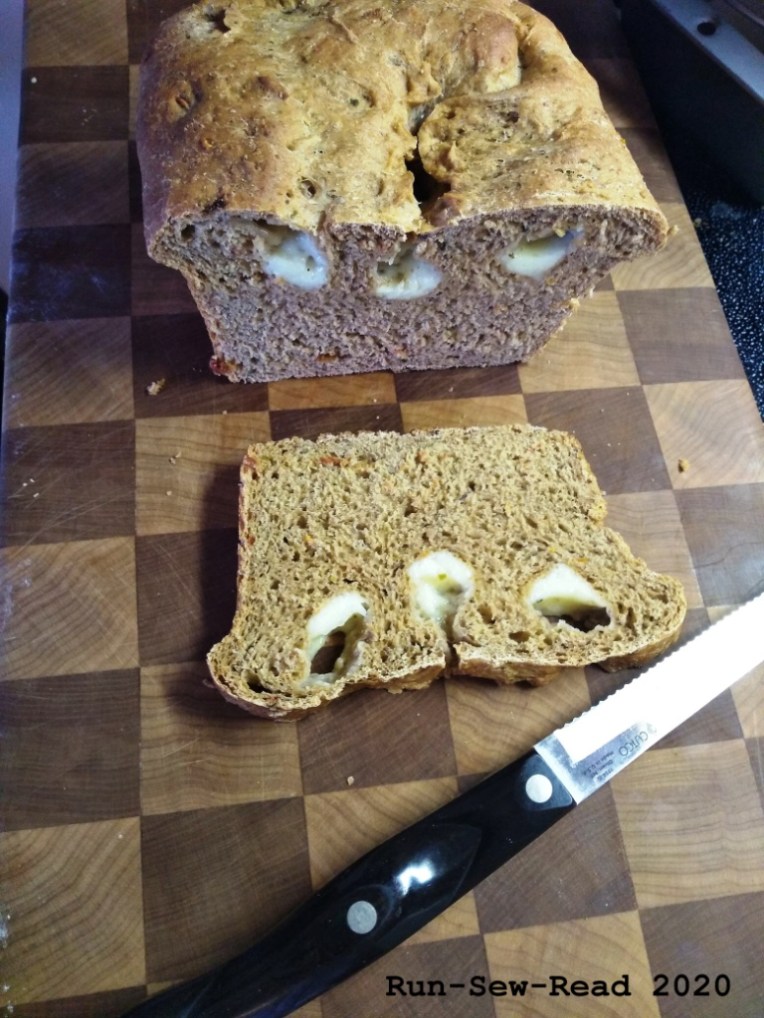
After cooling, here is the first slice (on my gorgeous cutting board made by my brother).
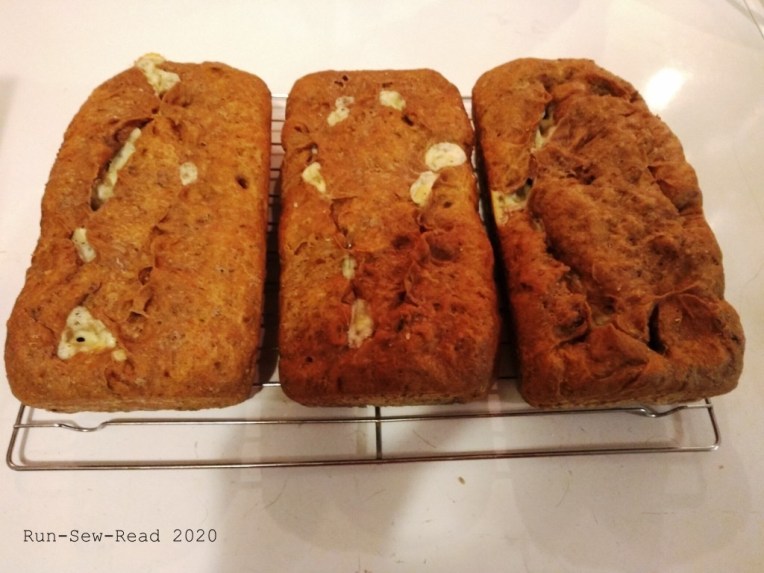
Here shown in better light is another batch, made in three smaller loaf pans.
Creating fun compositions for family and friends has given me a chance to indulge my creativity.
This slideshow requires JavaScript.
I’ve given them to neighbors up and down my street, and across the back yard. When a neighborhood diner gave out free drive-through breakfasts, I reciprocated by giving them some masks. Initially, I expected most people to say ‘no thank you’ when I offered masks. Turns out no one has declined. Everyone wants a mask. Everyone.
I’ve made a few batches of masks for care home and hospital staff. It bewilders me that it is individual nurses and aids who are desperately seeking these simple protections to keep their patients, coworkers and themselves and families safe. Where are their employers in all of this?
This mask, that can cover an N95 mask, is what I started out making. But it turns out N95 masks are like unicorns. No one I’m giving masks to has one, or knows where to find one. (Awesome tutorial here: https://www.instructables.com/id/AB-Mask-for-a-Nurse-by-a-Nurse)
So, I’ve switched to the simple flat pleated design based on two 9″x6″ rectangles. It’s much faster to construct and requires less fabric. Another huge bonus is that it fits in a regular #10 envelope, and costs only a 1st class postage stamp to mail. This has enabled me to get them to out-of-town friends and family quickly and economically. Mine are substantially based on the pattern from the Turban Project. https://turbanproject.com/face-masks-pdfs
One of my biggest frustrations is about the friends and family who want to learn, or relearn to sew, to help fulfill the huge need for masks right now. I want badly to invite them over and have them sew with me, but I can’t because of the need for social distancing.
Carry on, mask warriors. You are doing important work.
A heartfelt virtual hug to those in isolation or quarantine, or who have loved ones out of reach. My wheelchair-bound mom is in a locked down care home. The most I’ve been able to do for her is send her a mask, and send masks to the staff, and text her ‘Happy Easter’.
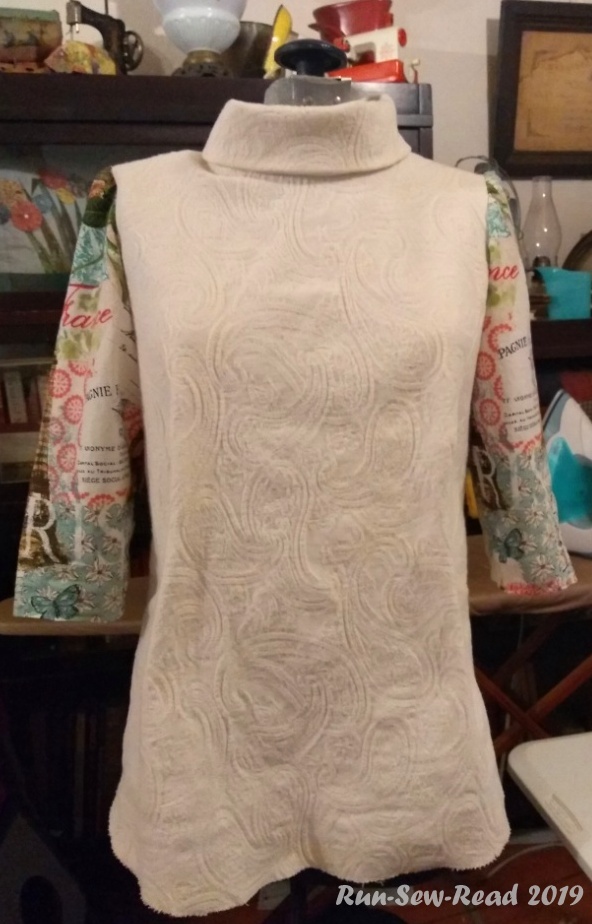
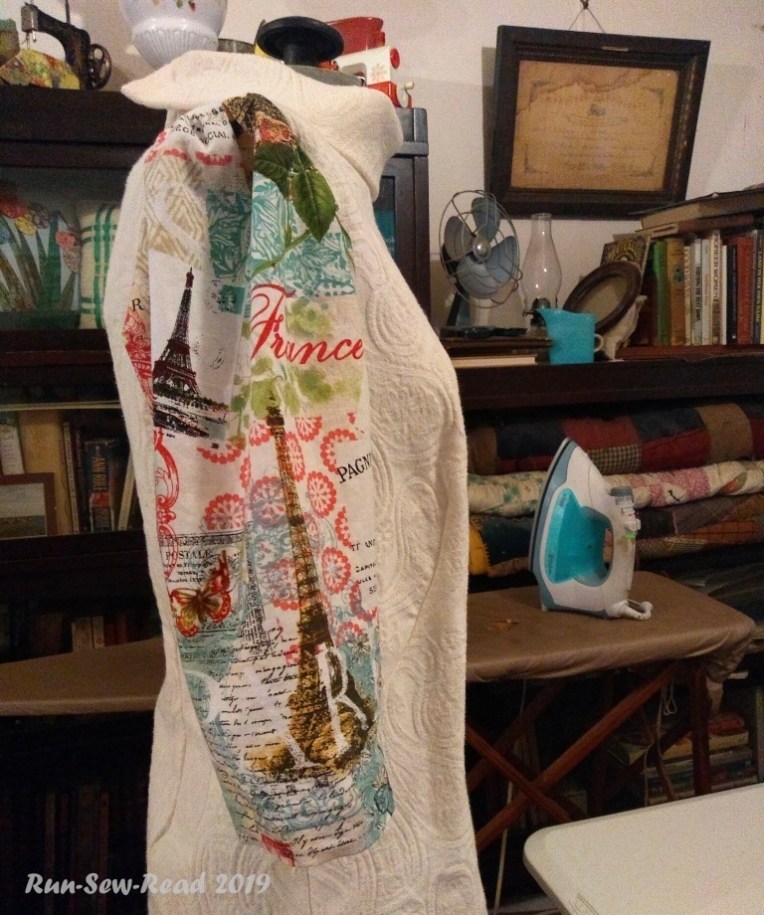
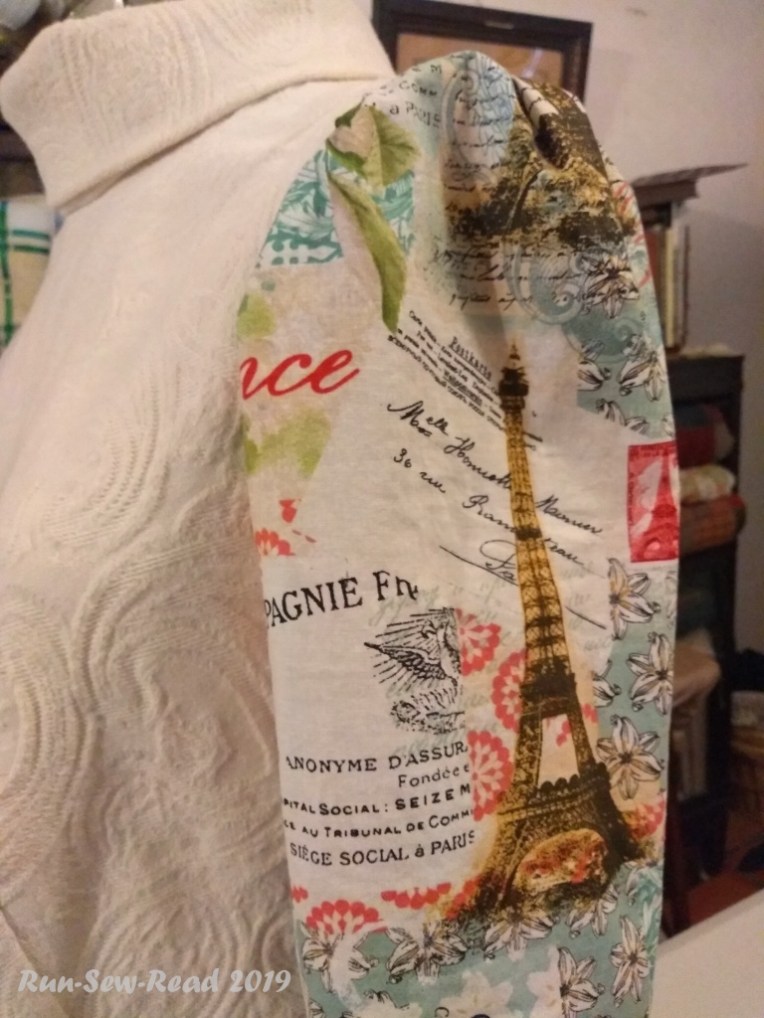
Back in January, I purchased this Tilly and the Buttons‘Orla’ top pattern. It’s now September, and finally I’ve made an Orla top. The pattern was a joy to use.
I wanted to make a top with print sleeves and a solid colored torso. This cotton upholstery fabric in my stash seemed right for the torso. It was salvaged from sofa cushion covers I’d made years ago. There were worn spots on the fabric, but there were enough good areas to carve out the body of a blouse from it.
This Paris print cotton was something I simply liked when I saw it in the store, so I bought 1/2 yard for the sleeves. My plan was to make a muslin shell to test the pattern, and if things turned out well, it would be a wearable muslin.
Voila! A wearable muslin!
Where I deviated from the pattern:
Adjusted the sleeve length to a 3/4 sleeve.
Used a stand up/rolled collar instead of the pattern options.
Added a few gathers to the top of the sleeve rather than the pleat in the pattern.
The pattern suggests using lightweight drapey fabrics, but I used the heavy cotton, and I like the result.
For bicycling and night activities, I incorporated some reflective elements. I used reflective fabric for ‘hem tape’ on the sleeves. At night, the hem can be flipped out for visibility. There’s also a reflective covered button for the back closure.
A few more comments on the Orla pattern: (I’ll definitely make more ‘Orlas’.)
The pattern size measurements ran true-to-large. I’m so used to pattern measurements not working out, that I decided to make a larger size than the pattern info indicated. Well, the pattern measurements were right on this time. On the first fitting, the blouse was way too roomy. I ended up taking it in two whole sizes, and could have gone down a third size.
The front curved darts are a pretty feature, and were easy to sew. But they became a challenge when I had to downsize the garment.
(Ghastly lighting in this new selfie spot! Yikes!)
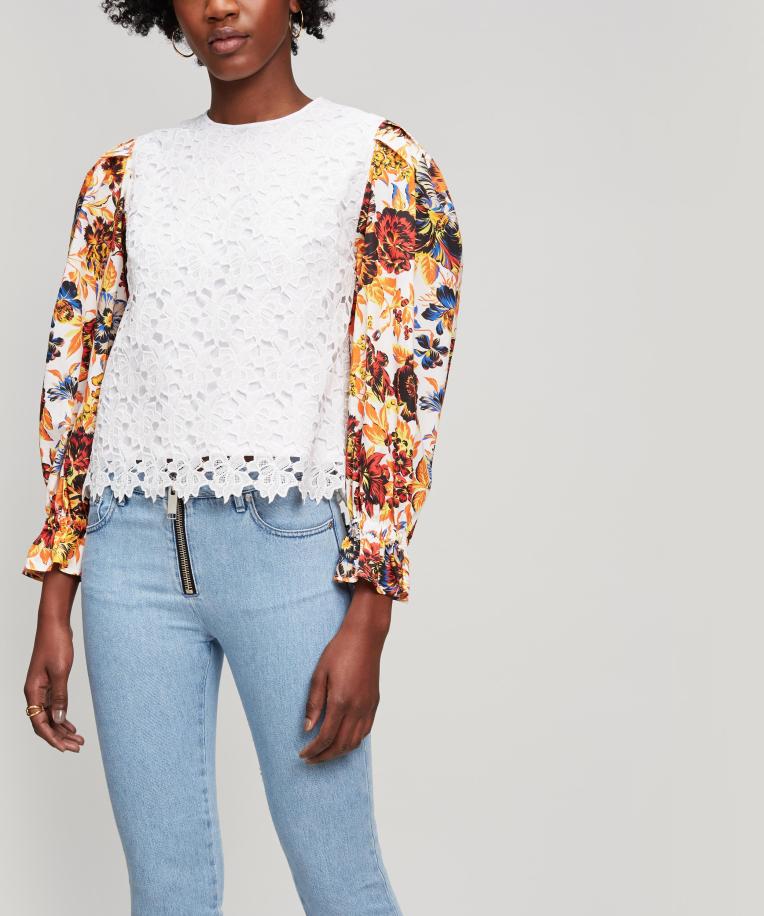
This picture was my inspiration. I saw it in a Liberty of London ad last year. Obviously, I didn’t stick close to the image. I still want to make a top similar to this. Maybe for Spring.
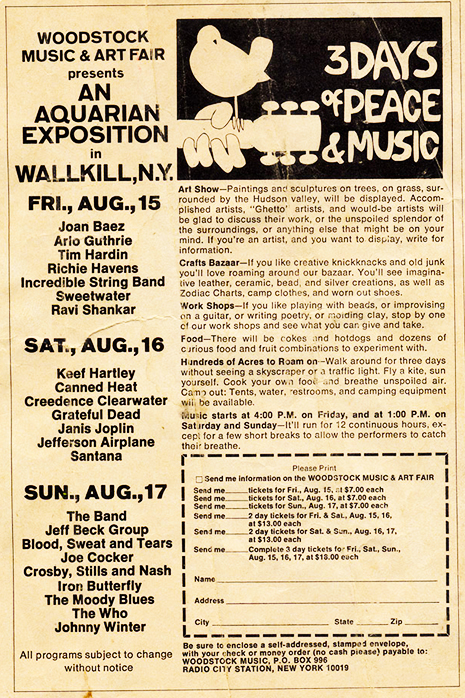
The original Woodstock Festival ads were for a different location and lineup than what became the actual festival. We know that the festival site ended up being near Bethel and White Lake, NY. Not all of the bands listed in the original ad had actually agreed to do the festival. Some declined because of schedule conflicts and various other reasons.
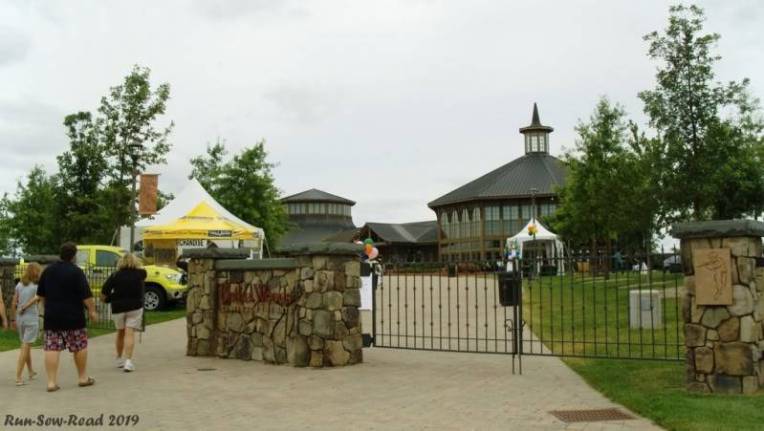
This was one of the bands who didn’t agree to do the festival. Forty-one years later though, they did agree to do a concert at Bethel Woods, and that’s when I decided to check the place out for myself.
On my arrival at Bethel Woods Center for the Arts, there was no resemblance to the original setting we’re used to seeing in pictures and video. The entrance did not have a 1960s vibe, and it wasn’t artsy. It resembled a 1990s gated community.
There’s a museum inside.
On stepping into the museum, visitors were greeted with a video of Country Joe and the Fish singing, “And it’s 1, 2, 3, what are we fighting for?…” Museum goers then spontaneously started singing along, “Don’t ask me, I don’t give a damn….”
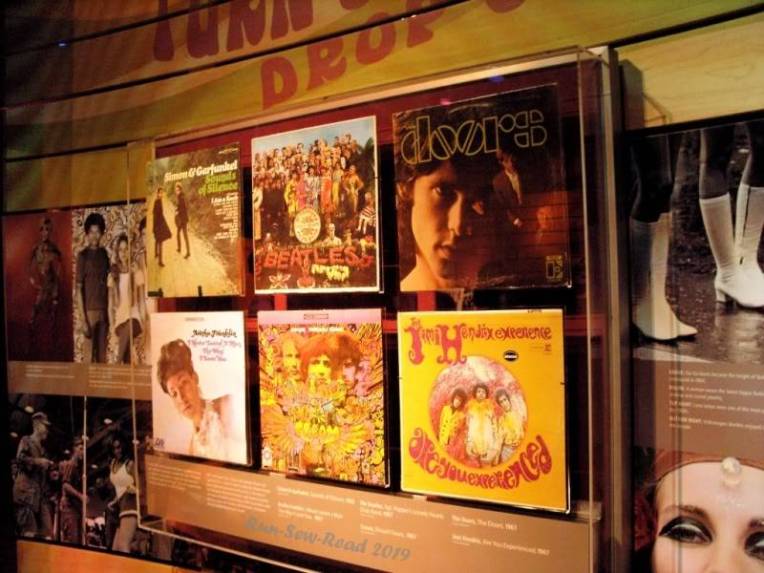
The ‘artifacts’ in the museum are relics of the fun, glamorous image of hippies.
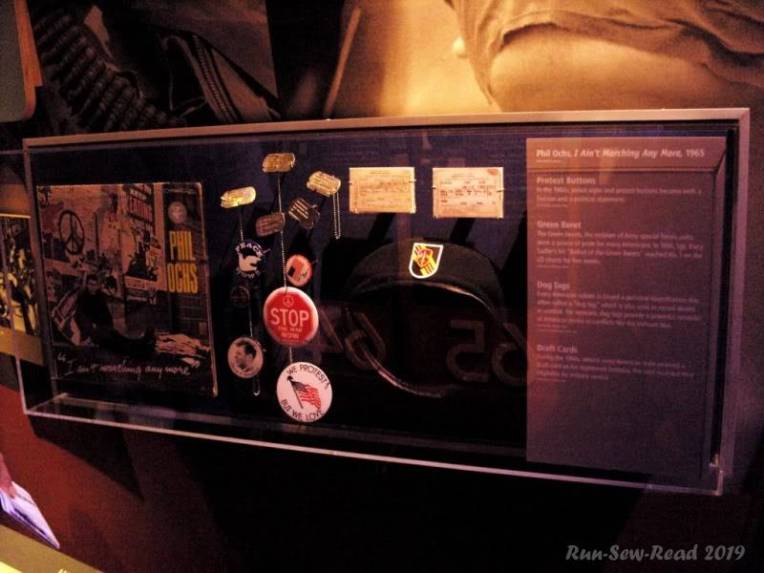
There is a nice, serious nod to Phil Ochs.
Then, as I was zooming in for a close up of this festival magazine ad, a security guard charged at me yelling, “No pictures! Photography is not allowed in here!” Seriously? Do they think a Doors album cover, or a photo of the Haight-Ashbury street sign, or a Woodstock magazine ad are rare and proprietary artifacts? Sheesh. Too many rules, man.
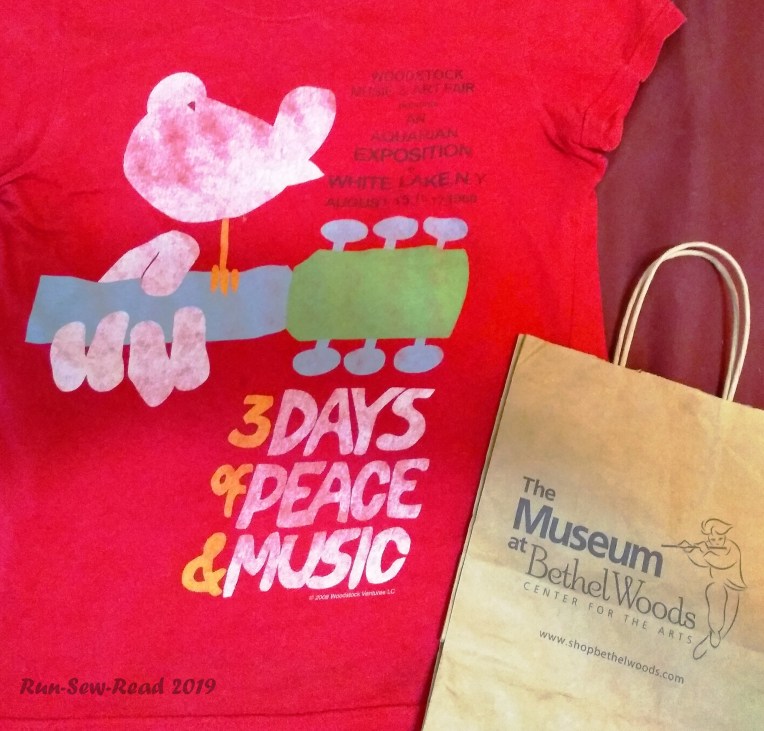
Annoyed, I made my way to the museum store and soothed myself with the purchase of a thin, overpriced t-shirt.
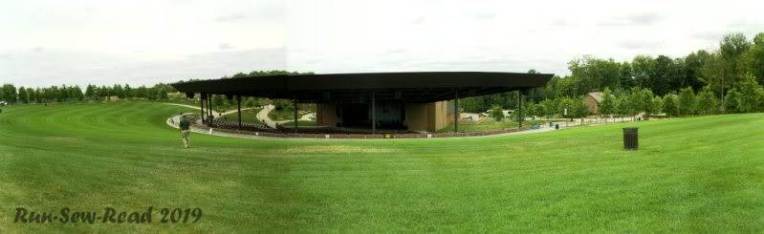
Moving on from the museum to the outside. They’ve constructed an outdoor amphitheater where concerts take place now. It’s way on the other end of the property from the original stage.
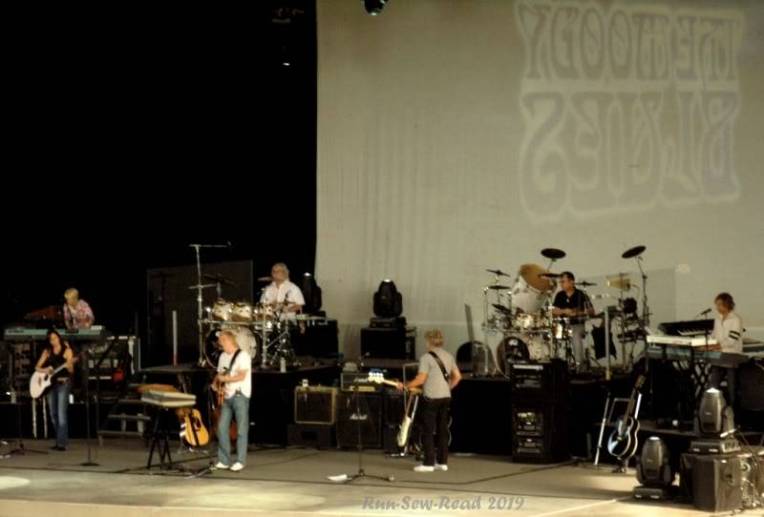
Before long, soundcheck was underway.
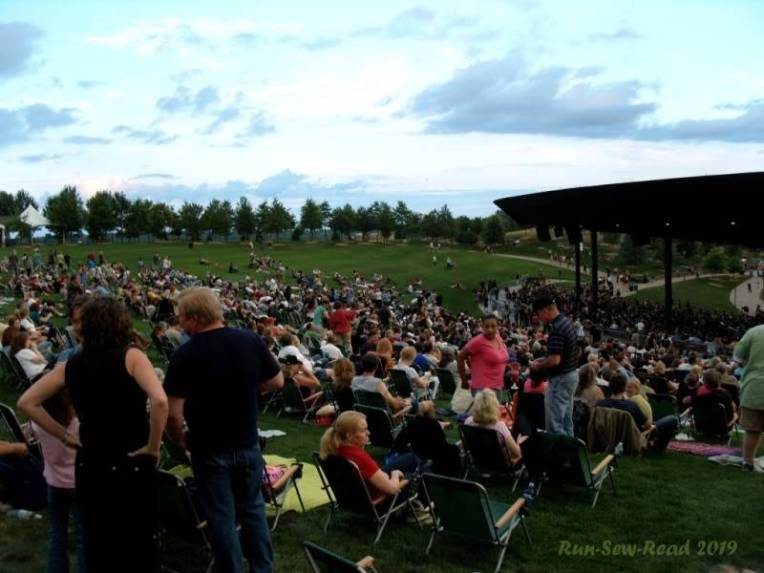
Then a good crowd started arriving.
The concert began.
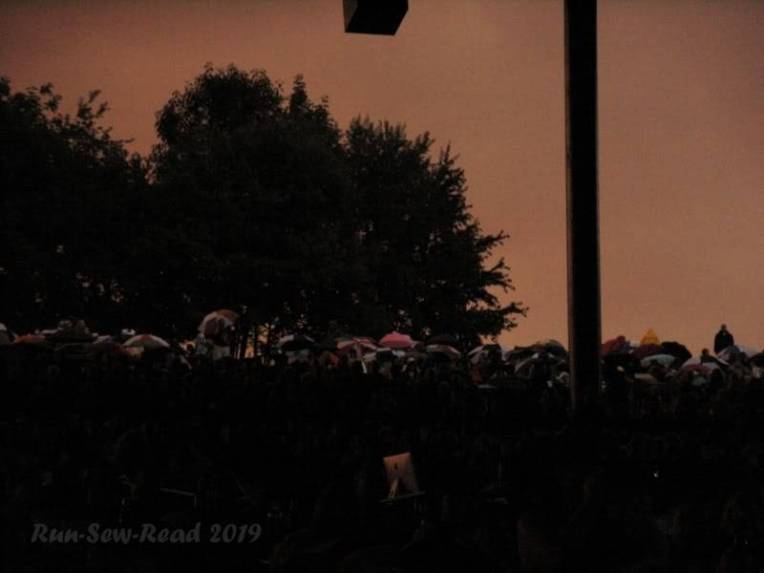
Then, just like 41 years earlier, the skies opened and it began pouring rain. To my amazement, everyone on the lawn stayed seated and just put up umbrellas. The rain was coming down in sheets and buckets, but the audience just sat there listening to the music, and the show went on as if nothing were wrong. Pretty cool.
Back to the ‘garden’.
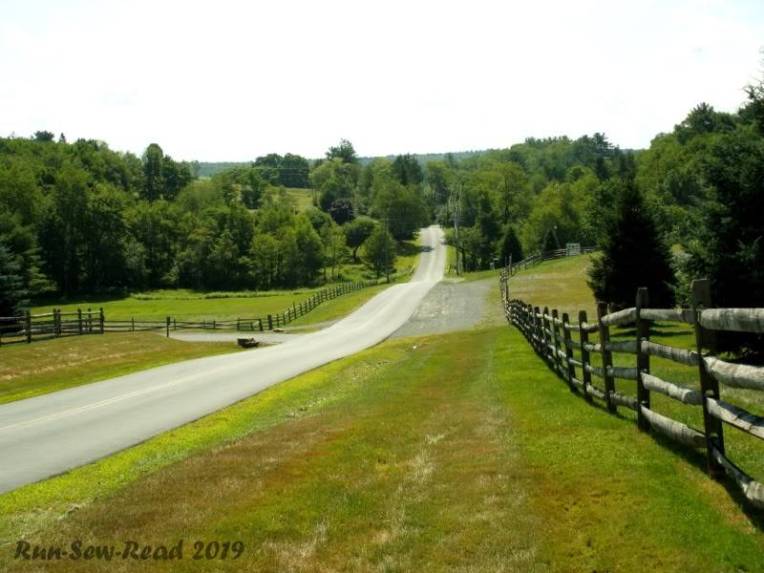
The morning after the concert, before heading to the airport, I circled back to the festival site to quietly take in the setting on a lovely Sunday morning.
This is looking at the original stage location from the Hurd Road side:
This is looking up the road with access to the original stage being that gravely patch on the right. I parked there, got out and climbed over the fence.
I stood at ‘center stage’. This is a stitched together pano of the view from ‘center stage’:
It really is a garden on that spot. (Someone should tell the group who now wants to excavate the stage location and ‘install’ a garden.)
Then it was time to get on the road. The 2-hour drive back to the Lehigh Valley (Allentown/Bethlehem) Airport was scenic.
This was the town of Eldred, NY, where I stopped for ice cream at the general store.
I crossed the beautiful Delaware River, and was back in Pennsylvania.
A little more driving and then a few hours on a plane and I was back in Kansas.
This trip was to see the ‘Royal Affair’ tour, consisting of Asia, Steve Howe’s Yes, John Lodge of the Moody Blues, and Carl Palmer’s ELP Legacy with guest vocalist Arthur Brown.
The show opened with something ‘Crazy’ I never expected to experience live:
One thing that did draw me to the show was Carl Palmer. Fifty years ago, he was the amazing drummer for the amazing Emerson Lake & Palmer. Today he is possibly even better. He did sets with his own band, and as a member of Asia.
Curiously, there was a little megaphone on stage.
Before long, I knew why: One of the Asia members was in the Buggles. So I’ve now sung along to ‘Video Killed the Radio Star’…with Carl Palmer on drums!
Other special moments were hearing the John Lodge 10,000 Light Years band perform ‘Legend of a Mind’ (Timothy Leary’s Dead); a song from John’s early years with the Moody Blues at their most psychedelic.
Then Steve Howe’s ‘Yes’ did a full set of Yes songs. Steve’s guitar playing was another main highlight. The entire concert was over four hours long. Definitely a full evening.
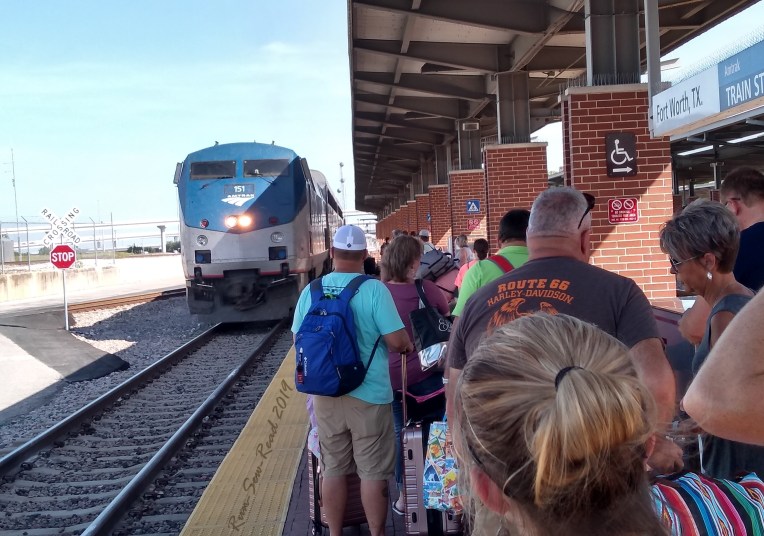
The next morning, it was back to Fort Worth for an afternoon of museums via Bike Share. It was Sunday morning, so I had extra time to kill before the museums opened. I did some exploring around downtown, first with a bike ride around downtown, and then via the free Molly-the-Trolley loop. All of my modes of transportation were available from the Fort Worth Intramodal Transportation Center (Fort Worth ITC).
When the museums opened, I headed to the Cowgirl Hall of Fame and Museum via bike. It was already a hot day, but with a slight breeze, thankfully.
The museum district has these great murals on the buildings.
After that, it was time for an unplanned treat. Just down the street from the Cowgirl museum, the Kimbell Art Museum has a special Monet exhibit! It runs through September 15, 2019. I saw dozens of original Monets! It was fascinating, comparing the painted scenes at a distance, and then up close where the brush strokes and colors seemed almost random.
The famous bridge.
All of those lovely water lilies.
From the museums it was a bike ride back to the Fort Worth ITC station, and time to board my Amtrak train for home.
It was another gorgeous, scenic ride; on time, with a dinner of buffalo chicken and wine, and no bad weather. I was home by midnight.
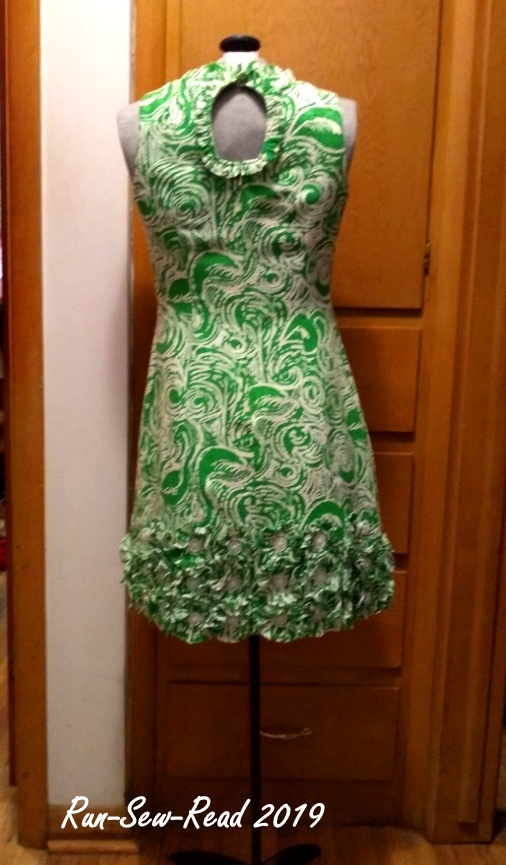
It occurred to me recently that as I create bright-colored summer dresses, I’m channeling Lilly Pulitzer in a way.
A couple of my dresses:
So, I looked up Lilly designs, and sure enough, the cosmic connection is undeniable. There are some differences; for instance, I almost always put a collar on my dresses, while ‘Lillys’ seem to all be sans-collar. Lillys are also more shaped. They have darts in front, back and bust. I liberally omit darts.
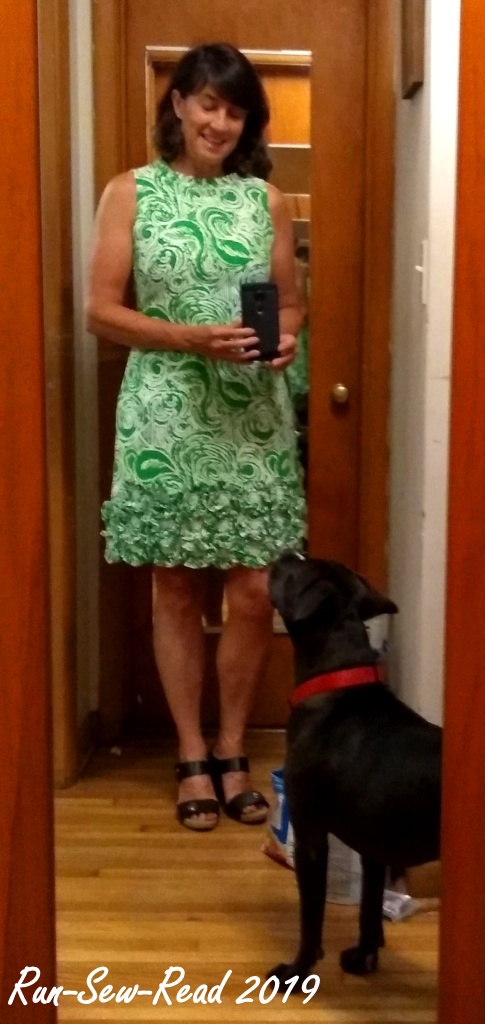
Not long after I looked up images of Lillys, there was the real thing hanging on the rack in my fave vintage clothing store; on the half-price rack to boot! I tried it on. It was quite snug through the bodice. When zipped up, it felt like a corset,… but fit otherwise. There was no way it wasn’t coming home with me. I’d figure out how to make it fit.
The dress
The dress is from the Lilly Pulitzer ‘Jubilee’ collection; a limited edition to celebrate her 50th year of the line. I believe it is from 2009. (This isn’t vintage, but the store attendant told me they had made an exception for this label and design. I’m glad they did!)
Cool Lilly details:
Lining. The outer fabric is a middle-weight woven soft cotton. The entire dress is lined with white cotton batiste/lawn fabric. It feels quite comfortable, and drapes nicely.
ID tag: When I opened up the lining under the arm, this tiny ‘Lilly’ tag was sewn into the seam allowance. I’m guessing it is to help ID a counterfeit.
Pockets! (I always intend to add pockets to my dresses, but it doesn’t get done if I’m in a rush to finish the garment. Then I always intend to go back and add pockets later, but sigh, that doesn’t happen very often. Note to self: Add pockets. Every time.)
Keyhole back. It is a nice feature that adds interest but doesn’t require special undergarments.
Unique Prints: All Lilly Pulitzer prints have ‘Lilly’ embedded somewhere in the print.
This Jubilee Collection print also has ’50th’ embedded in it.
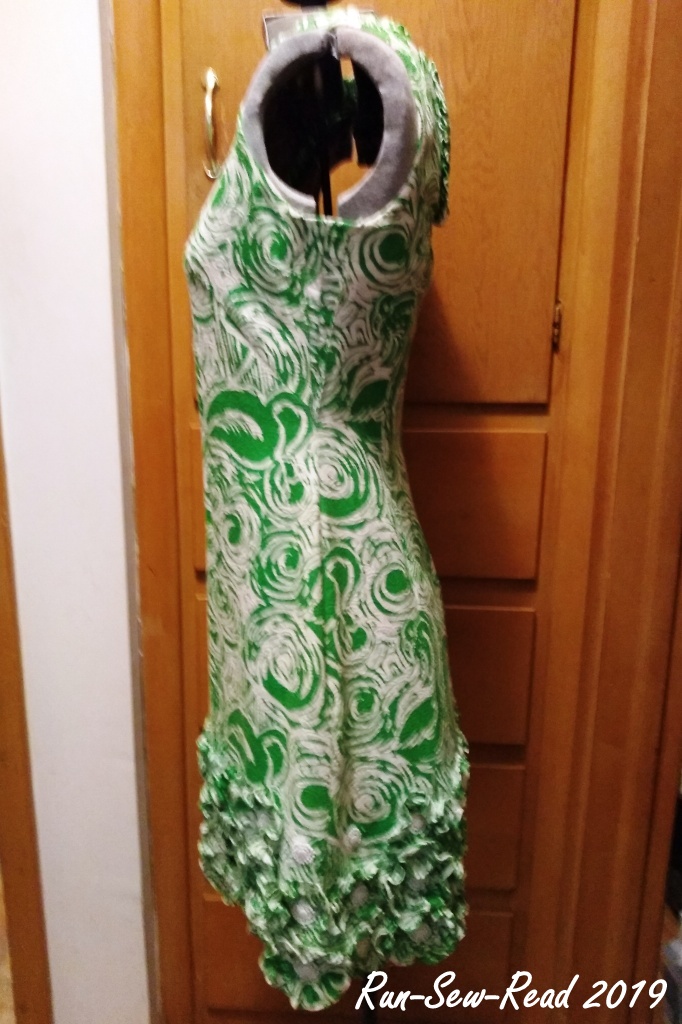
And now, the alteration:
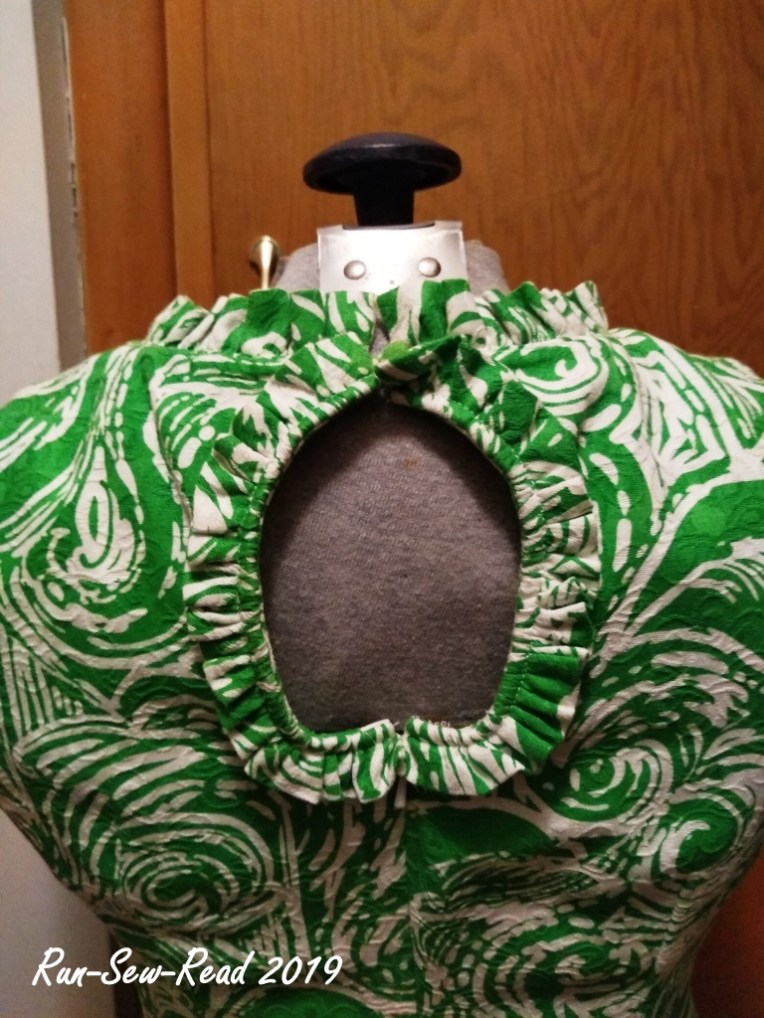
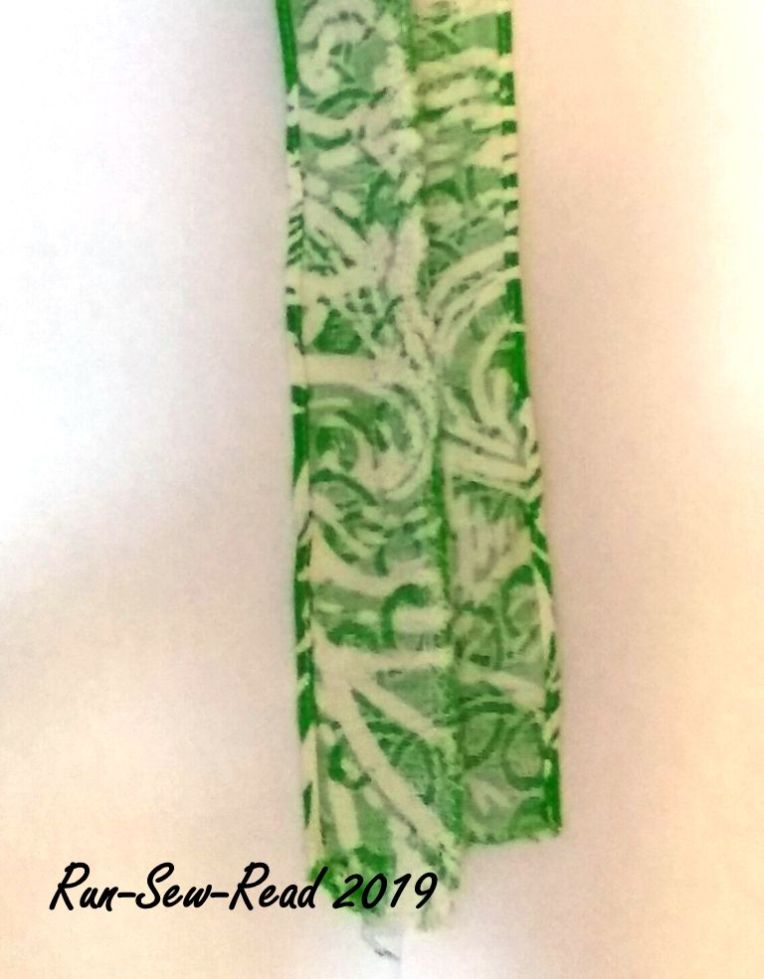
To expand the bodice, I had to find some spare fabric in the dress. The side-seam allowances were normal; not wide enough for expansion. The hem was narrow. No excess fabric there. My solution was to remove two of the ‘flowers’ on each side of the lower edge.
Two flower strips straightened out, pressed flat and then sewn together side-by-side, made a 9″ x 2″ strip. This was plenty wide enough to expand each side of the bodice. Here is one of the strips:
The strips were used to make a V-shaped inset to the side seams under each arm.
Mission accomplished!
The dress now fits comfortably. Once I’d gotten past the tedious process of unpicking the stitching on the four flowers, the actual altering process was surprisingly quick and smooth. No frustrations at all.
Myrtle the sewing pup-prentice, was dying to help the entire time. She finally found her role, hiding the ugly stack of paint supplies in my selfie.
Ice cream is a year round food for me. This Kitchen Aid ice cream maker attachment was on my wish list for ages. But at around $100, I considered it too pricey for an ice cream making gadget. And then finally came a Black Friday deal, and I bagged my own ice cream freezing/churning bowl for under $50. (Although still a little on the pricey side for this frugal cook.) Lately the price seems to be holding at the $50 level.
The Kitchen Aid (or any frozen ice cream mixing bowl) is super convenient, because you don’t have to deal with the bags of ice and rock salt needed for a traditional ice cream machine. The frozen mixing bowl works quicker, too. But there’s a process to it. So without further delay, here’s what works for me:
Everyone has their own target level for ice cream taste, texture and nutrition; and her ingredients are more rich than my preference. So below is my version of the ingredients. For my taste, this texture is still creamy enough to enjoy and not feel deprived of the decadence:
1 cup heavy cream
2 cups skim milk
¾ cup sugar
1 Tbsp vanilla extract
1/8 tsp sea salt
Quick Method (for eating soft ice cream asap):
Mixer bowl must be frozen in advance. There are no shortcuts for this step.
Combine all of the ingredients and pour into frozen mixer bowl.
Churn in frozen mixer bowl for 25-30 minutes.
Serve. It will have a light, soft-serve consistency, with a slight crystal-ly texture. It will be a bit like eating frozen, sweetened whipped cream.
Then store the leftovers in the freezer, and in a few hours, you should have perfect hard scoop ice cream.
Longer Method (for smooth hard scoop consistency):
Freeze the mixer bowl in advance.
Combine the ingredients and cook on the stovetop, just long enough to dissolve the sugar. Stir while cooking.
Chill the mixture in the fridge.
Pour the chilled mixture into the frozen mixing bowl and churn for 25-30 minutes.
Transfer to a tub with lid, and freeze for a few hours, or overnight.
When you start the churning process, it will look like this:
Then 10-15 minutes later, you’ll notice the mixture expanding and taking form:
After 25-30 minutes, the mixture will be at or close to the top of the bowl, and the motor will be working harder:
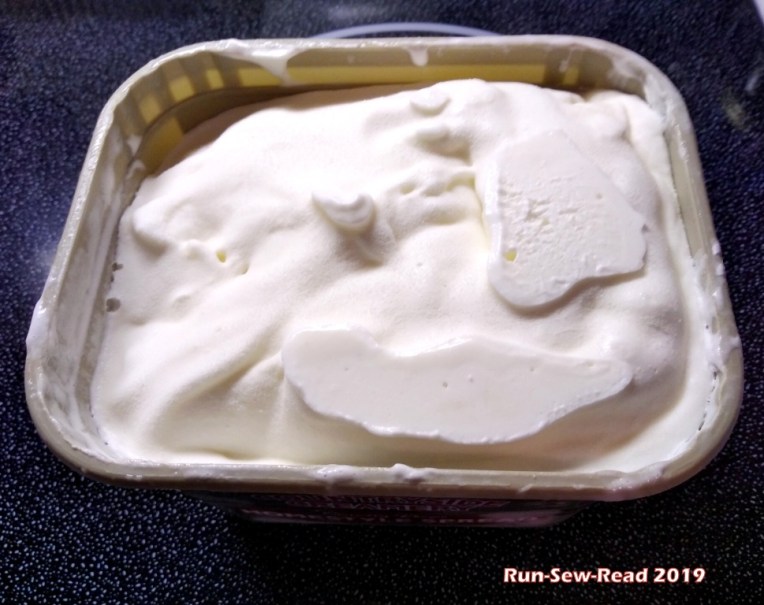
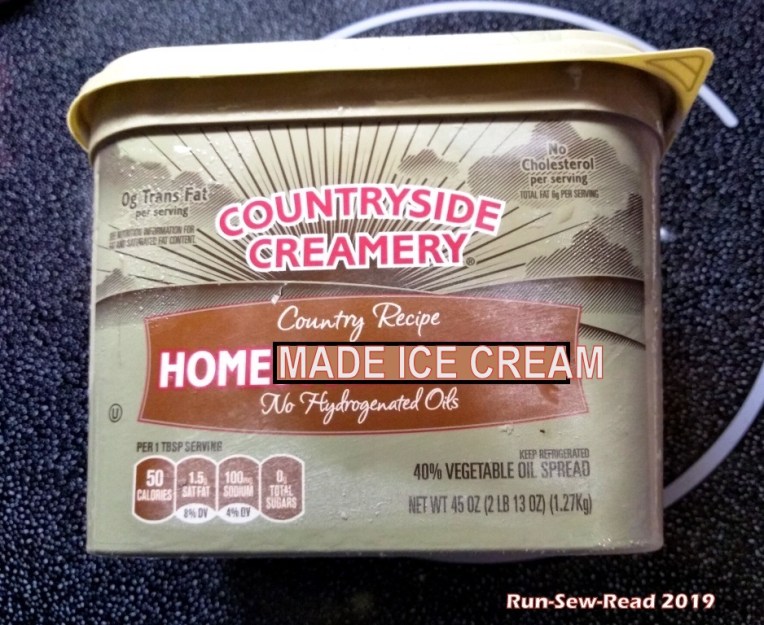
That’s when I stop and scoop the soft-frozen mixture into a tub, and put the tub in the deep freeze for a few hours. The batch fits perfectly in a 45 oz margarine tub:
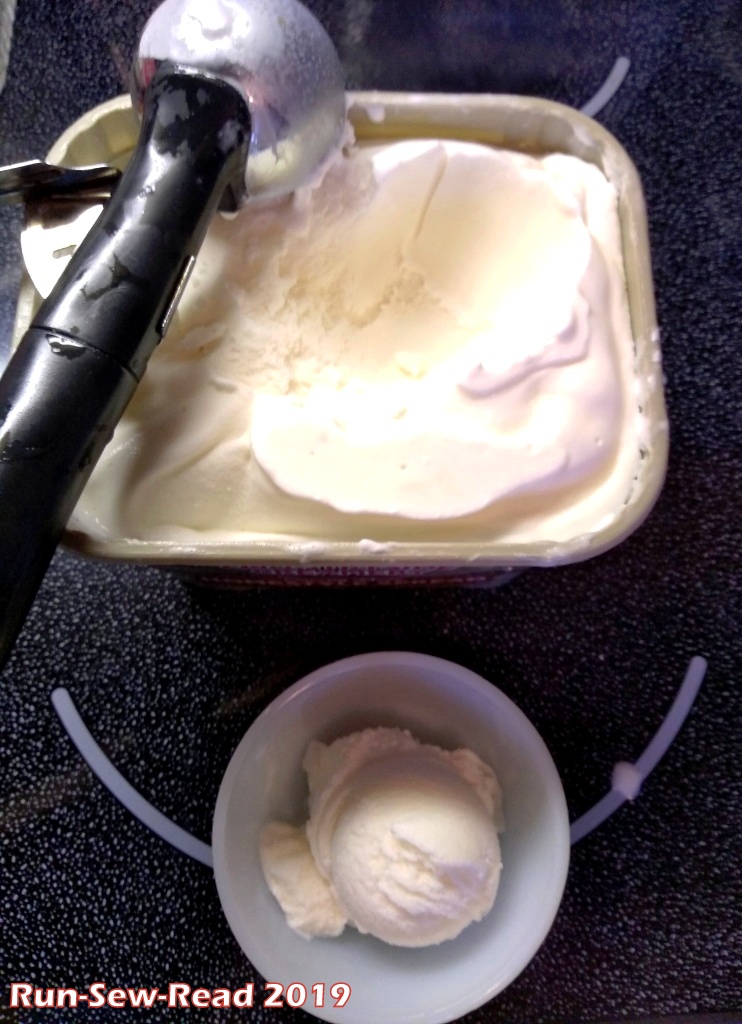
A few hours later, it’s like this:
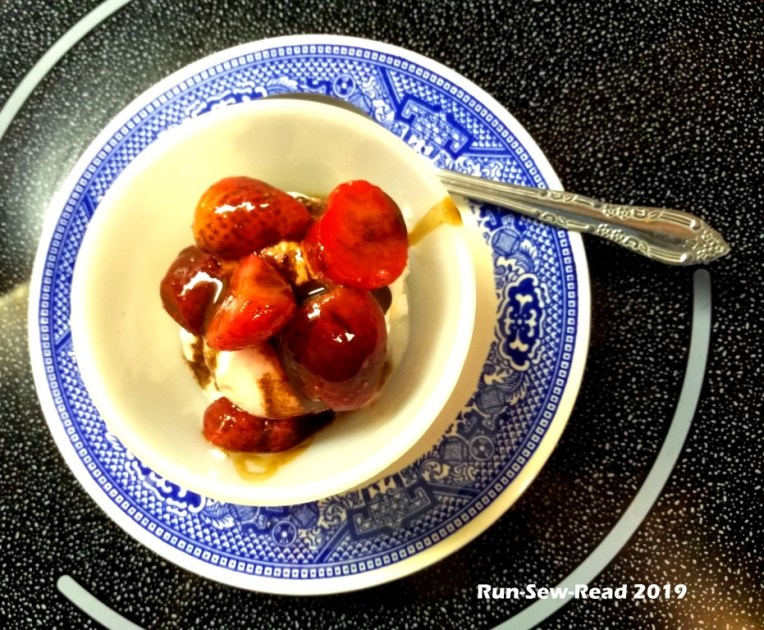
Serving: My current favorite toppings are strawberries and homemade chocolate sauce.
Or, you can take it to another level and make Fried Ice Cream. (And then top it with strawberries and chocolate sauce.)
One final tip: After the churning process, the mixing bowl will still be partly frozen. Immediately wash it and put it back in the freezer so it will soon be ready to make the next batch.
Start the process now, and by the time this video stops playing, you’ll have your own delicious homemade perfect hard scoop ice cream.
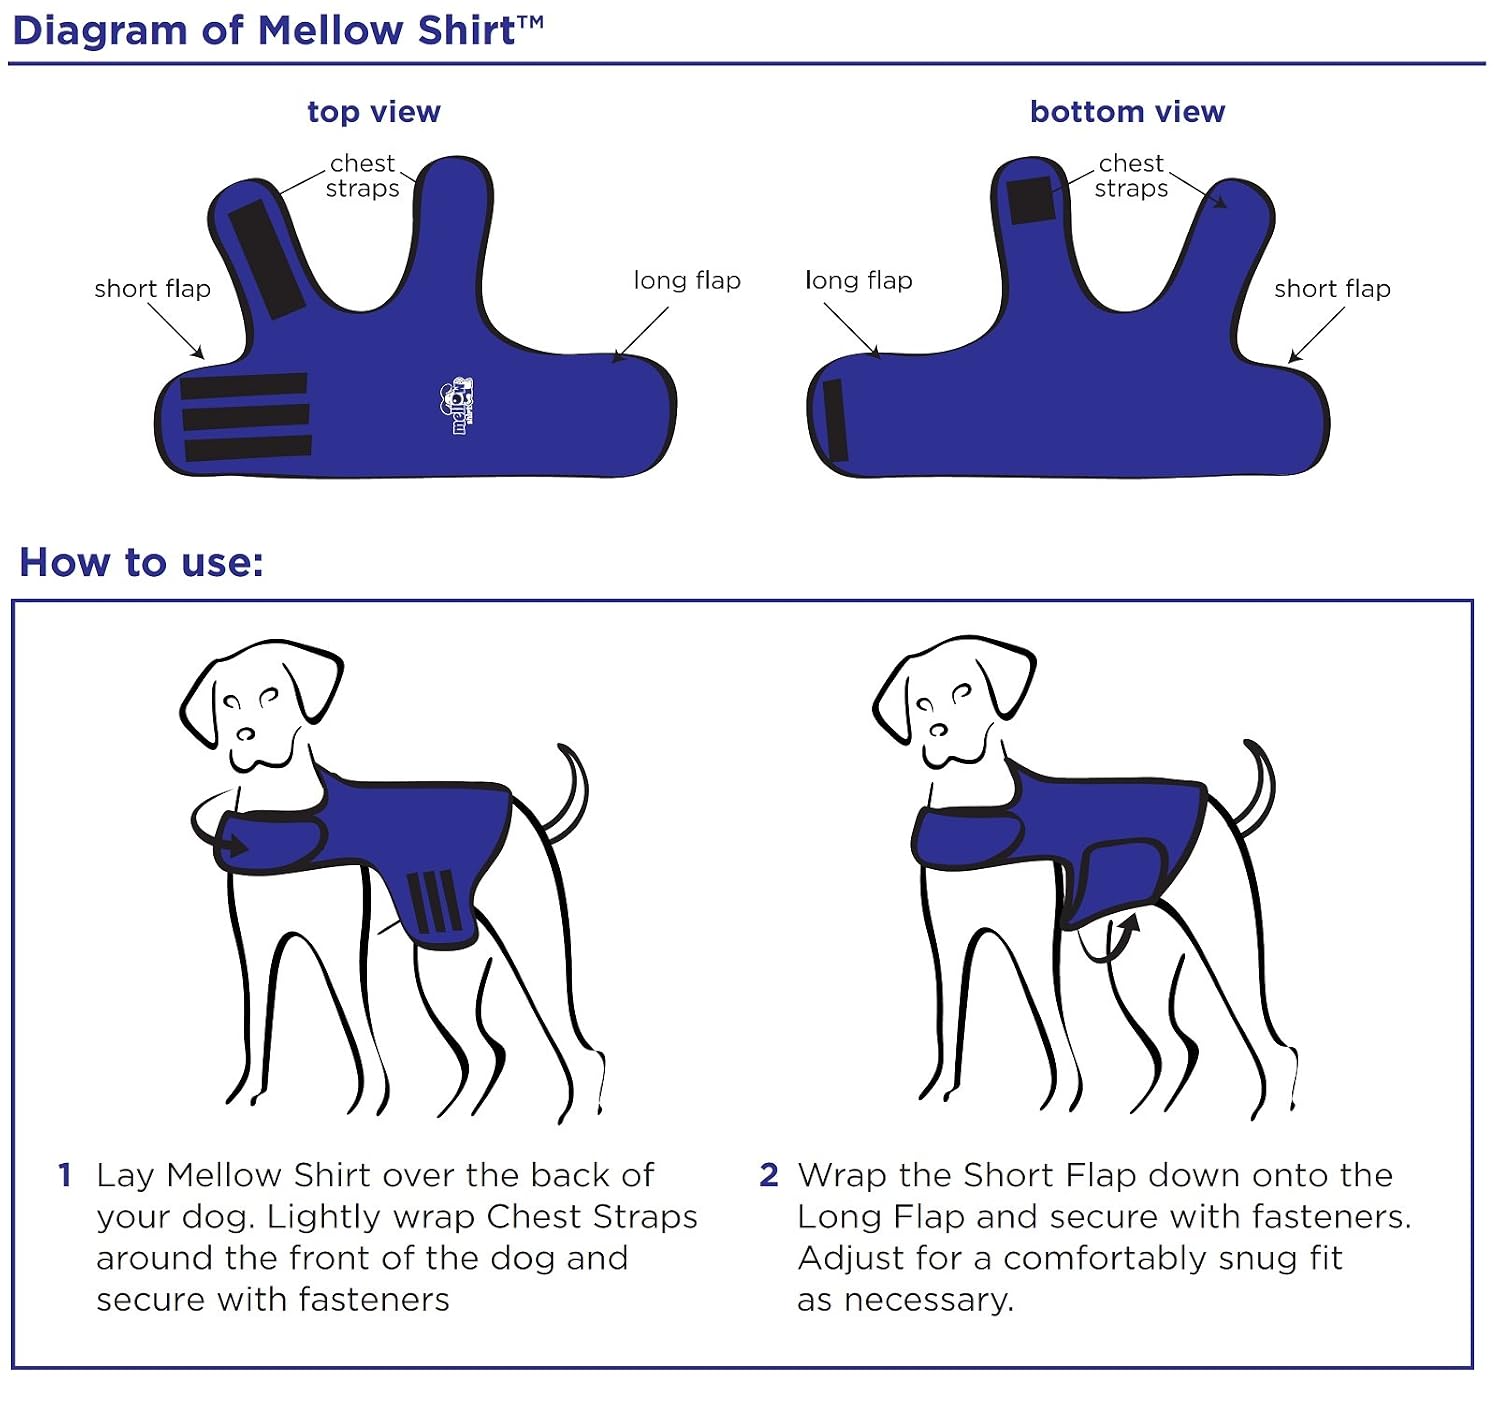
I may end up buying the authentic Thundershirt for Myrtle (or one of the smorgasbord of other brands now available on Amazon, such as this one called Mellow Shirt“).
But first I want to see if Myrtle needs it and if it will calm her during fireworks season. We’ve had three nights of fireworks in the neighborhood so far. The first night, she was visibly agitated, even in the house when I was with her, trying to comfort her. She was startled and barked at every boom.
So, I’ve mocked up a DIY compression vest for her. The first mock up is made of terry cloth, to be soft and cool.
The next mock up will be all or part netting, and stretchier:
While wearing the terrycloth vest, she immediately began sitting and laying down more, while not showing signs that the vest bothers her.
However, the real test hasn’t occurred yet. The fireworks have been quiet in our ‘hood since that first night.
I’ll be watching and tweaking the vests all week, hoping that by July 4th, we’ll have something that keeps her from being frightened.
The vest has not taken away her energy, and by that I mean her desire to play with the baby robins in the neighbor’s tree.