No matter how long I’ve kept a jar of yeast, it has never gone bad. Until now. Just two months ago, I wrote about DIY bread mixes; and wrote that ‘yeast keeps well past its sell-by date’. Turns out, that very yeast was going bad as I was writing the post. The bread made and pictured in that post turned out fine. But in the weeks that followed, one of those mixes turned out like the one pictured on the left below. I tried another loaf from the same set of mixes; got the same result. So I tried one more loaf, but added 1/2 teaspoon of yeast from a new jar, and got the result on the right.
The old yeast still has not reached the sell-by date on the jar, and has been stored continuously in the frig, but for some unknown reason it went bad anyway. These things happen, I guess. I stand by my advice to buy and keep a jar of yeast on hand. I’ve baked bread since I was a little girl, and this is the first time I’ve ever had yeast go bad.
The short loaves didn’t go to waste. They sliced and tasted fine, but a bit more dense than a regular loaf.
More desert island music
We are into the final three rounds of the Slice The Life 2020 Album Draft. Round 8 has just begun. For the latest ‘desert island album’ picks, click here.
For the latest Run-Sew-Read pick, click here, and enjoy the sample below.
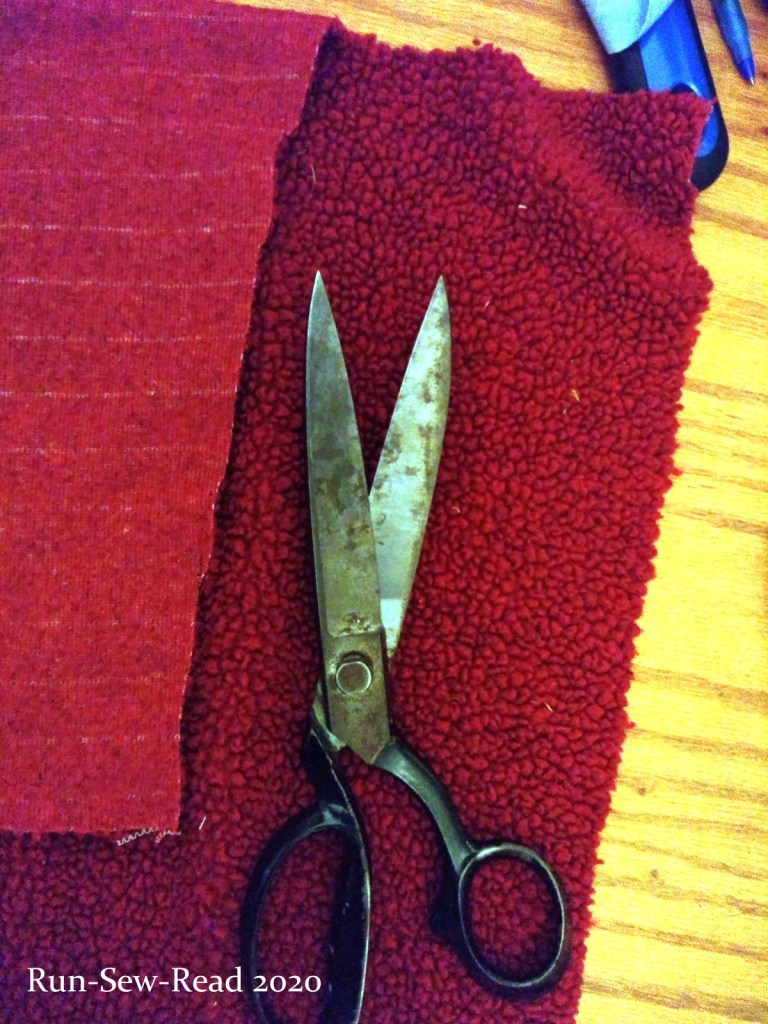
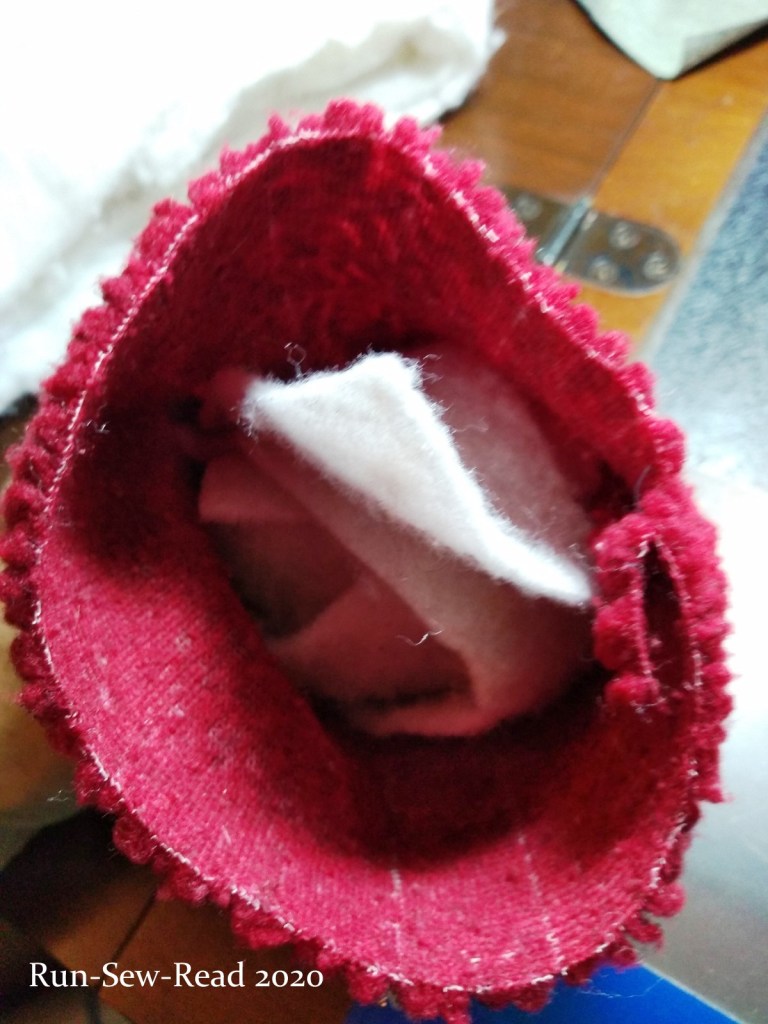
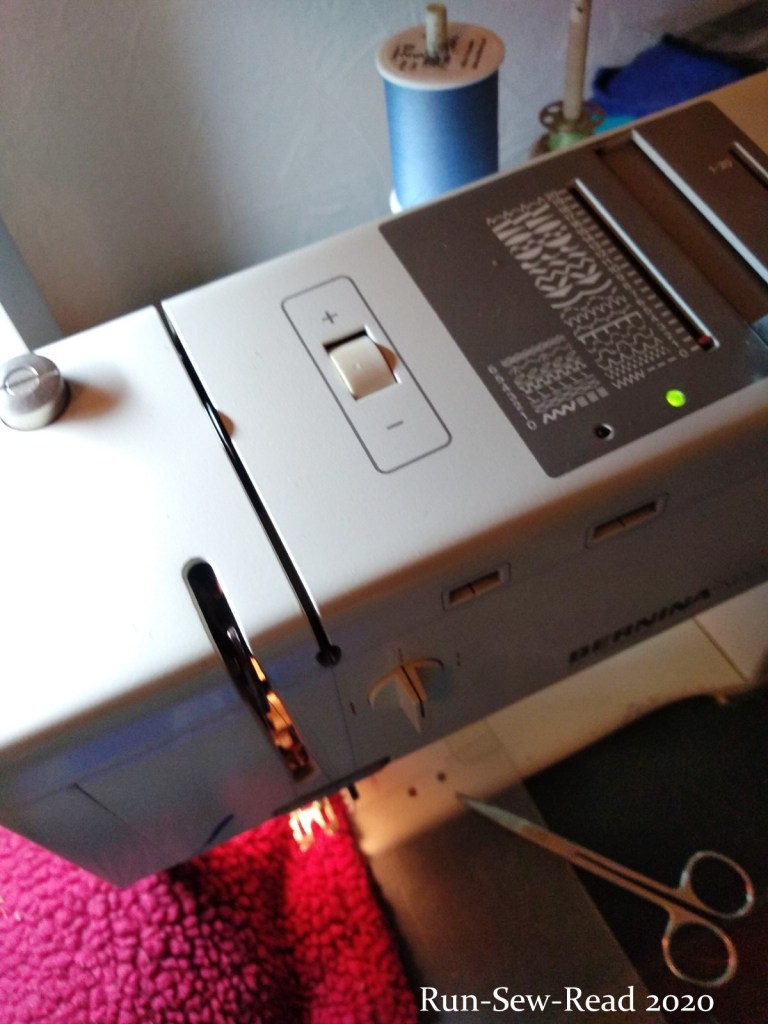
When Myrtle the two-year-old pup is being awful, and I need some peace, I can reach for the red plush fabric, and spend 5 minutes making her a squishy squeaky square.
When she sees me grab the red fabric, she calms down and sits as still as a statue by my sewing chair until I’m done. When I finish and hand it to her, her appreciation is a wonder.
THE PROCESS
Cut out a rectangle approximately 12″ x 6″, of plush fabric.
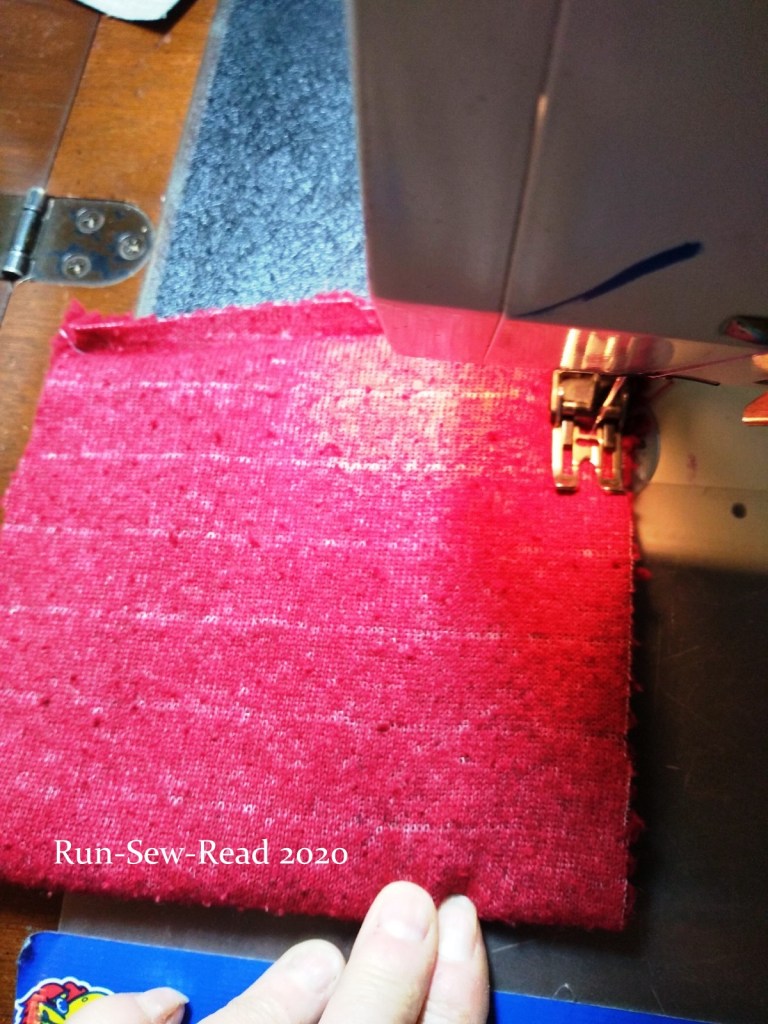
Fold in half, right sides together, to make a square shape. Sew two sides shut to make a little bag.
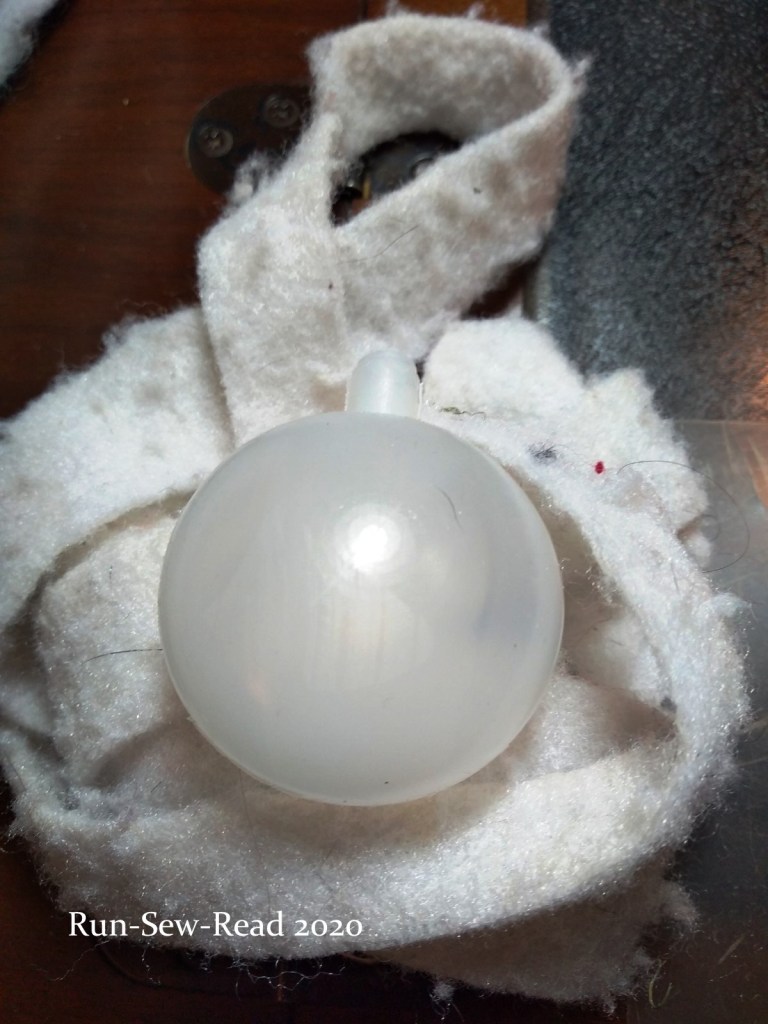
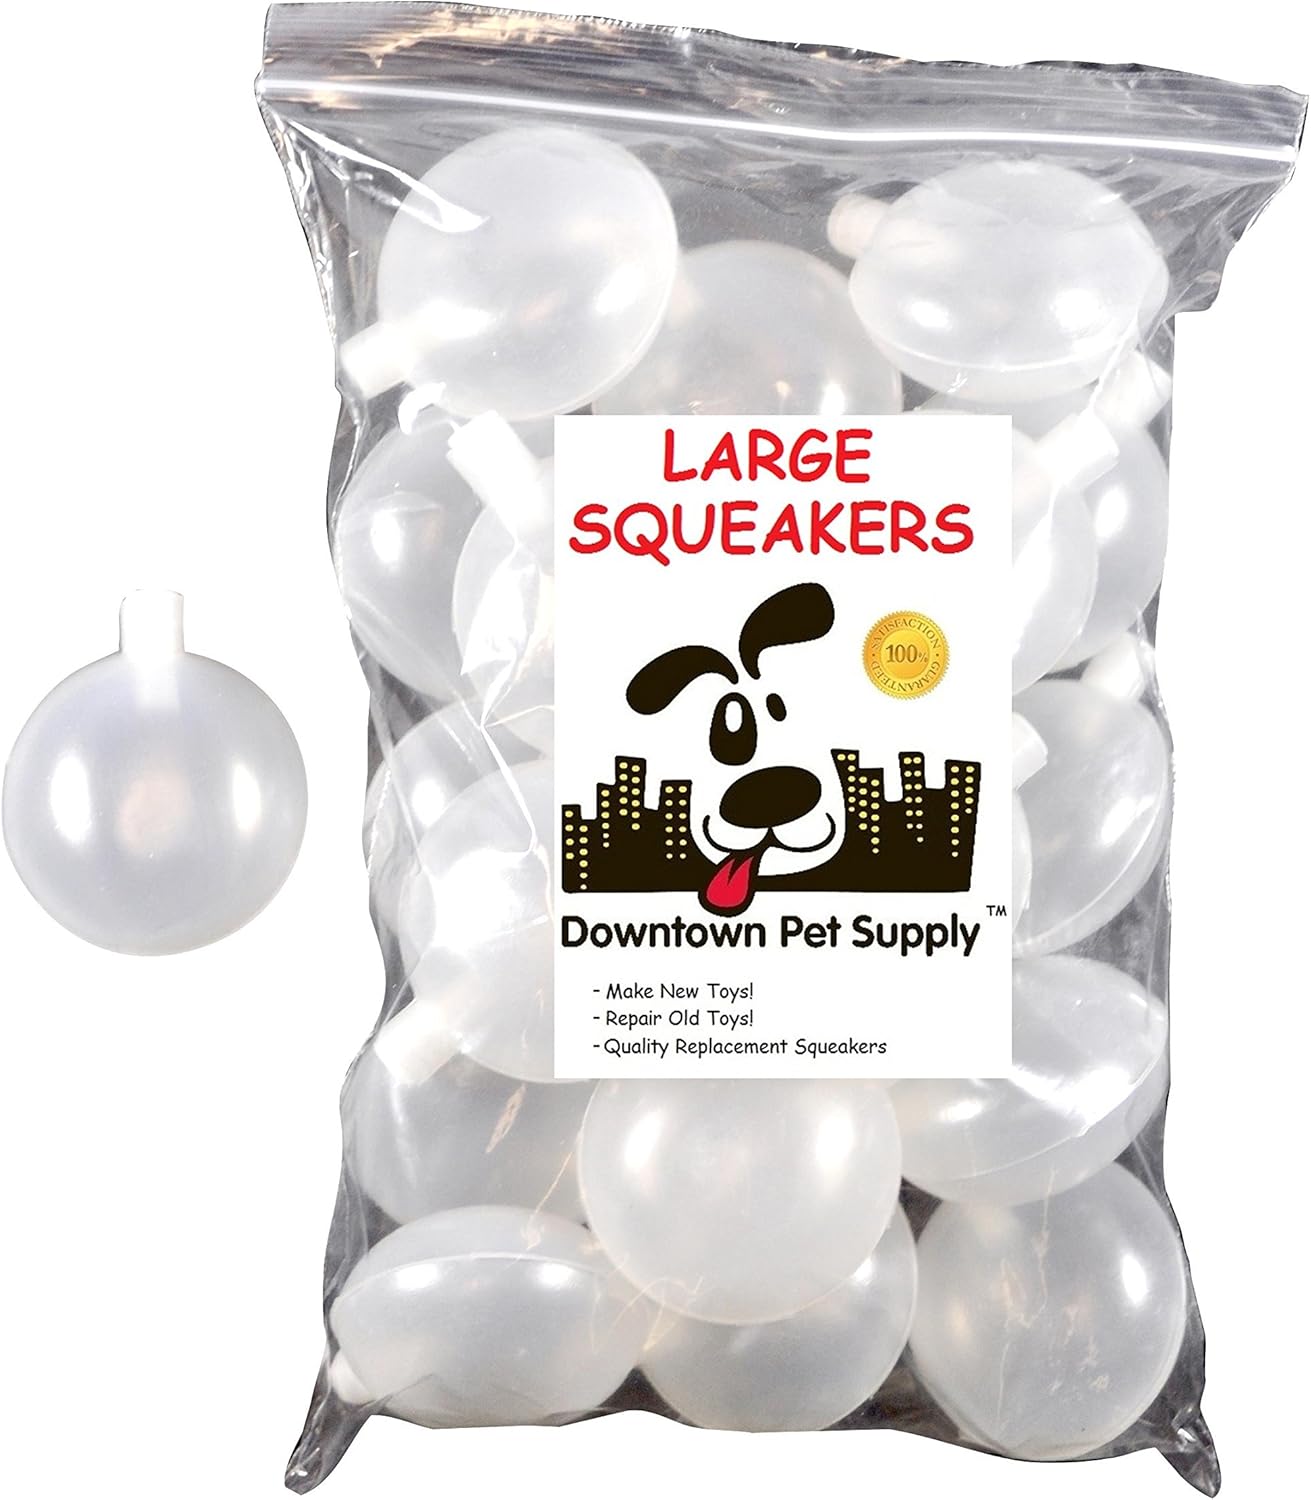
You need a dog squeaker and some fiberfill or batting scraps.
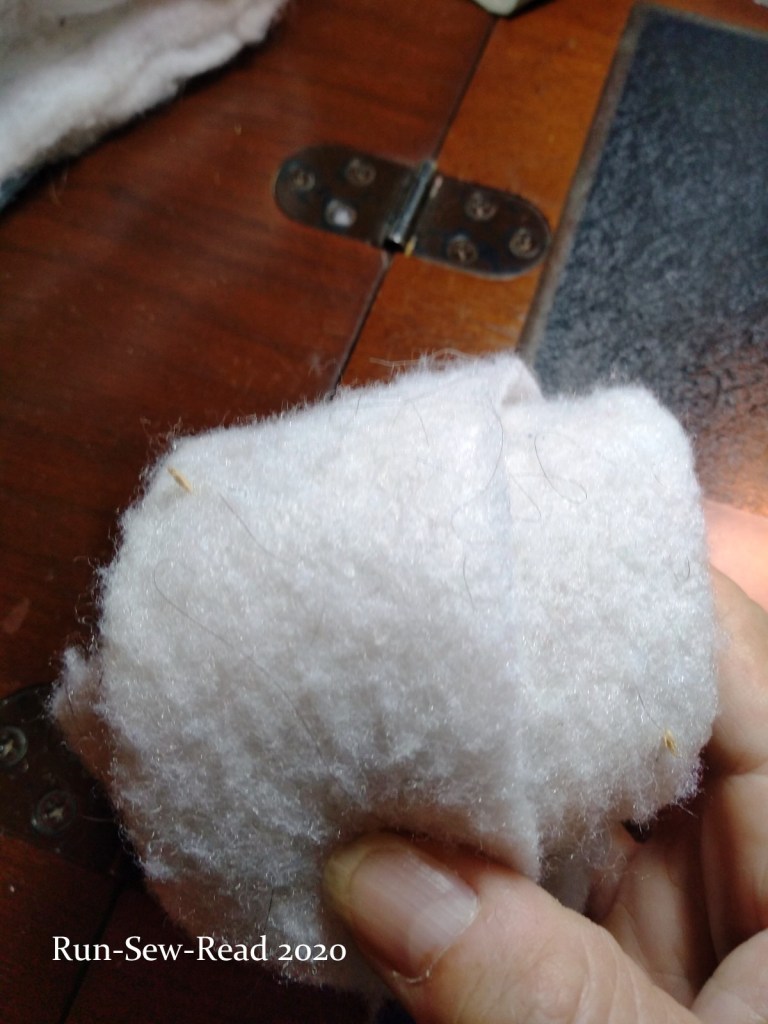
Wrap the squeaker in the fiberfill or batting.
Turn the bag right side out and put the wrapped squeaker inside.
The first four episodes are available now on Apple TV+. Future episodes are being released each Friday. The first episode was silly. From then on, each episode got better than the one before. I now don’t want the series to ever end.
This is the story of the coach who led last year’s (fictional) Wichita State Shockers football team through an undefeated season, and trip to the Rose Bowl; and then agreed to coach the Richmond, UK football (soccer) team. It’s London, Kansas, sports, and a bit of baking, all in one delightful package. In real life, there is no Wichita State football team. The university hasn’t had a football team since 1986, which makes this series even more awesome. They use the actual WSU mascot and logos.
The next season of Fargo will be released on September 27 on FX. It is set in Kansas City in the 1950s, and stars Chris Rock. I cannot wait. “Girl, you’ve got a panty on your head.”
The latest remake of Daphne Du Maurier’s Rebecca will be released October 21, on Netflix. How much am I looking forward to it? I’ve written a whole post on it, that’s how much. Read it here.
Only in 2020 is it a blog-worthy announcement to say, “I went to a baseball game this week.” This past week I proudly wore one of the masks I’ve made, and attended the championship game of the long-running annual National Baseball Congress World Series tournament. I’ve written about the NBC World Series in prior years, here in 2016, and here in 2018. This month they managed to plan and carry out a 2020 pandemic version of the tournament, in a borrowed stadium.
The COVID-19 rules for attendees: Masks were required to be worn by every person in the stadium. Every other row of seats was roped off, so attendees sat at least a row apart. We were also instructed to sit several seats away from other fans.
The championship game was between the Cheney (KS) Diamond Dawgs and the Santa Barbara Foresters.
My only 7th inning stretch of 2020.
The Foresters led from the start and continued to build on their lead as the game progressed. A rain and lightning delay was looming.
The Diamond Dawgs signaled with a 3-run homer in the bottom of the 9th, that they weren’t going to be rushed out of the stadium. But then came the 3rd out, and congrats to the champions, the Santa Barbara Foresters.
The first gust from the storm hit as I left the seats. The first drops of rain fell as I was getting into my car.
More sports to come?
The last live sports event I’d attended before this was a Big XII basketball game on March 5. On the day of this baseball game, it was rumored that two of the Power-5 collegiate conferences were going to cancel football for the year. The Big 10 did in fact cancel 2020 football, and the Pac-12 postponed their football season to Spring 2021. At the time, I thought this NBC baseball game might be the last live sports event I’d be attending in 2020.
But maybe not. The Big XII has announced that it does not plan to cancel or postpone its 2020 football season. Teams want fans there, too. Wishful thinking on my part? We’ll see what surprises are out there for the final four months of 2020. Wear those masks and be distant and considerate of each other. It’s our only hope of having more chances to head to the stadiums to cheer our teams on this year.
After years of ‘window shopping’ for a grain mill, I finally have my very own, and am grinding my own whole wheat flour, since last December.
THE GRAIN MILL
This is the grain mill model I purchased. It grinds up to 700g of berries per batch. 700g is about 4 cups of wheat berries, which makes 5-6 cups of flour.
The bottom section of the grain mill is the powerful motor, and the upper compartment holds the grain and the blade. The appliance is heavier than it looks. On the back of the appliance there’s a handy red handle to use in pouring the flour out.
THE WHEAT
Where to buy:
Wheat berries can be purchased by the pound here, at a local feed & seed store. I most recently paid 75 cents/pound. Wheat berries can also be purchased at some natural food stores, or ordered online. Here are a couple of options on Amazon:
I inquired with our local extension office about clean and safe preparation and use of wheat berries purchased from a feed & seed store. Their instructions were:
Use hard wheat; not the soft variety;
The wheat should be dry. Don’t wash it, because that will soften it, which will make it unsuitable for grinding.
Freeze the wheat berries for a couple of days, to kill the things that take up residence in growing wheat. (There’s a great discussion about those little ‘things’ here. In other words, don’t be grossed out about what’s in wheat; just follow the steps from the extension office.)
Sift the wheat berries with a wire mesh strainer, to remove dust and the things that got killed in the freezing process.
Eat only cooked or baked foods made with the wheat; nothing raw. (Translation: This is one of the reasons you’re not supposed to eat raw cookie dough. Sorry kids; this bums me out too.)
The standard food handling rule applies: Wash your hands before and after handling the wheat berries.
THE GRINDING PROCESS
Measure the wheat berries, sift, and then pour the berries into the mill.
Measure
Sift
Put berries in mill
Grind for about 5 minutes. The grinding compartment and wheat get very hot, so I run the mill for one minute at a time; letting it cool for a few minutes between each minute of grinding.
Here is what the flour looks like after 1 minute of grinding and again after 5 minutes. The two pictures might not look all that different, but they feel different to the touch. After 1 minute, the texture is a little bit grainy, like a very fine sand. After 5 minutes it is a soft powder.
After 1 minute of grinding
After 5 minutes of grinding
The flour will have more volume than the berries. Two cups of wheat berries will produce around 3 cups of flour.
STORAGE AND SHELF LIFE
Wheat berries have a years-long shelf life. You can buy and store wheat berries in bulk, without fear of them going bad. I’ve stored them for years in a dark cabinet in an airtight container. I noticed no change in taste, smell or texture.
After grinding, the whole wheat flour should be stored in the frig and used within about 3 months. I grind my berries on an as-needed basis, and keep a cup or less of the flour on hand in the frig. King Arthur Flour recommends storing whole wheat flour in the freezer. https://shop.kingarthurbaking.com/items/king-arthur-premium-100-whole-wheat-flour-5-lb
Is it necessary to use a mill to make flour? Probably yes. I’ve tried grinding wheat berries in an electric coffee grinder. It produced tiny granules the consistency of fine sand, but did not make flour. The granules didn’t go to waste though. They were a super tasty addition to my oatmeal.
I’ve tried grinding wheat with a food processor, and no, it simply didn’t work.
BAKING WITH WHOLE WHEAT FLOUR
Whole wheat flour creates a more dense, flatter, heavier product. If you don’t want that, use a combination of wheat flour and all-purpose white flour. My general ratios:
In cookies, I use a ratio of 1 part whole wheat to 3 parts all-purpose flour. (1/4 c. w/w : 3/4 c. a/p)
In breads, I use a ratio of 1 part whole wheat to 2 parts all-purpose flour. (1/3 c. w/w : 2/3 c. a/p)
In my recent post about DIY make-ahead bread machine mixes I used 1/3 whole wheat flour from my mill. See that darker colored flour in the bottom of the jars? That’s the w/w flour. That combination gives some of the benefits of whole wheat, but not the flat, heavy loaf. It retains the lighter, fluffier texture from the white all-purpose flour.
HOW ABOUT SOME MUSIC?
The Slice The Life 2020 Album Draft continues. For the latest ‘desert island album’ picks, click here.
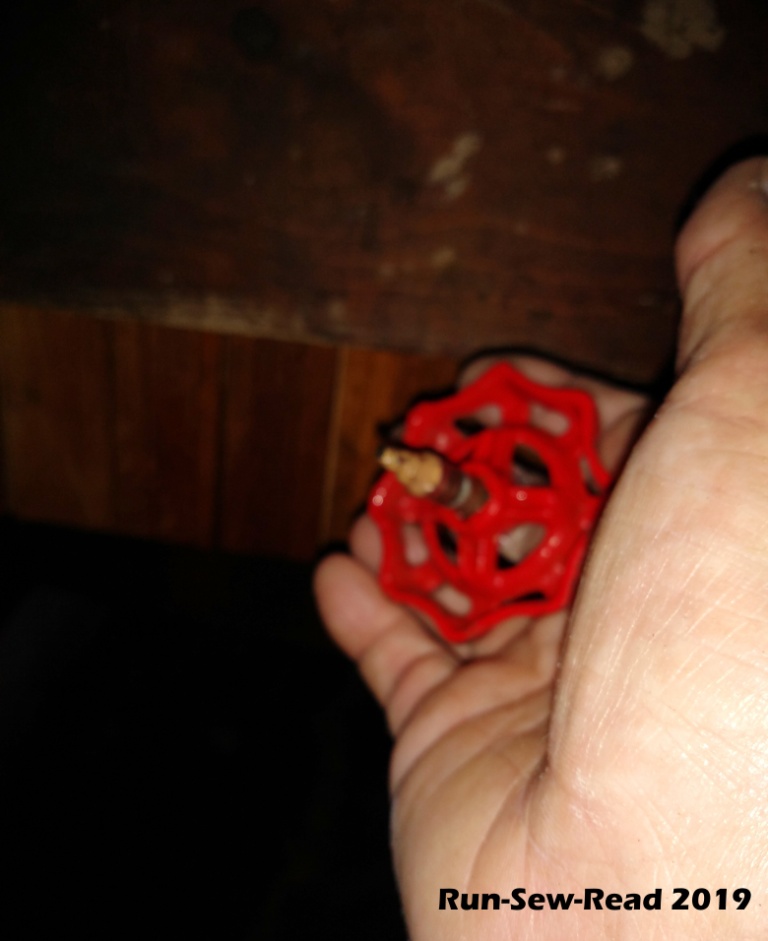
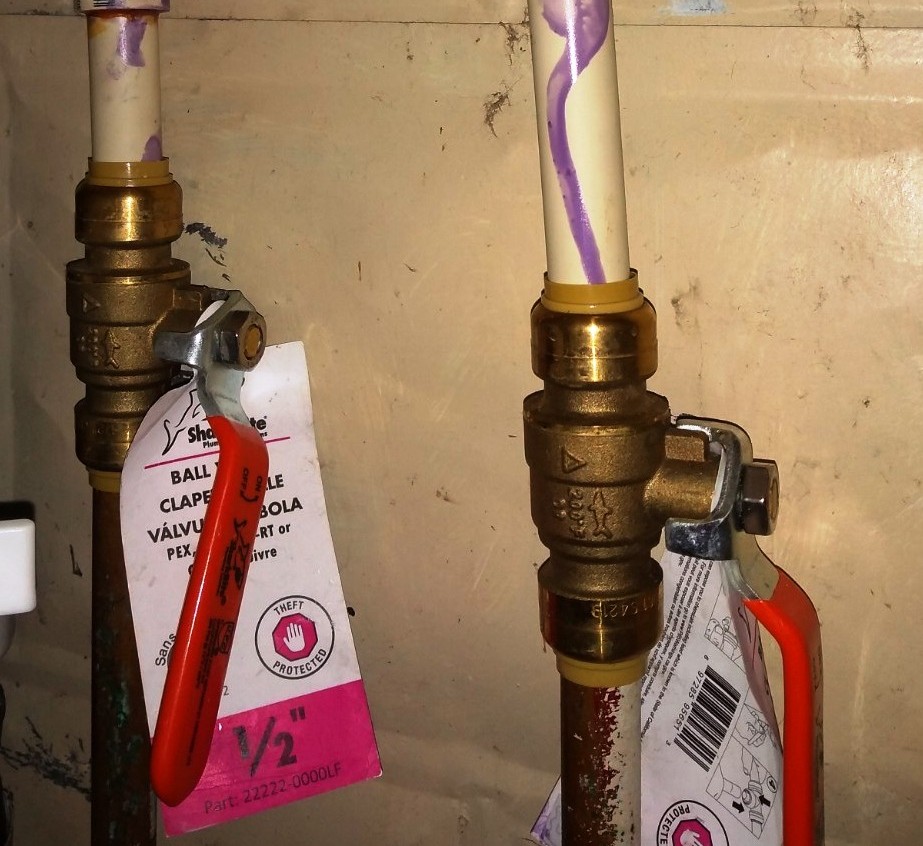
Like my former main house shut off valve, the washer shut offs were this round red handled type, that can’t be trusted to last more than a few years.
This time the old washer shut off valves didn’t break or start leaking, but recently, when I tried to turn them off, the cold water valve was stuck open. I didn’t try to force it to turn, because I’ve had one of the handles break off in my hand and the valve start spraying water (a la last year’s post).
The new shut offs. I replaced the washer shut off valves myself, with these Shark-Bite connections, and cpvc pipe. As you know if you’ve done any DIY plumbing projects in recent years, Shark Bite connections are a literal game-changer, making anyone and everyone a potential plumber. They push into place. Honest. No cement, flame torch or solder required; and no leaks.
New utility sink! I also used this as an opportunity to add a utility sink, which I’ve wanted for years. I loved the sink instantly. It gives me a place to fill and empty the mop bucket, and rinse off and soak big things. It will also serve as a backup to hold washer discharge water if there’s ever a blockage in the drain (which has happened before).
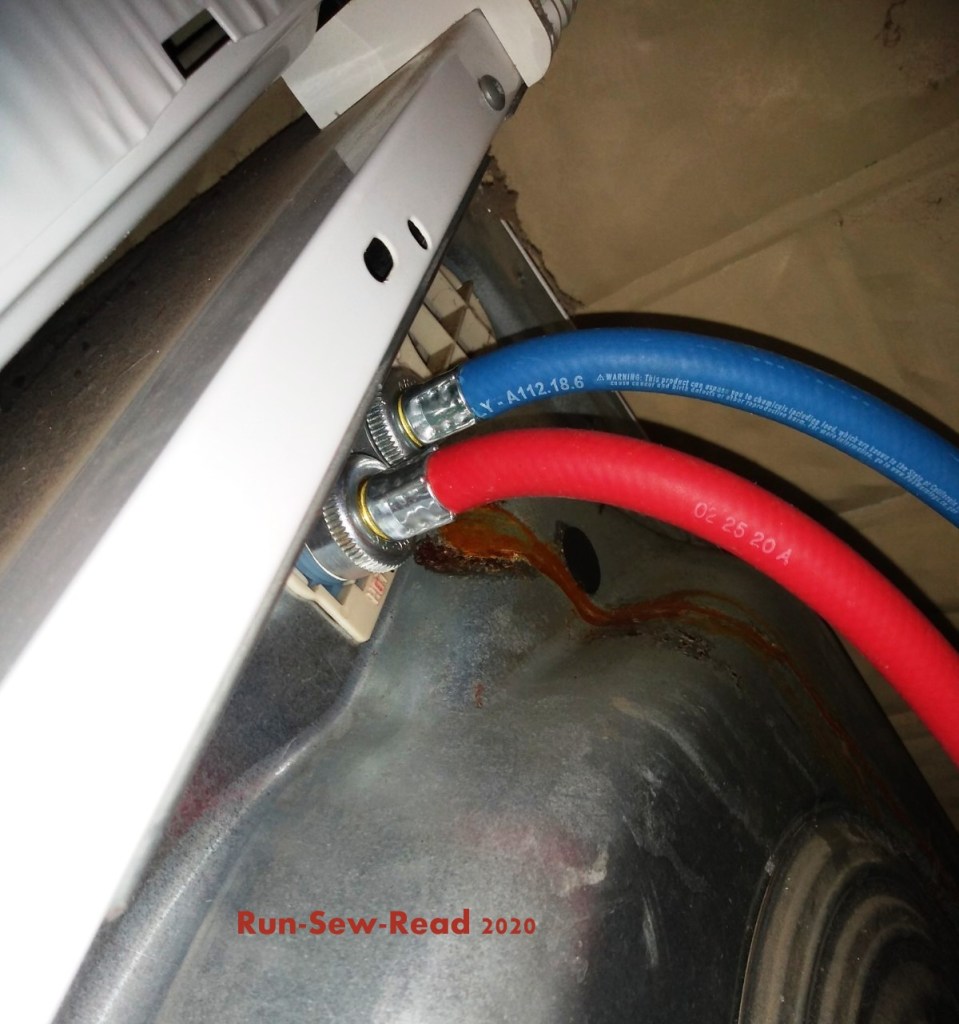
New washer hoses, too. Murphy’s Law dictates that all of my ‘simple’ DIY plumbing projects will expand into a second project. This time it was new washer hoses. As I was reconnecting the washer hoses to the new shutoff, I realized one of the hoses was going bad. Turns out, the cold water hose was so corroded at the washer connection, that it wouldn’t come loose. I feared in removing it, I might also break the connection on the washer itself. I applied some WD40 and stepped away from the project to give it time to work. Success. The hose connection came loose with some gentle coaxing, and without breaking anything else in the process.
Not good.
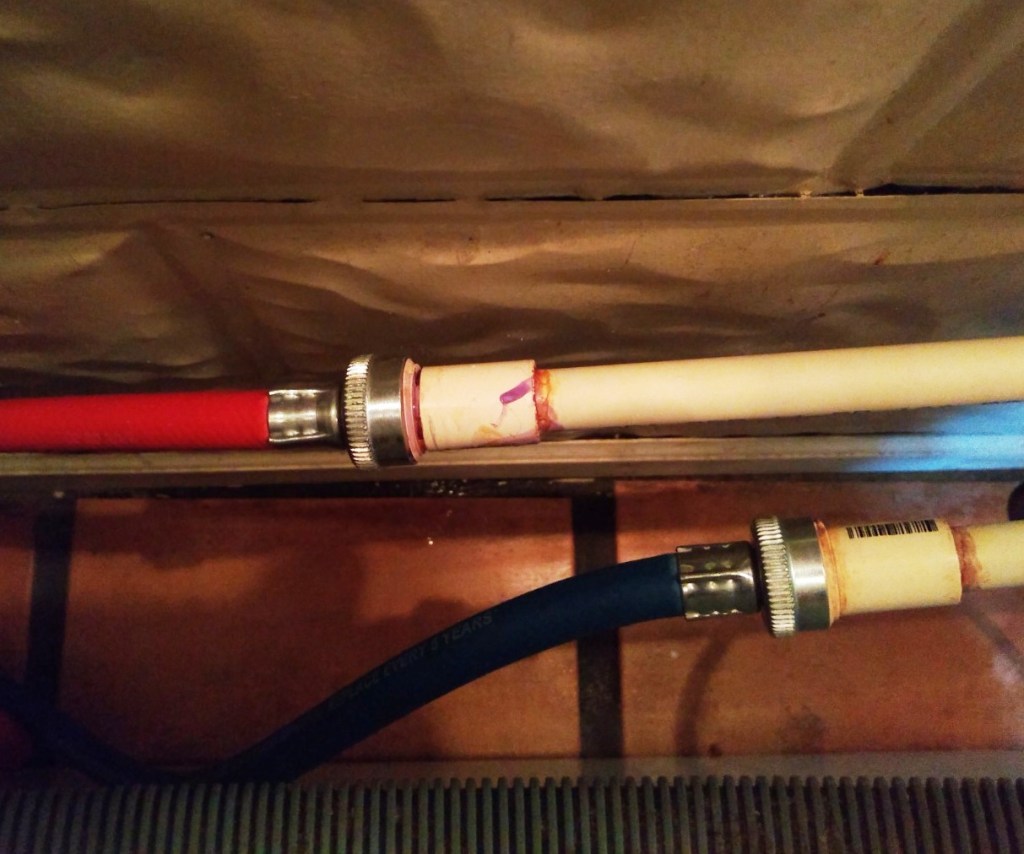
I’d wanted the metal braided kind of washer hose, but the store didn’t have that type in the length I needed. I could have ordered and waited on them, but I wanted everything installed that day. These will be good for several years anyway.
My wheelchair-bound mom with advanced Parkinson’s, is in a care home, locked down for the pandemic. My last ‘normal’ visit with her in her room was back in February. Then came the lockdown. Earlier this month they started allowing limited visits, so my brother and I gave the required 24-hour notice of our visit, drove 5 hours each way, to talk to her outside, for 30 minutes, from behind a strip of tape that kept us 10 feet apart, with lawnmowers working all around us. She can only talk in a whisper volume, and has trouble verbalizing her thoughts and enunciating, so we could hardly make out anything she was trying to say. After 5 months, and 5 hours of driving, and all of us wearing masks, not even a hug was allowed. But we did get to see her, and take her a bottle of Coke and some homemade cookies, and that gave us all a boost.
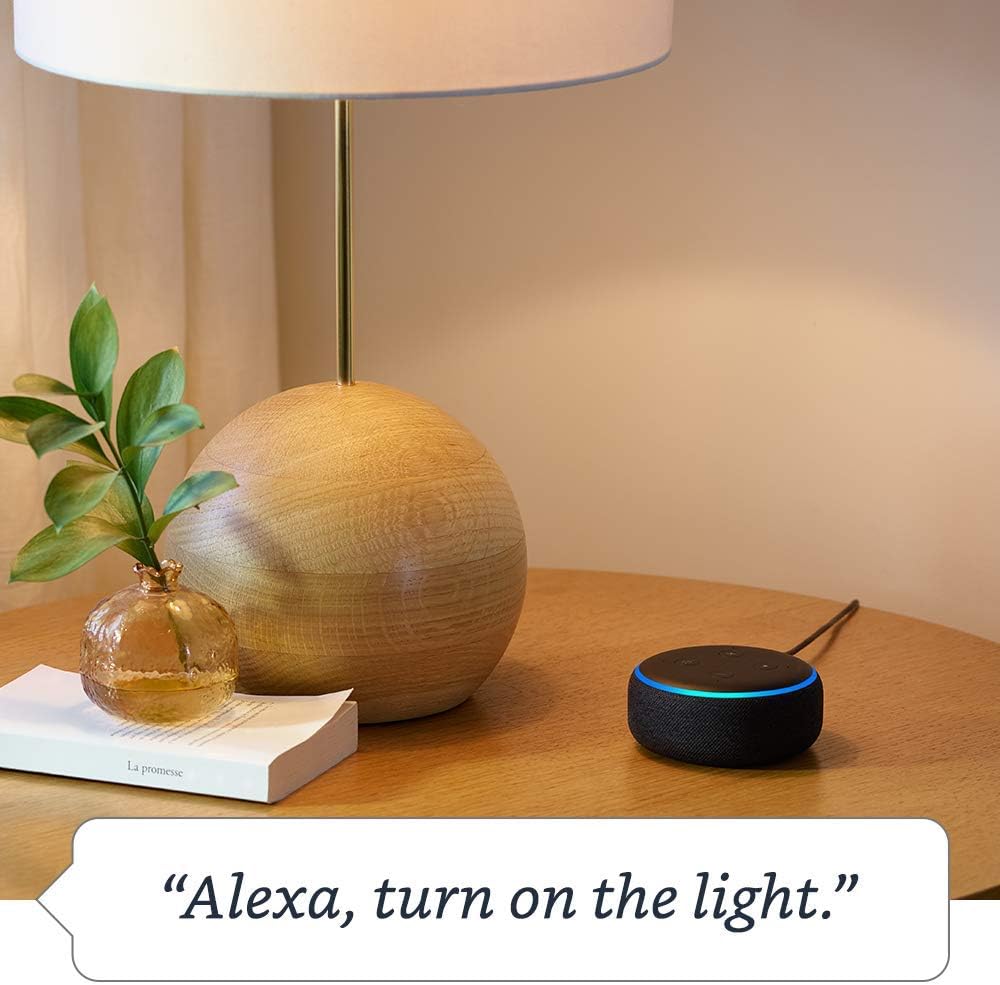
The other thing we took to her was an Amazon Echo Dot device for her room. It has been an unbelievably helpful communication facilitator.
This post is a recommendation and review of the Echo Dot device. It is not solicited or compensated. The device has been a Godsend for us in our situation with our mom, and I want to share the information for anyone who may find themselves and a family member similarly situated.
From the moment Amazon introduced Alexa, ‘she’ was banned from my devices and my home. A device listening in my house all the time was not okay. Then I began reading about Amazon’s Echo Dot, and realized it can help my mom, who can no longer dial her phone, check messages, text, use email, etc. We got the Dot to her, and programmed it with a handful of close family members and trusted friends as her contacts. The Echo Dot picks up her whisper voice, and can understand her voice commands. She can talk to her contacts simply by saying, “Alexa, call _____.”
So, where Alexa was once banned from my house, ‘she’ is now listening day and night in the form of an Echo Dot on my front room table.
The Drop In
Not only can the Echo Dot call your contacts’ phones; it can also ‘drop in’ on other Echo Dots or Alexa-enabled devices. It works like an intercom. I say, “Alexa, drop in on Mom.” I’m instantly talking to her through the Echo Dot in her room, and the sound is loud and clear, as if she’s here in my house.
The first time I ‘Dropped In’ on Mom, it went perfectly. I dropped in, started talking, she heard me and we had a brief conversation, as if she were here in the next room, rather than another state. We ended that drop in with agreement to do another one soon.
Then I started getting ready for bed, and let Myrtle-the-dog out one last time. I happened to glance toward the Echo, and realized it was glowing green, which meant someone had Dropped In and could hear me. It was Mom, trying the Drop In for herself. I frantically thought back through the last few minutes, trying to remember if I’d said any cuss words or something else I wouldn’t want Mom to hear. It was a flashback to being a busted teenager. I now watch my language even in my own house, because you-know-who might be listening.
It’s been a couple of weeks, and the Echo has been amazing for her. She can make a shopping list of things she needs someone to bring or send to her. She can call her friends and family, and Drop In on those of us with Alexa devices. Her voice is loud and clear. I can assist remotely by adding to her contacts, and reading her shopping list, etc., from the Alexa app.
Shopping List. She can say, “Alexa, put socks on the shopping list.” And we know she needs socks.
Routines. We’ve set up a couple of Alexa ‘routines’ for her. One is for morning. She can say, “Alexa, good morning.” It will tell her the day, time, weather, and a news briefing from the Kansas City Star. There’s a ‘good news’ briefing, that will give her a good news report. There is an evening routine with tomorrow’s forecast and a news briefing.
Music. She tells Alexa to play 50s music, Elvis songs, classic country, and more. Alexa does what she requests.
Meanwhile, here at my place, I’ve now gotten a Smart Plug, that allows me to say, “Alexa, turn on/off the light.” Each morning Alexa reads me my calendar for the day, the weather report, and a news briefing when I say, “Alexa, good morning.” Alexa is now maintaining my grocery list. And now that the MLB season is underway, I can ask, “Alexa, what time is the Royals game?”
Wrapping this up…, if you are like the pre-Alexa me, you’ll want to keep banning her from your home and devices. It’s a privacy thing. I don’t blame you. But if you have a need to stay in touch with a vulnerable family member or friend, even temporarily, the Echo Dot works, and works well. All it requires is a plugin and a wifi connection. It has restored our ability to have a daily conversation with our mom, and she can contact and talk to us and her other close friends and family at will, even though she can no longer operate her phone.
Link to Echo Dot page on Amazon (or click on one of the pictures above): https://amzn.to/3jEbU0w
These bread mixes use six basic ingredients and cost only pennies per loaf. Having a mix ready to go makes the bread-making process super efficient and low-effort. A one-loaf mix fits perfectly in an 8oz instant coffee jar.
The tiny Tupperware cups hold the yeast, sugar and salt. (I use instant coffee in my mochas, so I end up with about three empty jars per year. If you don’t use instant coffee, try empty 30 oz mayo jars. )
The mix ingredients are: Flour, sugar, yeast, salt, margarine and powdered milk (not pictured).
I like to make up four to six mixes at a time.
Here are the finished mixes lined up in the back of my frig.
The breadmaking process goes from mix and liquid, to the bread pan in two steps, to a finished loaf. (Of course the top of this loaf caved in slightly, because I was planning to take a picture. Sigh. )
When the pandemic was declared, the store shelves were immediately emptied of bread; and yeast, flour and other baking staples. Thereafter, they were unavailable or in short supply. As a regular bread maker, I had a supply of yeast and flour on hand, plus some DIY bread mixes made up; and a couple of freshly-made loaves in the freezer. Never expecting a pandemic or grocery shortage, I’d considered that modest stockpile to merely be a convenience. But it ended up getting me through the the shortage.
In addition to the bread mixes, I try to keep an extra unopened 4 oz jar of yeast in the frig, and a spare bag (or 2) of flour in the freezer, plus however much is in my flour canister. Flour came back to the store shelves fairly quickly, but four months into the shortage, I was down to less than half a jar of yeast. This month, jars of yeast finally came back to the store shelves. Even if you don’t do a lot of baking, don’t be afraid to buy yeast by the jar, and don’t worry if you can’t use it up before the sell-by date. In my experience, it keeps well past its sell-by date.
Slicing made easy.
Do you dislike slicing a bread machine loaf as much as I do? The loaf shape is awful for slicing. To make the process happier: Cut the loaf into quarters, and then slice and use one quarter at a time. The other three quarters go in the freezer. When I need one from the freezer, it thaws in just a few minutes, or 30 seconds in the microwave.
My bread machine is this one, which has been discontinued, but there are still some models in the Amazon warehouse. I’ve never been picky about what features are on my bread machine. I’d probably be happy with any machine at any price.
Which ten music albums would you want with you when stranded on a desert island? Ten bloggers (me included), are participating in a 10-round desert island ‘album draft’. Round 2 is currently underway. All of the album draft bloggers except me are ‘proper’ music bloggers; and some are musicians as well.
The link below will take you to a listing of the draft picks so far. Check in now and from time to time over the next eight weeks, to see what albums have been drafted and why they were selected. Feel free to drop us a comment about the picks.
As masks have finally become plentiful, with enough supply to meet demand, my one-person mask making sweatshop is still operating, but I’ve slowed down production in order to indulge in more creativity. I’m using the same patterns as I was here and here, but have continued to experiment and add ‘improvements’ and improvisations.
I’m enjoying the process, and am grateful that I can do this one thing to help people navigate the pandemic. I’m inspired by all of the creative masks I see. Our community is under a mandatory mask order right now, and what I love most about it (besides the way it makes people keep each other safer) is looking at everyone’s masks. I love the vast array of prints and designs. Instead of people-watching, I’m now a mask-watcher.
My neighbor gave me a mask she made! I had given her a mask very early on. Then a few days after that, she came over asking where I got my pattern. Of course I printed her a copy to keep and use. Then one day she came over with this mask for me! She had worked her own details into it; filter pocket and good nose wire included. I love wearing it as much as I love my own. So, I say go exchange masks with fellow mask makers!
Another neighbor informed me that her mask was stolen from her car. So you’ve been warned, that the coolest masks have street value. Protect your valuables.
How long will we be making and wearing masks? I don’t know, but I just pulled fall and holiday woven cottons from my fabric storage, thinking I might as well get started on masks for the upcoming seasons.
And for some mask-making nourishment…
One big chocolate chip cookie… For the sheet cookie, I added an extra cup of flour; spread the dough on a 1/4 -size sheet, and baked 2 minutes longer than specified for drop cookies.