
An awning was not what I planned to sew this week, but the fabric on the existing one gave out.
The backstory: Two years ago, my brother helped me enclose my front porch, which I love, but it left no cover for someone standing at my front door. It also made the front of my house very plain looking. I went shopping for an awning online. It looked like I’d be spending $500-$1000 for an awning just for my entry door, and I wasn’t sure the dimensions would be right. Enter thoughts of a DIY project.
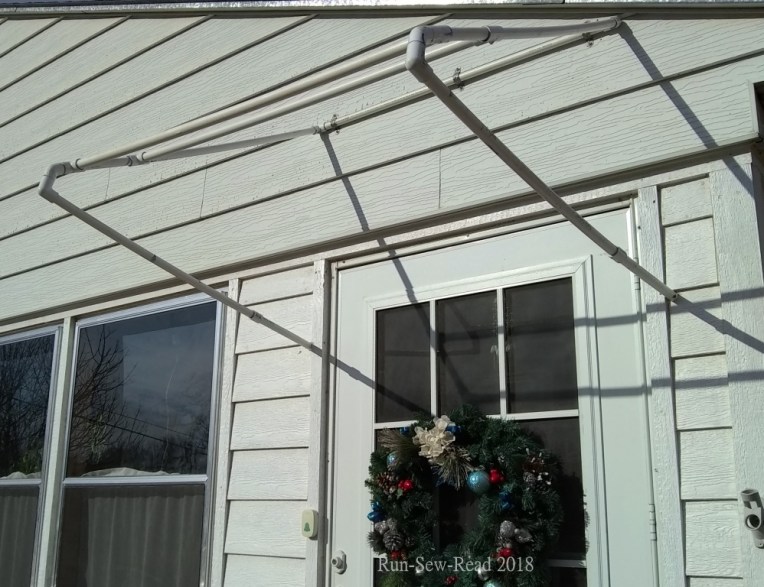
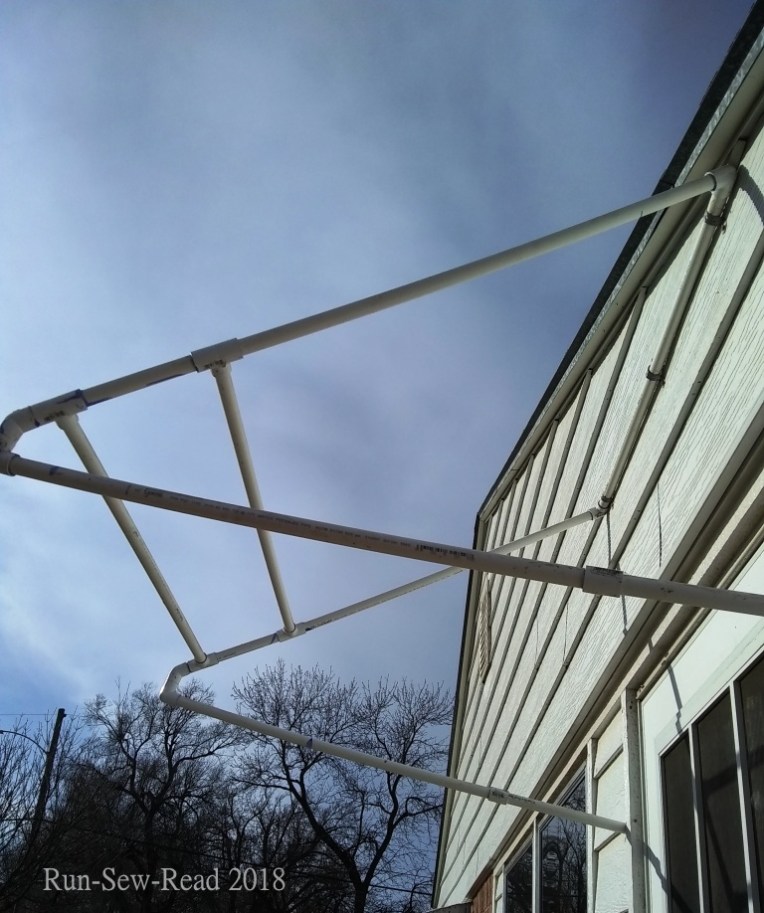
Some quick online research showed that my idea of making an awning frame out of PVC pipe had merit. I found some great examples and advice, such as this one on the Instructables website. My brother had mentioned that awnings with a 45° angle seemed to be the sturdiest, so that’s what I started designing.
The frame needed to be secure on the exterior while giving the entry door room to swing open and closed. It took one do-over to get the frame dimensions right. When I was installing the frame to the house, a neighbor guy saw me on the ladder wrestling with the frame, and came over to help. Many thanks to him, for making the job a lot easier with a team of two.
Here is the frame complete and installed over the doorway, attached to the exterior with galvanized pipe strapping and deck screws.
Next step was to design and sew the fabric awning. I chose a pvc-lined canvas fabric from Walmart. It was $5/yard. I don’t have a product link to share, because it doesn’t appear to be offered on their website. The woven fabric was super easy to cut and sew. The fabric is more brittle than I wanted, but it is waterproof, and I was willing to give it a try for the first one. I fastened the fabric awning to the frame with velcro strips.
Amazingly, the first awning withstood every bit of wind, rain, snow, ice and hail we had here in south-central Kansas for the past year and a half. But this month, the fabric failed. The awning frame is as secure as the day I installed it. But the fabric now literally tears like paper, and started falling apart.
While I shop for a more durable fabric, I’ve made a quick replacement from more of the Walmart fabric. It should last another year at least, while I try to perfect the next choice of fabric and tweak the construction.
The process:
This awning takes three pieces of fabric:
- A 48 x 48 inch square, for the top piece
- Two triangular pieces, each 30 x 40 x 43 x 4 inches, for the awning sides. (These two pieces need to be mirror images.)
After cutting out my fabric pieces, I turned under the fabric edges 1/2″ and hemmed it for a finished look.
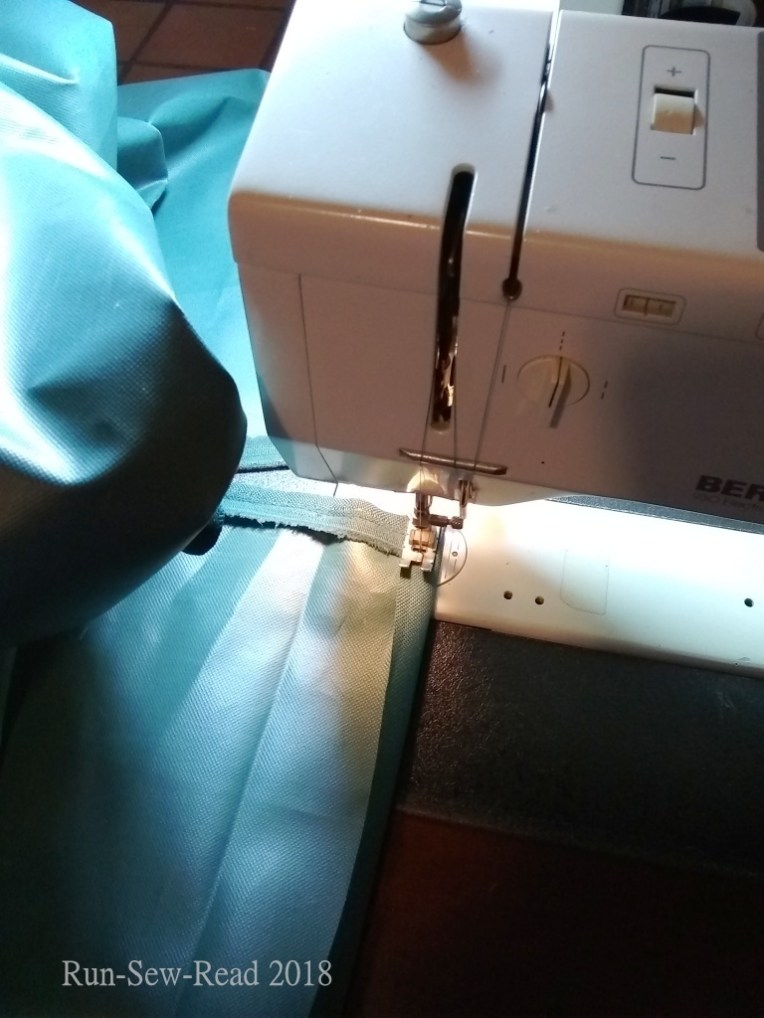
Velcro tabs are sewn onto the awning to anchor it to the frame.
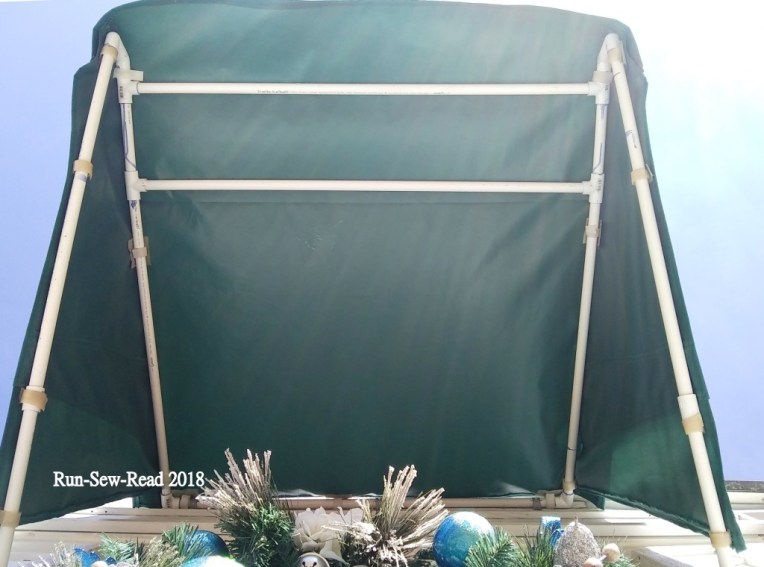
The top piece is tacked to the side triangles in four places on each side, rather than sewing the entire sides together. That is intended to make it less susceptible to wind, by leaving vents for wind to get through.
This picture shows how the top overlaps the side about two inches, hiding the ‘vents’.
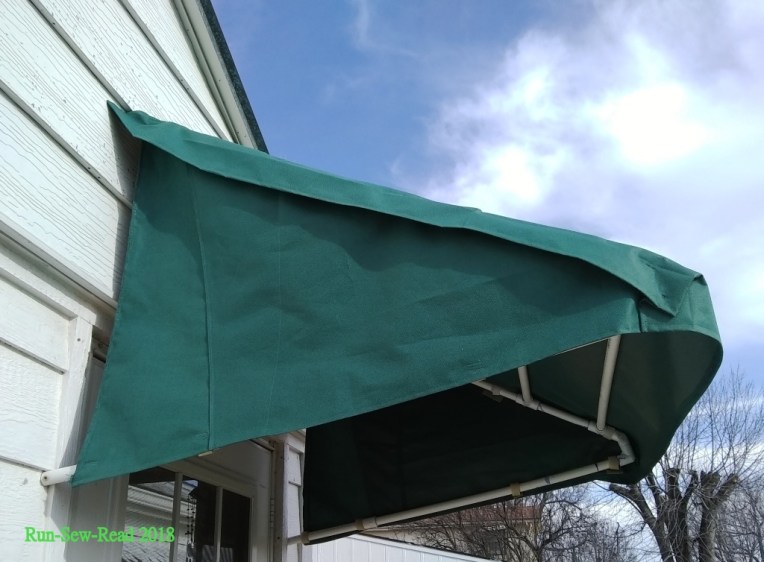
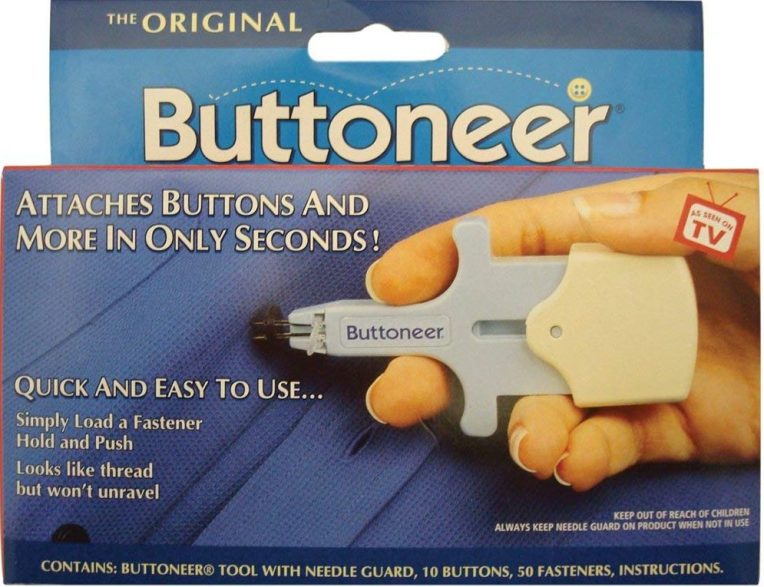
To tack those top edges down so they don’t stick out on the sides so much, I used a Buttoneer. Remember those TV commercials from the 70s?
The Buttoneer is still sold, and mine has been an amazingly useful gadget. The Amazon reviews give it 2/5 stars, and some reviewers say it’s not the quality of the original ones. If so, that’s disappointing indeed. I’ve had mine for years, and wouldn’t want to be without it.
Initially, the front awning hem was not hanging quite straight. Annoying, but a quick fix, again using the Buttoneer.
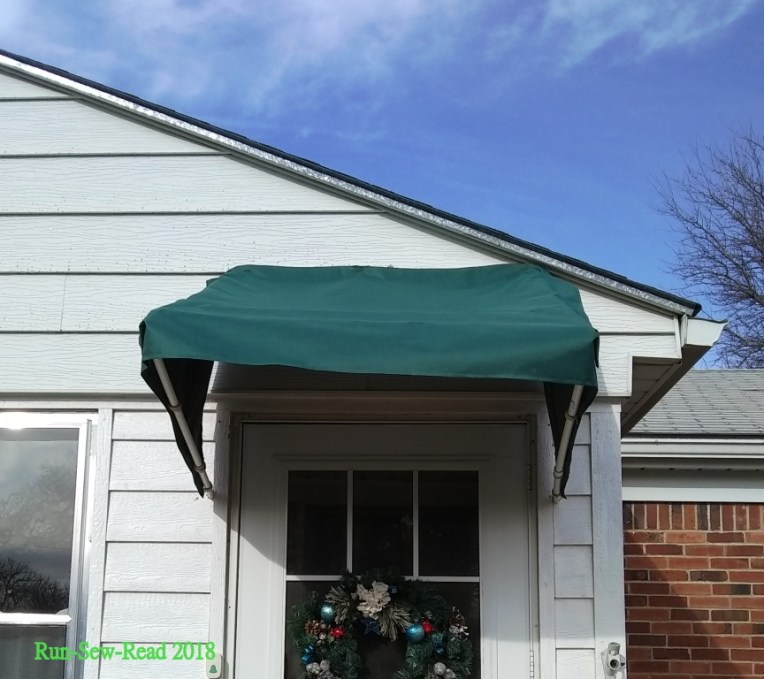
Here is the awning after using the Buttoneer to tack down the sides and straighten the front.
Materials used:
- PVC pipe
- PVC primer and cement
- Pipe strapping
- Deck/siding screws
- Outdoor waterproof fabric (2.5 yds of 60 inch wide fabric) to make the top and two side triangles.
- Velcro
The total cost of the awning materials was about $25. Compare that to the purchased awning prices I was seeing, in the $500-$1000 range.
Final thoughts on this awning.
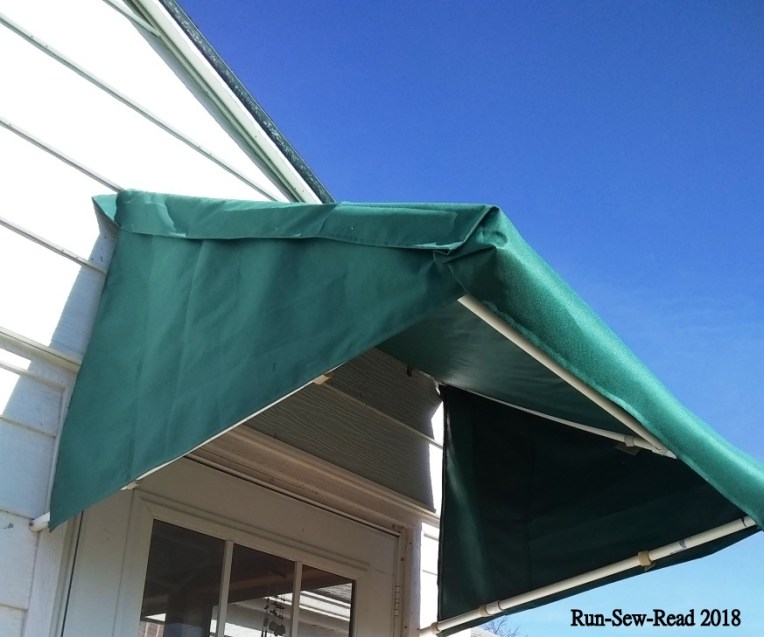
- The first awning I made was light colored, so the PVC frame was not conspicuous. From the angle of someone on the street, it still doesn’t show under the new dark green fabric. But if you are up close enough to see under the awning, it really stands out against the dark fabric. I’m thinking of painting the PVC a dark color.
- I’d like to add a more attractive bottom edge to the awning. I’m plotting and scheming for what that should look like.
In the meantime, anyone who comes to my door (me included) has a bit of shelter.

Wow – that’s an intimidating project. I’m a DYI – er but wouldn’t have thought to try that. – I’m impressed -you did a fabulous job. Bravo!
LikeLike
Thanks! It was a reluctant project, but it feels good to have the solution I was envisioning, and not have to break the bank getting it.
LikeLike
Love the PVC idea…looks really good.
Great Blood on the Tracks song. Love the complete album.
LikeLiked by 1 person
Thanks!
LikeLiked by 1 person
Awesome DIY project! I love this!
LikeLike
Thanks!
LikeLiked by 1 person