If you loved the original Mary Poppins movie like I did, then Mary Poppins Returns is a must-see. It is not a remake of the 1964 movie. It is a continuation of the story, 20 years later. The music and actors are different from the original, but it feels completely connected. I got emotional several times during the movie, not because it was sad (it isn’t), but because it was wonderful to have more of the Mary Poppins story. Put the two movies together, and it’s a captivating miniseries.
There’s the familiar London steeples and rooftops,
and the familiar Cherry Tree Lane.
I don’t want to give away any surprises or spoilers, so no more details about the film. But as always, I came away with sewing inspiration, too. I’ll have to wait for better views when the movie is available for streaming, but for now here’s what I’ll be looking at:
Mary’s carpet bag, blue striped coat and striped skirt.
Jane Banks/Emily Mortimer’s pants-vest outfit. The pants in particular. They are pleated and baggy, and the hem hits where the ankle meets the foot.
If you are a Mary Poppins movie fan, and haven’t seen Mary Poppins Returns yet, I hope you can get to see it at the theatre. Until then, here’s a little reminder from 1964.
Happy Boxing Day! I hope you had a lovely Christmas day. Here’s some of what came out of my kitchen over the past few days:
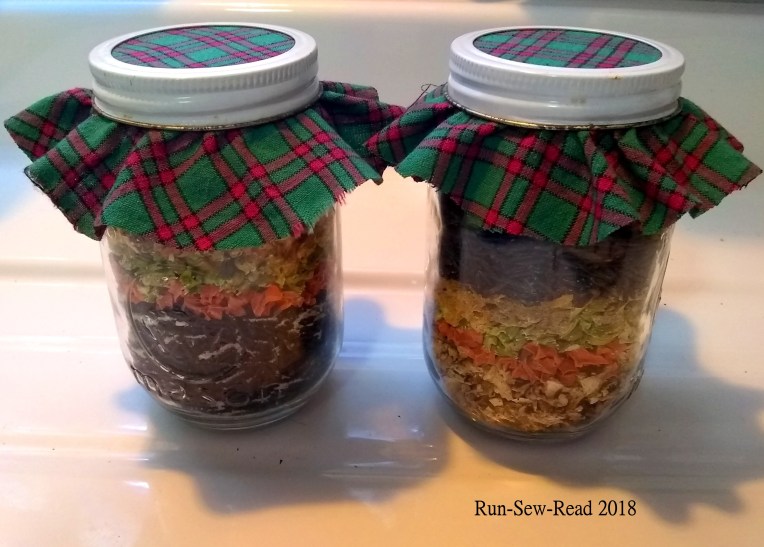
Soup mixes for my family who have pressure cookers.
Homemade treats for the pup cousins, using this simple recipe from another blogger.
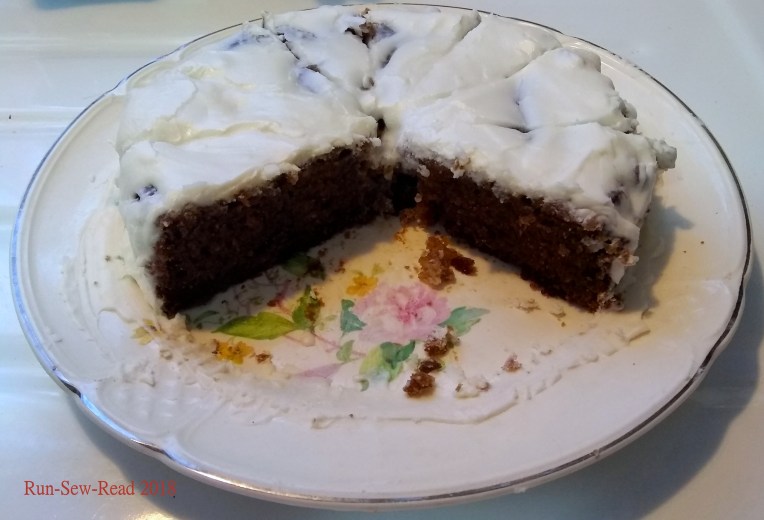
I tried baking a small carrot cake in the Instant Pot. It came out dense like a brownie; not light like a cake. The flavor was good though, so I hastily frosted it (aka the best part), and put it away for my own snacking later. We shall not speak further of this failed cooking experiment. 😉
Carrot cake ruled out, I ended up making my fail-safe pumpkin bread to take to the family gathering.
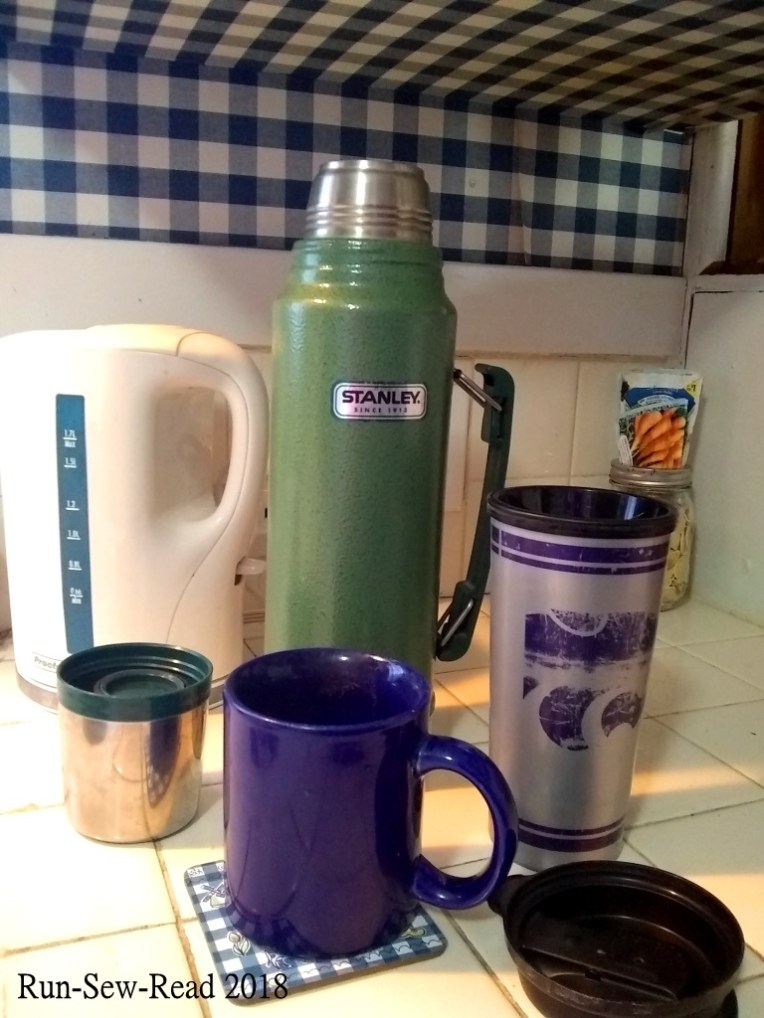
Prep for the road trip to KC involved bottling a supply of hot coffee for me, and packing a bag of food, toys and blankets for Myrtle the foster pup.
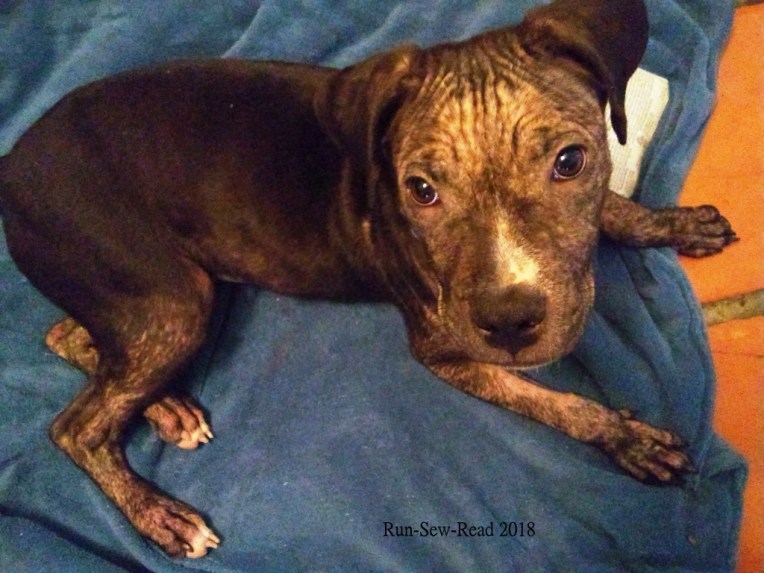
While I was in the kitchen doing Christmas prep, this cute little booger was in the other room producing a spectacular array of shredded stuff. Look how proud she is of her work.
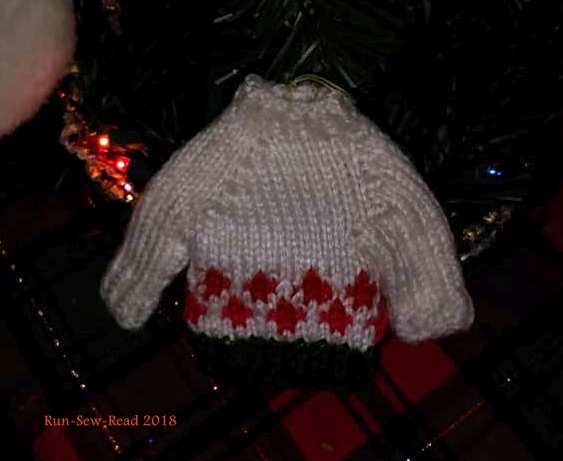
Not from the kitchen, but this was my first-ever attempt to knit a tiny sweater tree ornament. It was my ‘hostess gift’ to our aunt and uncle who had us all at their home. (Free download pattern here.)
The family gathering was special, as always. Myrtle got lots of attention from the foster cousins, both human and canine. The cat cousin Willie opted to hide out in the bedroom.
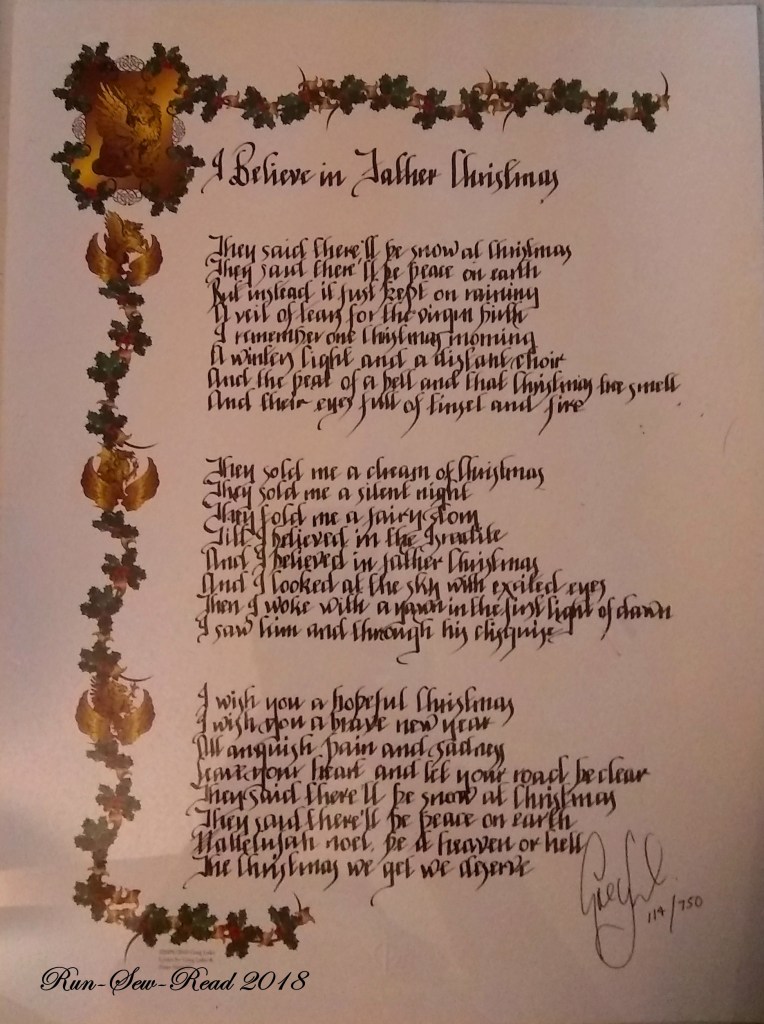
Back at home, where my Christmas decorating is bare-bones, this print is one of my treasured holiday items.
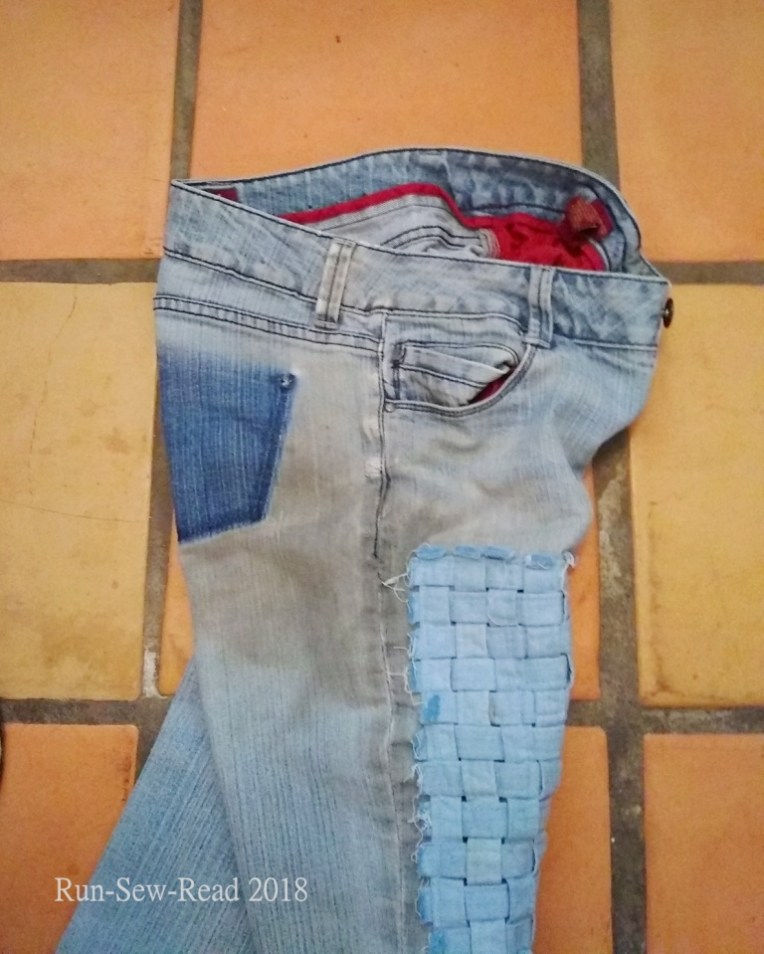
You wouldn’t know it now, but these jeans were once Casual Friday office attire.
Then they morphed into my go-to comfortable yard work and housework jeans. Then a knee blew out. Then the other knee went. With two holey knees they were stylish, so heck yes, I kept wearing them. Now they’ve reached the point where the denim is falling apart in places.
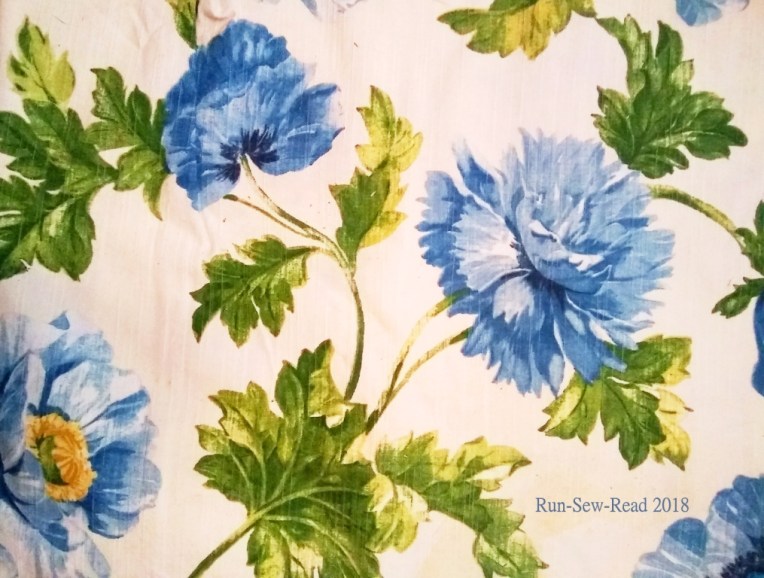
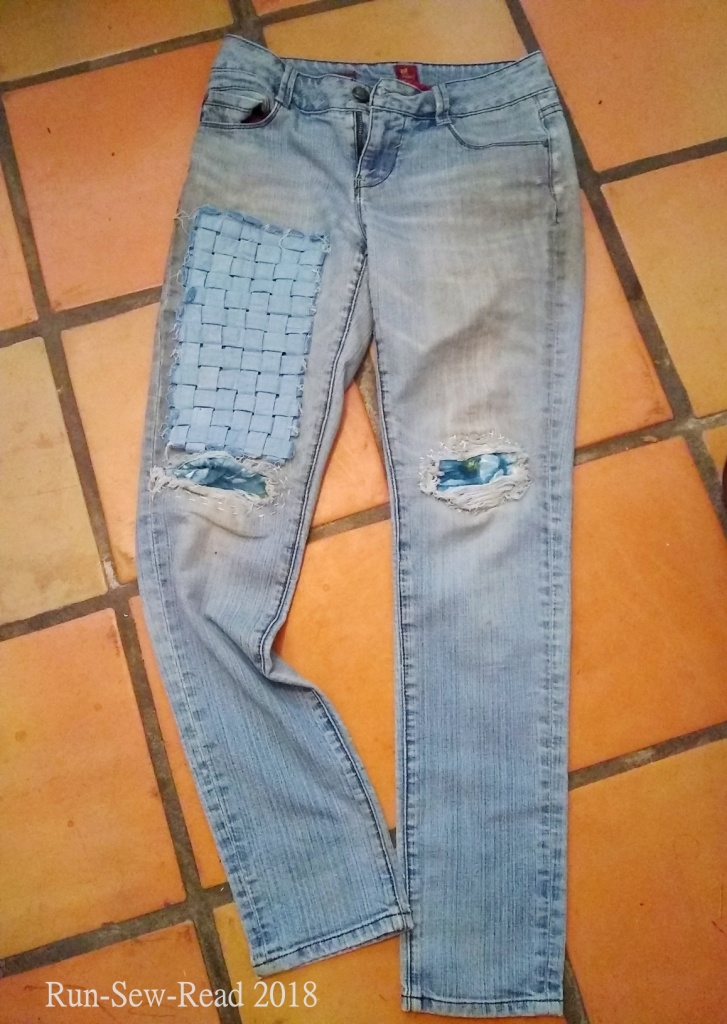
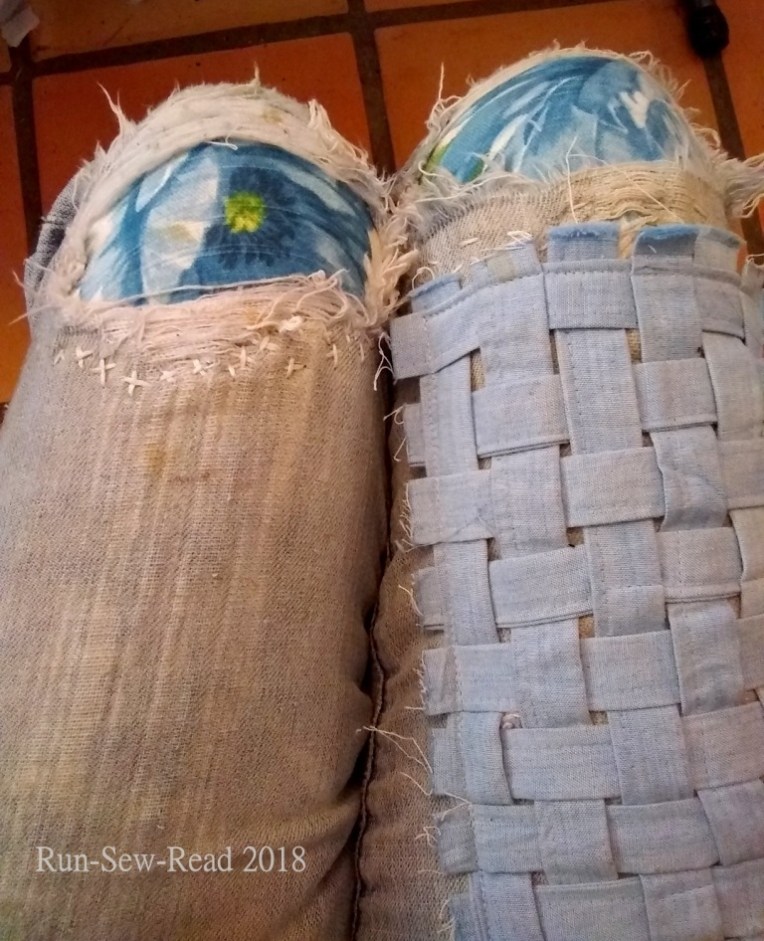
I don’t need to keep the jeans, but they are darn comfortable. So, I started using them to experiment with patchwork. A dig through my stash ensued. Flowers from this barkcloth print now cover the knee holes.
Some chambray strips from old curtains, are now a woven patch to reinforce the worst weak spot in the denim. It’s working well.
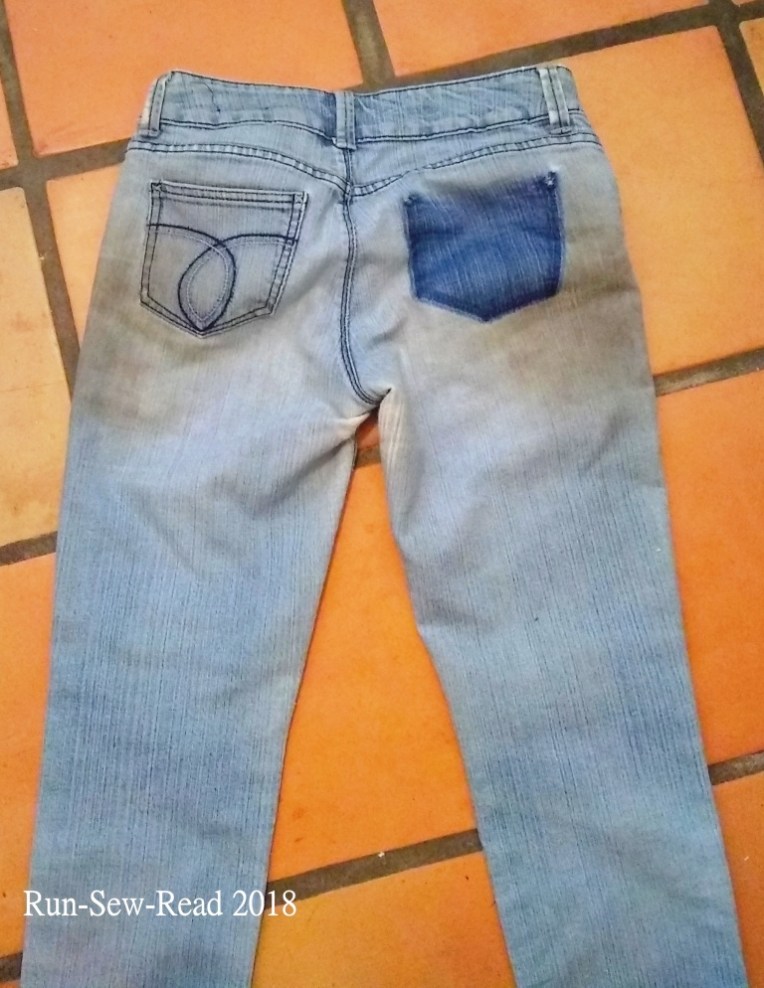
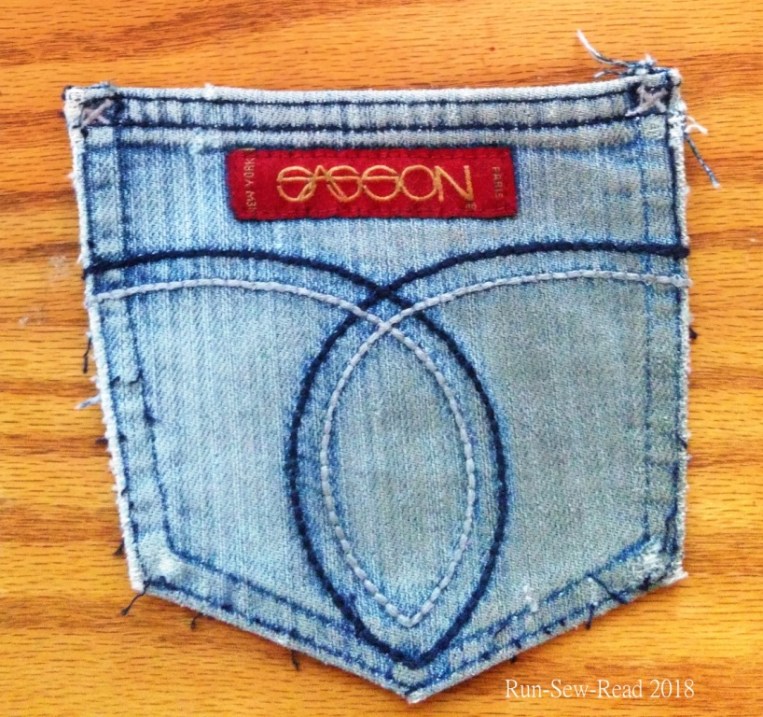
For the next fix, I want to mask the stained sides, where I’ve wiped my hands way too many times. I’ve removed a pocket, which shows what color the fabric used to be.
I’ll put the pocket back on, but maybe not in the same spot.
My mom used these iron-on patches on my brother’s jeans all the time when we were little. They didn’t last that long on little boys’ jeans. The patch edges would start lifting, and then the patches could be peeled off. I might find a way to use these on my jeans.
The patchwork will be a continuous work in progress. There are more places to repair now or soon, and as I wear the jeans, they will keep developing new areas to be patched.
Hopefully the jeans will keep looking better as I add to them, so that someday they warrant showing in another post.
Not a blue jeans song, because this creative process is about thinking outside the lines and beyond the obvious.
More sewing inspiration this week came by way of this hour-long documentary on photographer Slim Aarons. What caught my eye first, were the colorful ‘everyday’ dresses and the lighting.
Slim’s former assistants were interviewed in the documentary. They were lovely and poised, and told good stories. “We’re waiting for clouds.” I’ll remember that one. In listening to his assistants tell about the photos, I fell in love with the fact that minimal makeup and staging was involved. The subjects were mostly rich, privileged, and often famous, but the settings relaxed and the smiles were natural.
The documentary only lasts an hour, but that was just the start for me. After the documentary, I spent an absurd amount of time perusing the Getty photos website, where Slim’s archive is available for viewing and prints for purchase.
A few of the many images that grabbed me, for their nostalgia or for sewing inspiration, or both:
This slideshow requires JavaScript.
Don’t recognize anyone in the slide show above? Then try these:
February 1989: British rock star Mick Jagger holidays on the island of Mustique in the Grenadines. (Photo by Slim Aarons/Getty Images)
August 1968: Singer Marianne Faithfull and Mick Jagger of the Rolling Stones stand in front of a gilt framed portrait in Castletown Mansion, Eire. (Photo by Slim Aarons/Getty Images)
circa 1955: American baseball player Ted Williams (1918 – 2002), outfielder and slugger for the Boston Red Sox. (Photo by Slim Aarons/Getty Images)
Slim had a repeat theme of hammocks, and furry boots. I love both.
This slideshow requires JavaScript.
These next few really triggered my creative impulses:
This slideshow requires JavaScript.
The outfit!
This slideshow requires JavaScript.
Plaid coat!
Slim’s use of light was distinctive. Several of his snowy scenes reminded me of the movie, Grand Budapest Hotel. (Love that movie!) This picture is an example:
This 2014 documentary chronicled the first 8-weeks that menswear designer Raf Simons served as the new Creative Director for Christian Dior. In those 8 weeks back in 2012, he was tasked with designing, producing and showing his first women’s Dior collection. Staff introductions at Dior were quick, and then everyone went to work. The 8 weeks can be summed up as: Artist drapes fabric on a model; amazing skilled craftsmen (both men and women) read his mind and make an entire collection happen. There was scolding by Raf, followed by flowers. The collection came together due to the amazing skill and dedication of the inhouse craftsmen. Long hours were involved…for the craftsmen.
The unveiling of the collection before an audience of fashion critics and influencers, was the climax of the documentary. In the minutes before the show, Raf sat at a table on a balcony and cried with fear and self doubt to a friend, as the staff was scurrying around to make the show happen. Before the show, he had informed his organizers that he was too shy to take to the runway at the end of the show and be acknowledged by the audience. He flat refused to appear before the audience.
The venue for the show was an old vacant mansion. Here is a model approaching the audience-filled showroom, while in the background, the next model is ascending the stairs.
Raf’s vision was to cover all of the walls of the showrooms in fresh flowers. The aroma must have been overpowering.
The scene moved to the showroom, where the guests were all seated and the fashion show was underway. There sitting in the middle of my TV screen was Harvey Weinstein, flanked by young beautiful blonde women. His presence was sickening. His leer was gag inducing.
This slideshow requires JavaScript.
Before the show was over, and while the procession of models was still underway, the Raf who was ‘too shy to appear on the runway and be acknowledged’, darted onto the runway between models, and did a runway stroll, soaking in the crowd’s adoration. What an ending.
Taking my thoughts back to Dior HQ for a moment. What the craftsmen and craftswomen did to create garments and an entire collection, from the vague, rough drawings and drapings by the ‘creative director’, was simply unbelievable. I’d love to meet them and visit them at work. It was truly fascinating. For this, I recommend the documentary.
The documentary was filmed in 2012, when Raf was initially hired by the Dior company. Less than three years later, Raf had moved on, to the label bearing Calvin Klein’s name but now owned by another corporation.
An awning was not what I planned to sew this week, but the fabric on the existing one gave out.
The backstory: Two years ago, my brother helped me enclose my front porch, which I love, but it left no cover for someone standing at my front door. It also made the front of my house very plain looking. I went shopping for an awning online. It looked like I’d be spending $500-$1000 for an awning just for my entry door, and I wasn’t sure the dimensions would be right. Enter thoughts of a DIY project.
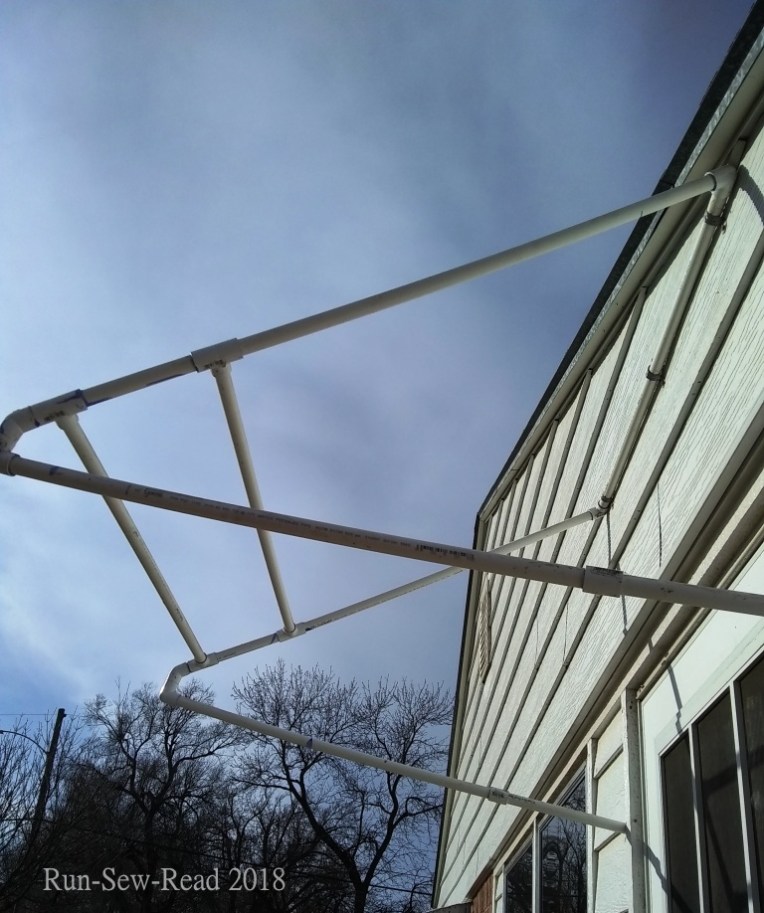
Some quick online research showed that my idea of making an awning frame out of PVC pipe had merit. I found some great examples and advice, such as this one on the Instructables website. My brother had mentioned that awnings with a 45° angle seemed to be the sturdiest, so that’s what I started designing.
The frame needed to be secure on the exterior while giving the entry door room to swing open and closed. It took one do-over to get the frame dimensions right. When I was installing the frame to the house, a neighbor guy saw me on the ladder wrestling with the frame, and came over to help. Many thanks to him, for making the job a lot easier with a team of two.
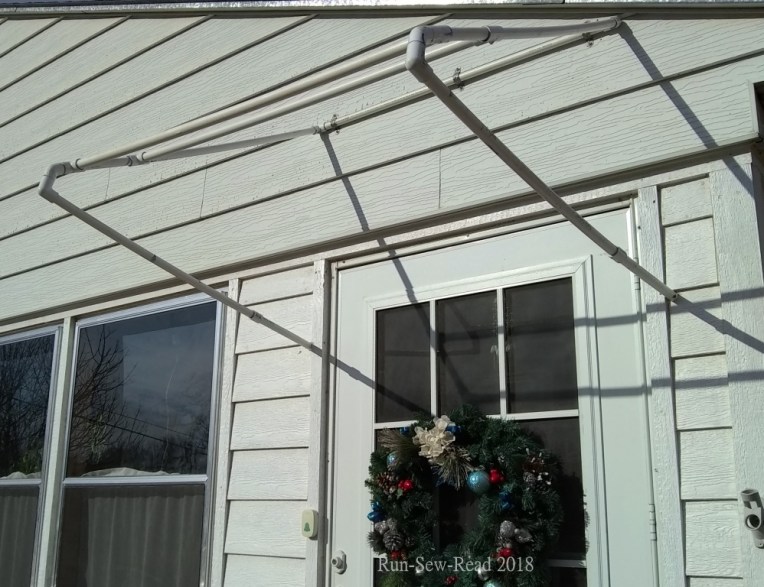
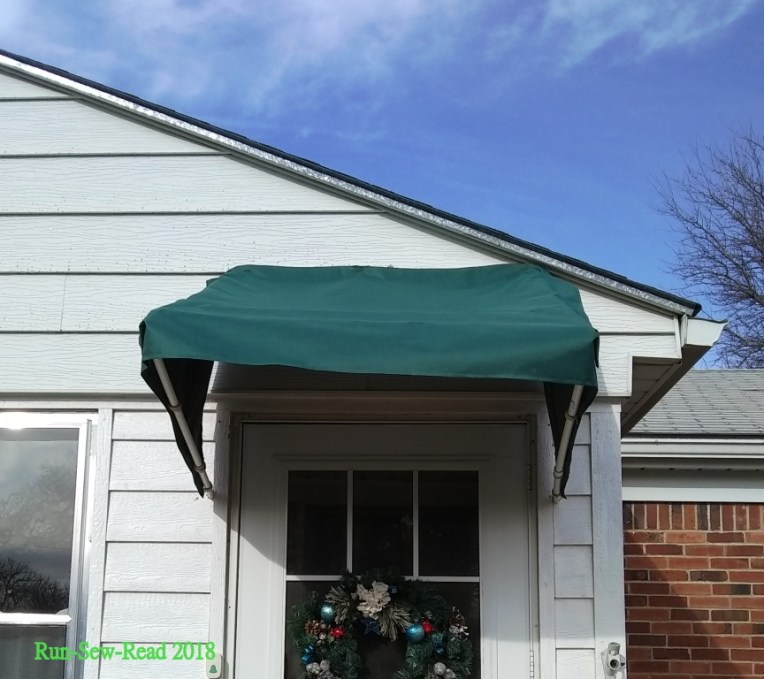
Here is the frame complete and installed over the doorway, attached to the exterior with galvanized pipe strapping and deck screws.
Next step was to design and sew the fabric awning. I chose a pvc-lined canvas fabric from Walmart. It was $5/yard. I don’t have a product link to share, because it doesn’t appear to be offered on their website. The woven fabric was super easy to cut and sew. The fabric is more brittle than I wanted, but it is waterproof, and I was willing to give it a try for the first one. I fastened the fabric awning to the frame with velcro strips.
Amazingly, the first awning withstood every bit of wind, rain, snow, ice and hail we had here in south-central Kansas for the past year and a half. But this month, the fabric failed. The awning frame is as secure as the day I installed it. But the fabric now literally tears like paper, and started falling apart.
While I shop for a more durable fabric, I’ve made a quick replacement from more of the Walmart fabric. It should last another year at least, while I try to perfect the next choice of fabric and tweak the construction.
The process:
This awning takes three pieces of fabric:
A 48 x 48 inch square, for the top piece
Two triangular pieces, each 30 x 40 x 43 x 4 inches, for the awning sides. (These two pieces need to be mirror images.)
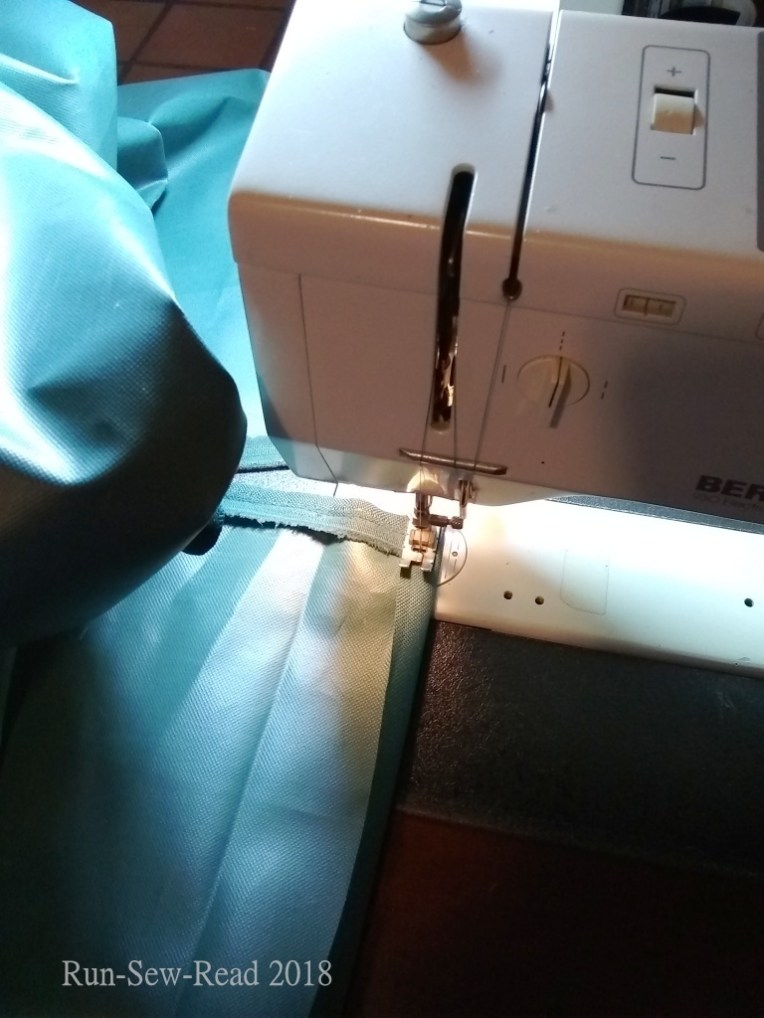
After cutting out my fabric pieces, I turned under the fabric edges 1/2″ and hemmed it for a finished look.
Velcro tabs are sewn onto the awning to anchor it to the frame.
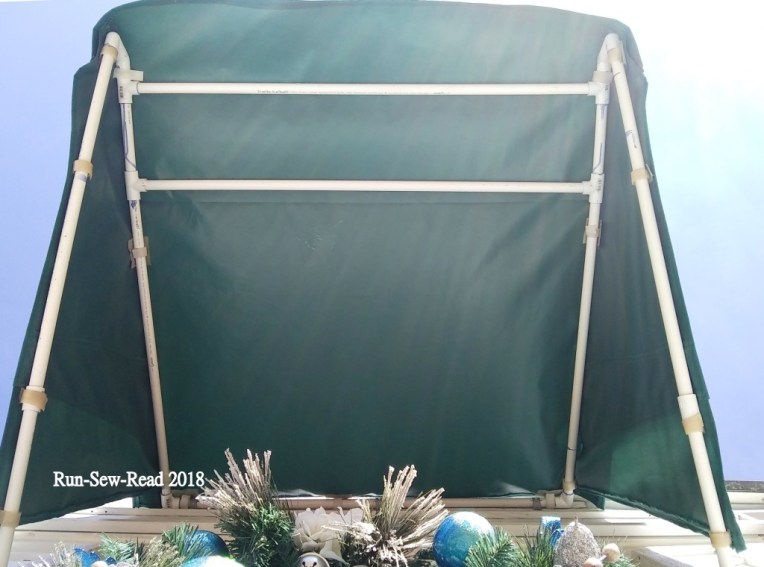
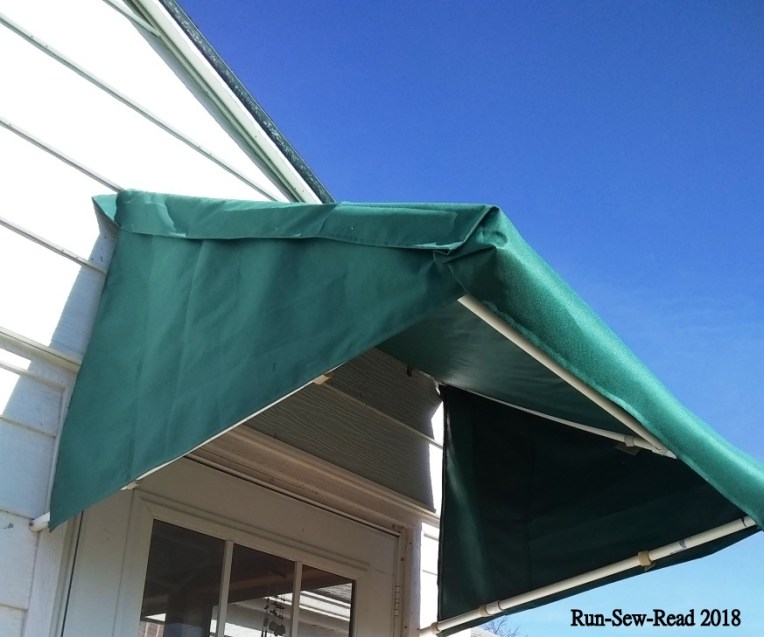
The top piece is tacked to the side triangles in four places on each side, rather than sewing the entire sides together. That is intended to make it less susceptible to wind, by leaving vents for wind to get through.
This picture shows how the top overlaps the side about two inches, hiding the ‘vents’.
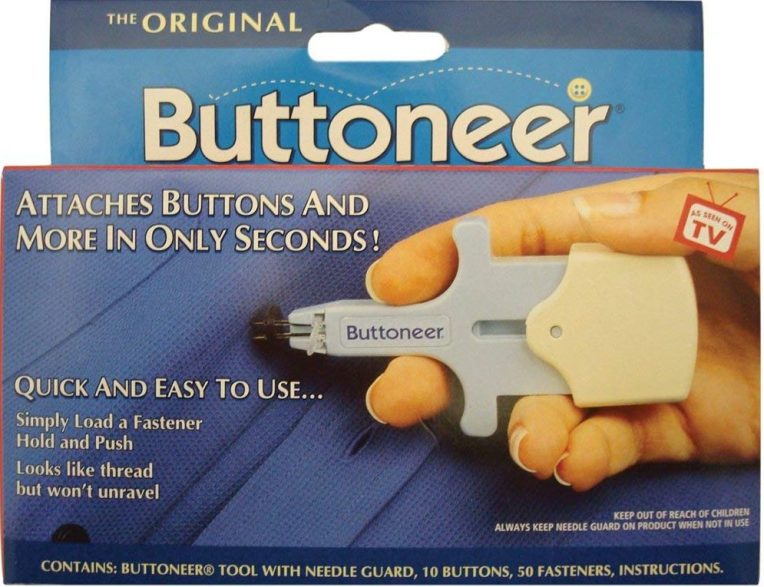
To tack those top edges down so they don’t stick out on the sides so much, I used a Buttoneer. Remember those TV commercials from the 70s?
The Buttoneer is still sold, and mine has been an amazingly useful gadget. The Amazon reviews give it 2/5 stars, and some reviewers say it’s not the quality of the original ones. If so, that’s disappointing indeed. I’ve had mine for years, and wouldn’t want to be without it.
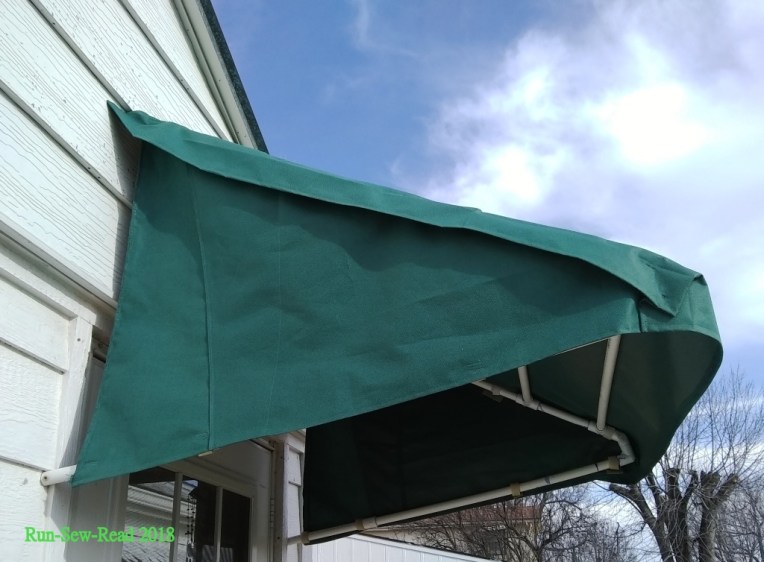
Initially, the front awning hem was not hanging quite straight. Annoying, but a quick fix, again using the Buttoneer.
Here is the awning after using the Buttoneer to tack down the sides and straighten the front.
Materials used:
PVC pipe
PVC primer and cement
Pipe strapping
Deck/siding screws
Outdoor waterproof fabric (2.5 yds of 60 inch wide fabric) to make the top and two side triangles.
Velcro
The total cost of the awning materials was about $25. Compare that to the purchased awning prices I was seeing, in the $500-$1000 range.
Final thoughts on this awning.
The first awning I made was light colored, so the PVC frame was not conspicuous. From the angle of someone on the street, it still doesn’t show under the new dark green fabric. But if you are up close enough to see under the awning, it really stands out against the dark fabric. I’m thinking of painting the PVC a dark color.
I’d like to add a more attractive bottom edge to the awning. I’m plotting and scheming for what that should look like.
In the meantime, anyone who comes to my door (me included) has a bit of shelter.
This is a pressure cooker (Instant Pot) recipe I tried this week after seeing others recommending it. They were right; it’s simple and scrumptious.
The recipe calls for carrots, celery, onion, and mushrooms; all chopped. My own twist was to use dehydrated ingredients from my pantry. It worked out great! Oooh, the possibilities!
(All of my ingredients are dry or dehydrated, except the mushrooms. I only had canned mushrooms on hand, and didn’t want to postpone making the soup.)
What it looked like in the pot, before adding the water and cooking:
A bowl of soup!
My dehydrated carrots were grated, which made them too small for the orange color to stand out. Next time I dehydrate carrots, I’ll chop some of them instead of grating the whole batch.
This was my first experience ever with actual wild rice. (The recipe emphasizes to use only wild rice and not a rice blend.) It turned out perfect; thanks to the recipe and the pressure cooker.
While I savored the delicious soup, someone else chewed an old boot. We were both happy.
Gift idea! Using this recipe, I’ve decided to package the dehydrated and dry ingredients into gift soup mixes for my family members who have pressure cookers. I’ll be able to give it a label that says, “Just add water and margarine.”
The middle of the blanket wasn’t getting warm, but the sides were really warm. The possibility of a short in the wiring concerned me, so I decided to investigate.
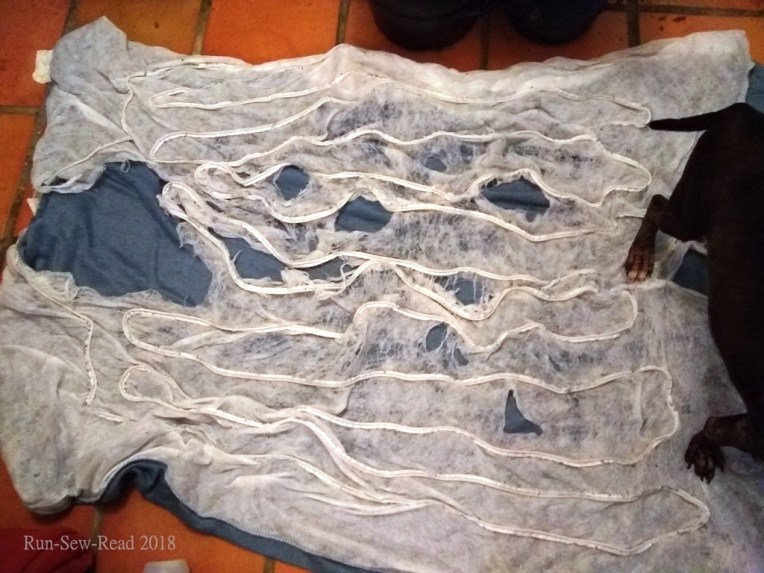
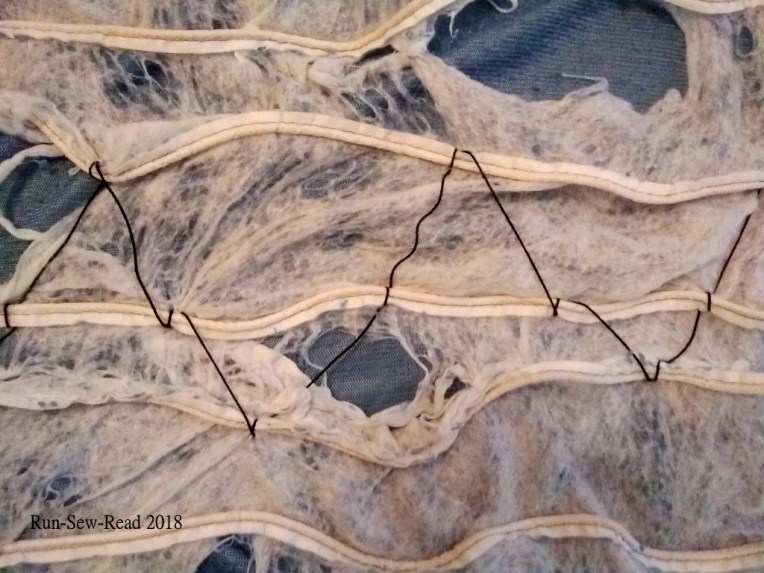
With my seam ripper, I opened the end of the blanket opposite the plug. Turns out the heating element wires are sewn to a piece of non-woven interfacing, that is then sewn into the side seams of the blanket. The problem was that the interfacing had ripped in half down the middle. The two halves moved apart and started bunching at the sides.
Here is what it looked like when I turned it inside out and started rearranging the wires in the middle. What a mess. While arranging them, I looked them over for damage or deterioration. Everything looked fine.
Once I had the wires spread out, I used some black #3 crochet cotton from my stash, to make anchor stitches to hold the wires in place. I stitched through one side of the blanket, since it was futile to try stitching the interfacing back together.
The stitching went quickly, thanks to my super useful long doll needle.
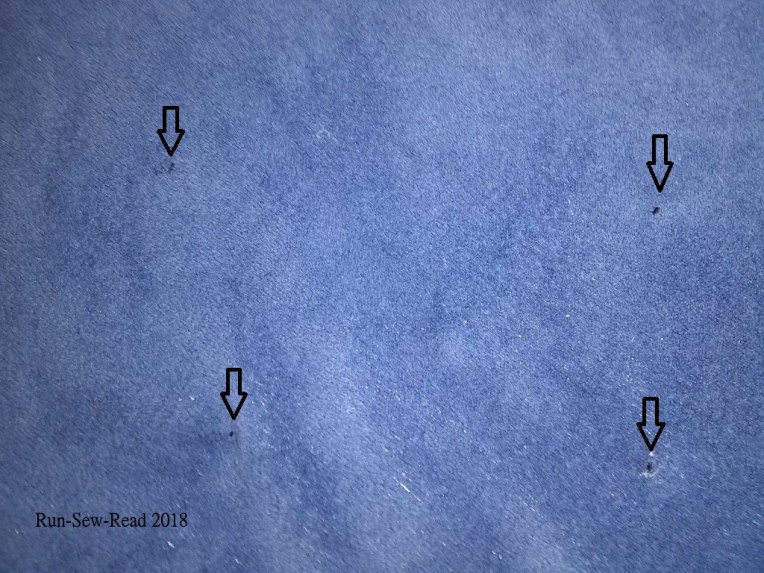
When I had enough stitches to keep the wires distributed across the blanket, I tied a knot, and turned the blanket right side out again. Amazingly, the little black stitches barely show on the blue-gray pile:
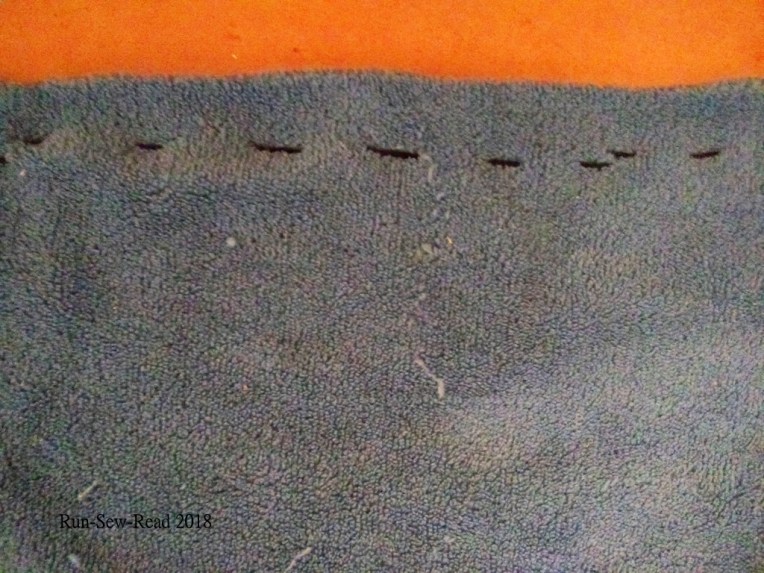
I used a big running stitch to close the blanket back up temporarily, in case I need to open it up and make more adjustments.
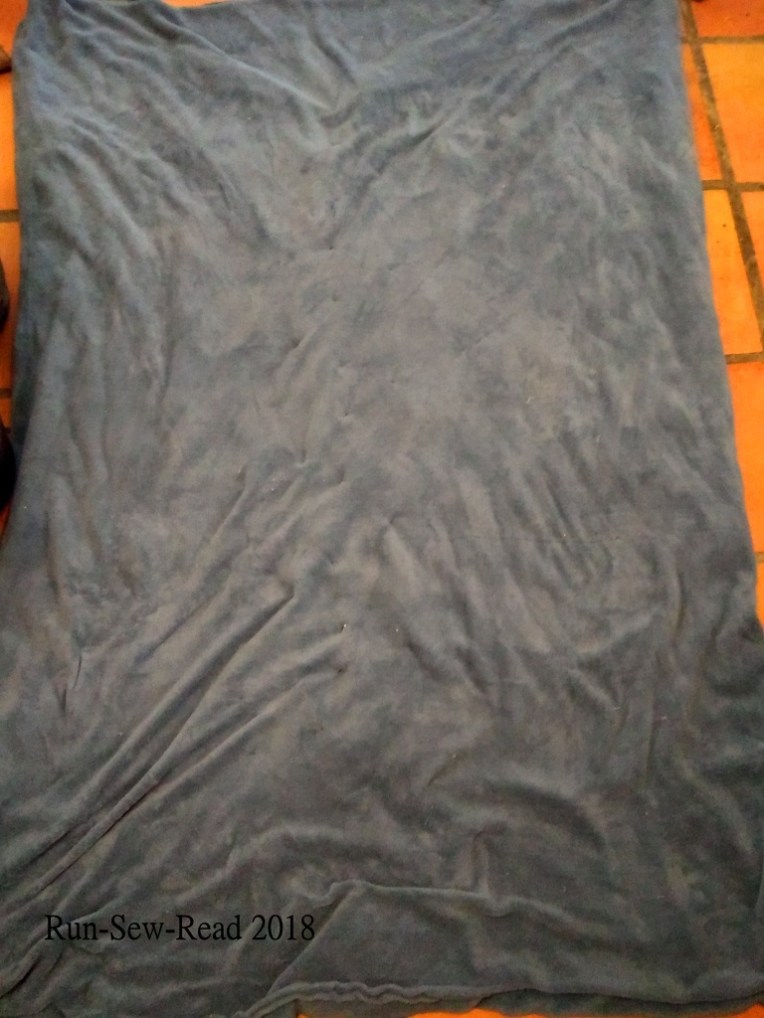
Here’s a shot of the whole blanket. It’s a super soft minky-type fabric.
So far, the fix is working out nicely. I’m having to share the blanket with the foster pup, but that’s mostly working out, too.
I’m one of those people who is cold all the time, so electric blankets are pretty nice to keep around.
Welcometo my new blog layout. It was time for a change. For now, it’s a slight shock every time I see the bigger text and photos. I’ll be tweaking a few more things until it’s the way I want it. Ultimately, I hope it gives a better reading and viewing experience.