Patching jeans

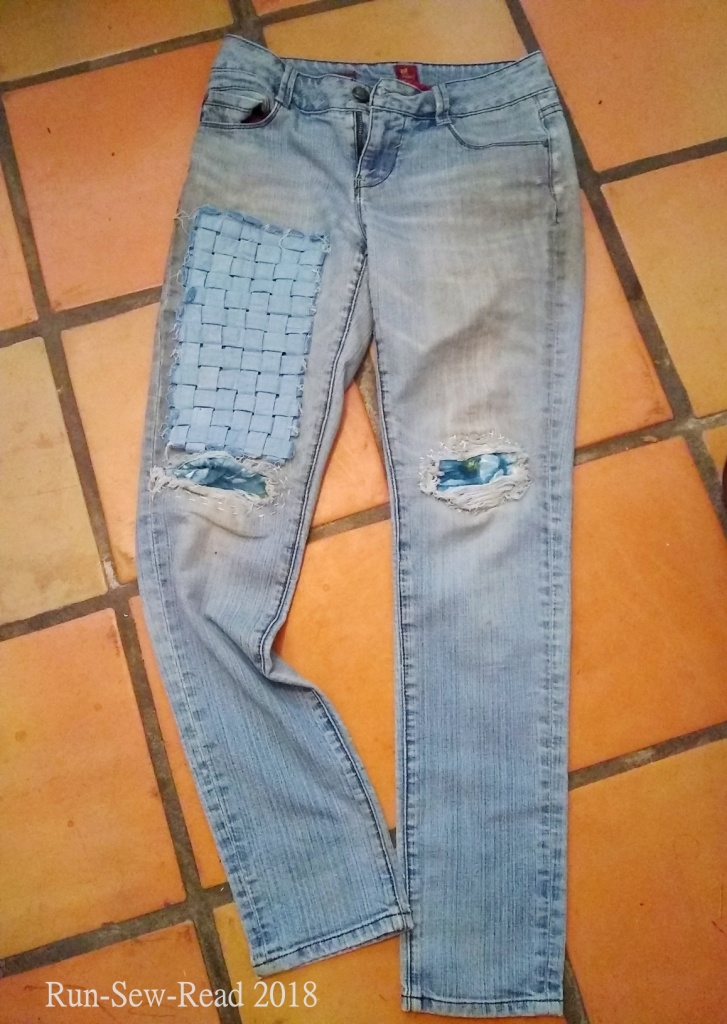
You wouldn’t know it now, but these jeans were once Casual Friday office attire.

Jeans back b w RSR

Then they morphed into my go-to comfortable yard work and housework jeans. Then a knee blew out.  Then the other knee went.  With two holey knees they were stylish, so heck yes, I kept wearing them.  Now they’ve reached the point where the denim is falling apart in places.

Jeans worn spot a w RSR

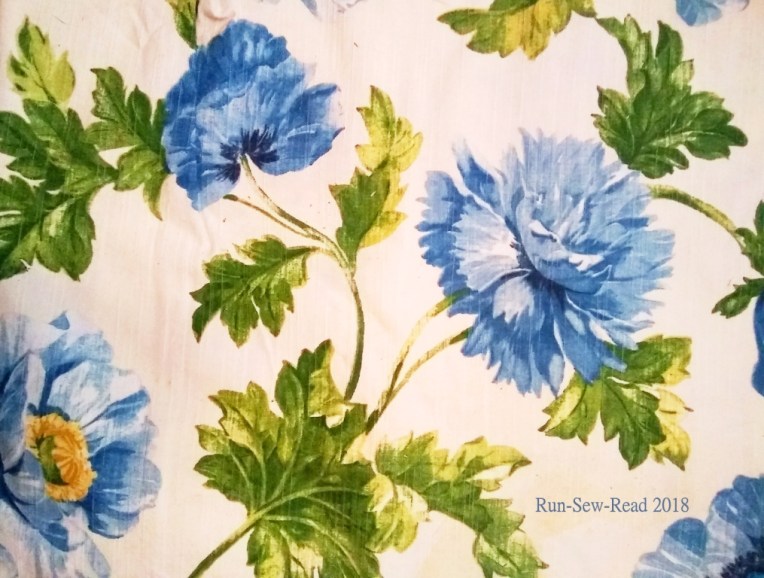
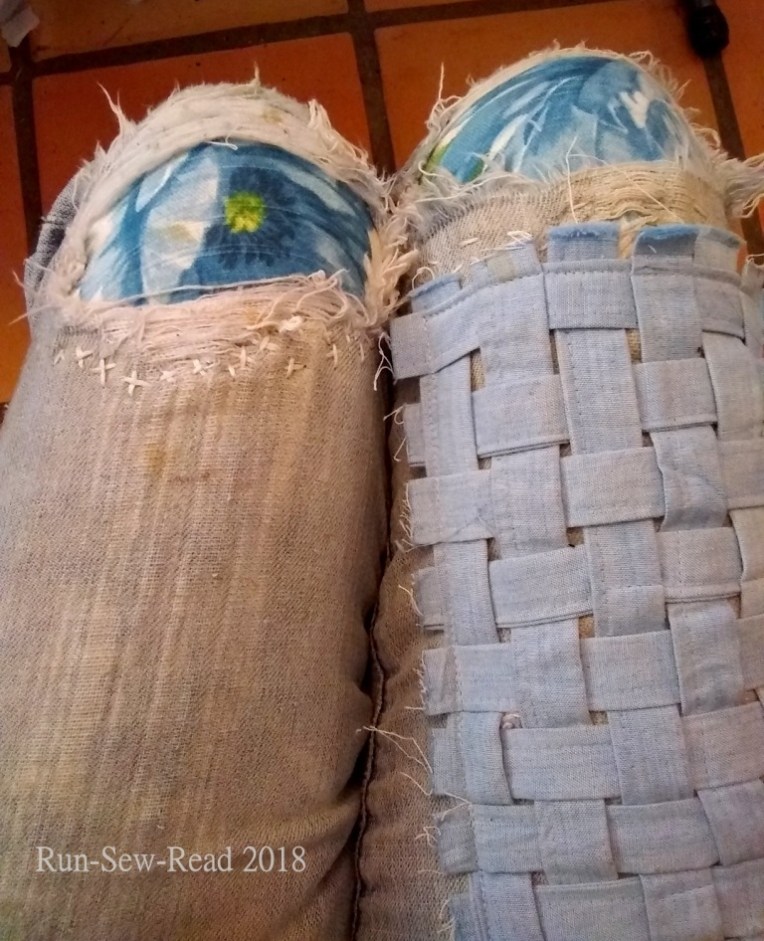
I don’t need to keep the jeans, but they are darn comfortable.  So, I started using them to experiment with patchwork.  A dig through my stash ensued.  Flowers from this barkcloth print now cover the knee holes.

Floral fabric for jeans a w RSR

Some chambray strips from old curtains, are now a woven patch to reinforce the worst weak spot in the denim.  It’s working well.

Jeans front a w RSR

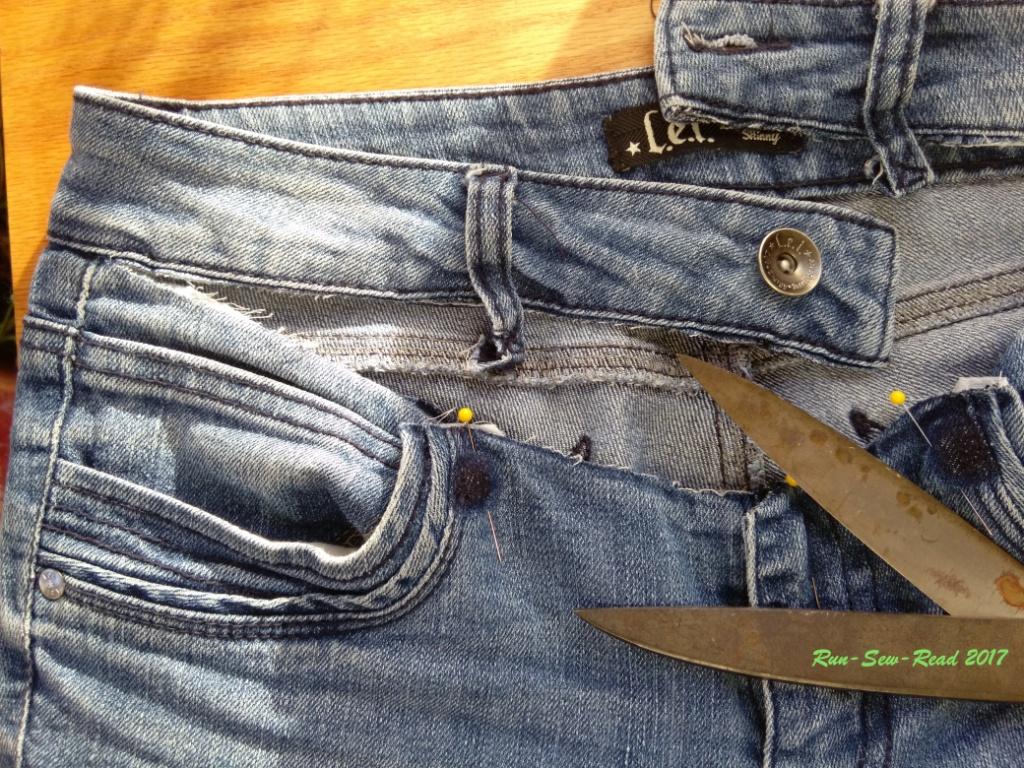
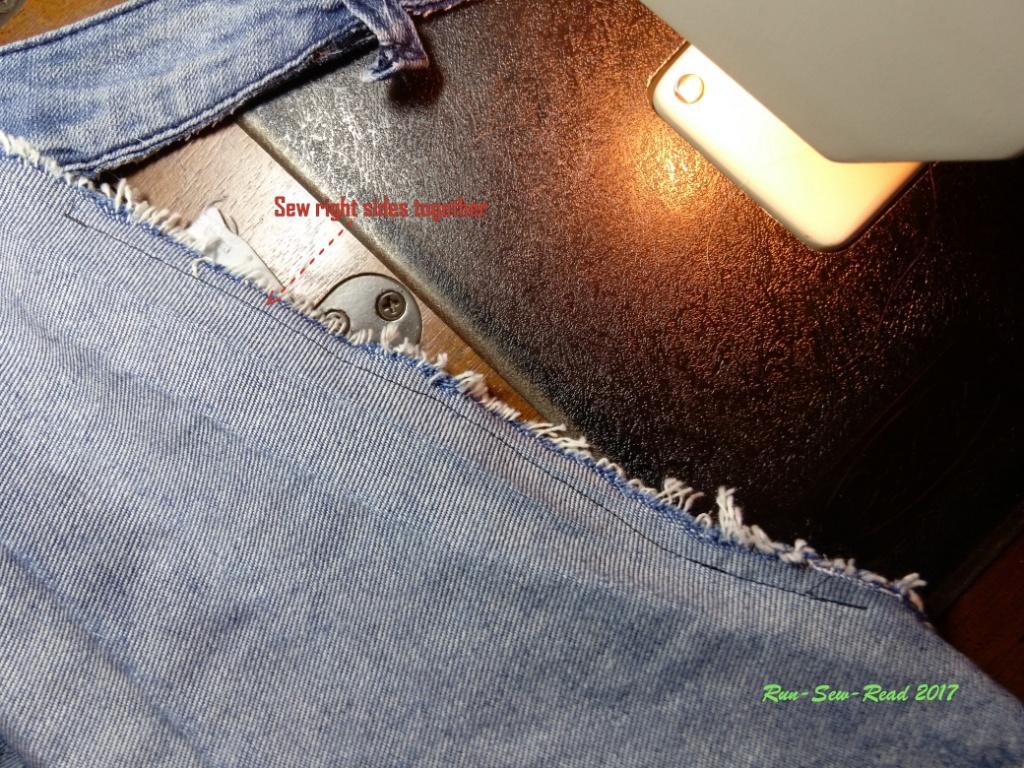
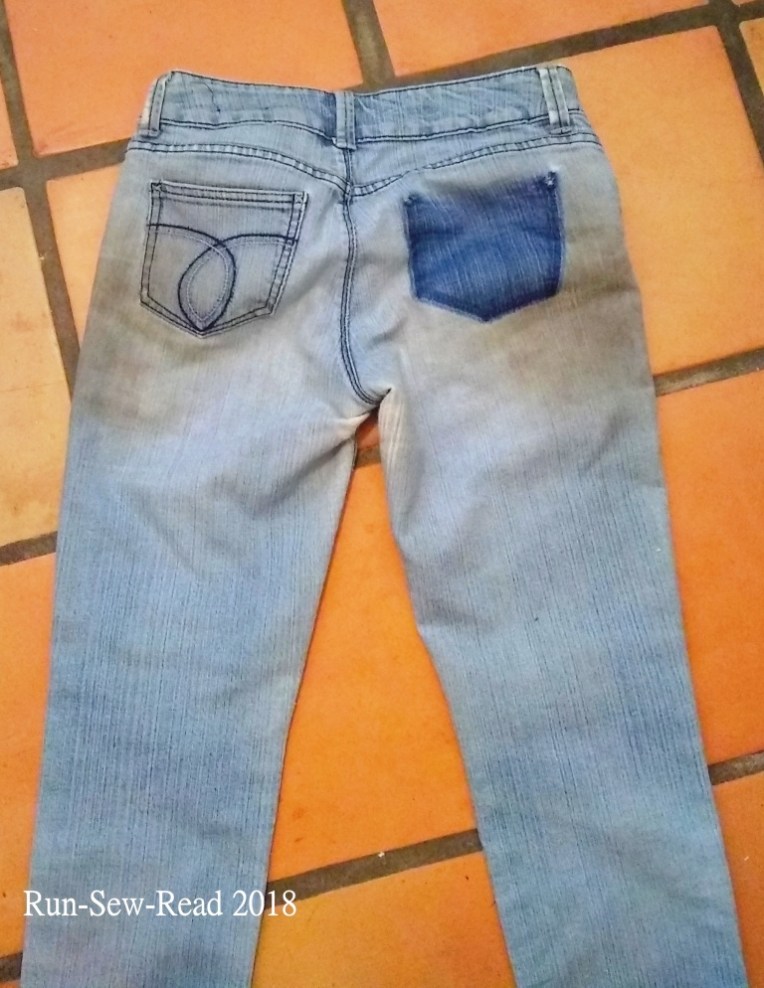
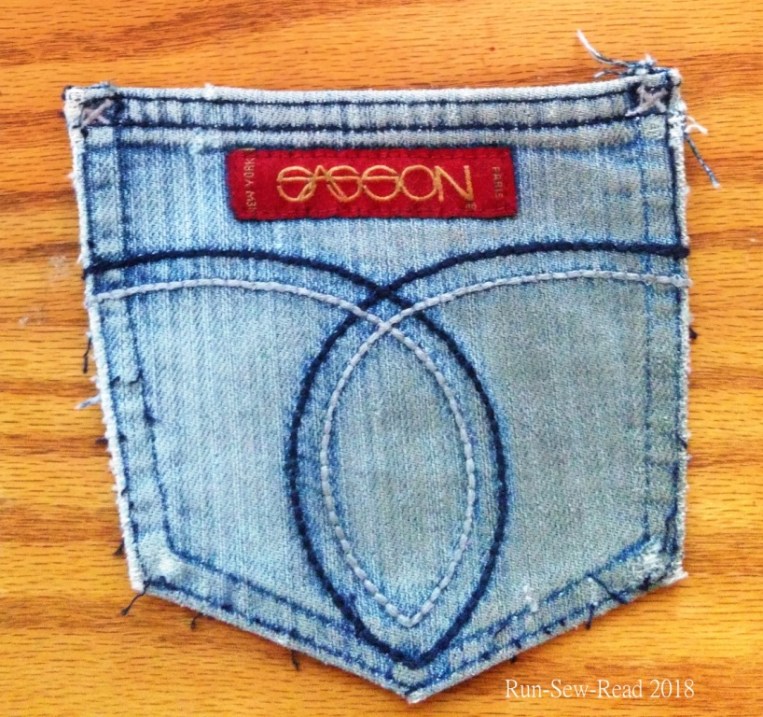
For the next fix, I want to mask the stained sides, where I’ve wiped my hands way too many times.  I’ve removed a pocket, which shows what color the fabric used to be.  Jeans side a w RSR

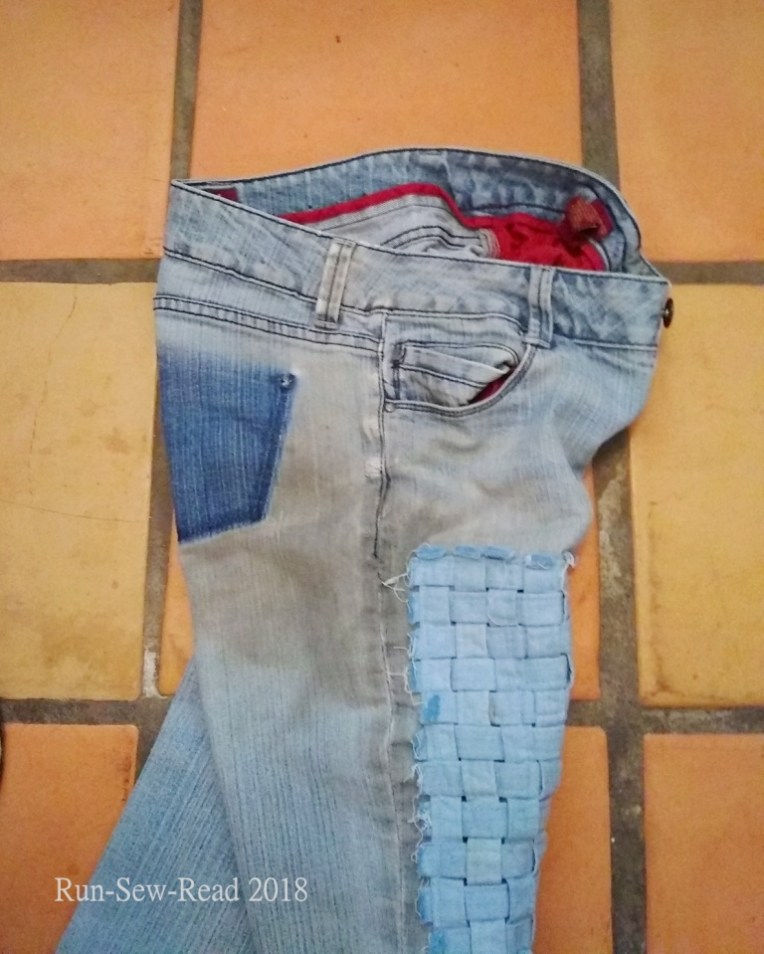
I’ll put the pocket back on, but maybe not in the same spot.

Pocket - RSR

My mom used these iron-on patches on my brother’s jeans all the time when we were little.  They didn’t last that long on little boys’ jeans.  The patch edges would start lifting, and then the patches could be peeled off.  I might find a way to use these on my jeans. Patches - RSR

The patchwork will be a continuous work in progress.  There are more places to repair now or soon, and as I wear the jeans, they will keep developing new areas to be patched.

Jeans knees a w RSR

Hopefully the jeans will keep looking better as I add to them, so that someday they warrant showing in another post.

Not a blue jeans song, because this creative process is about thinking outside the lines and beyond the obvious.


Jeans waist, not waste

I made an executive decision last week, to ban low-rise jeans from my person.  I despise the old low-rise trend; can’t stand wearing them.  They never feel right.

Low-rise jeans are also bad for the body, I think.  They ruin posture and cause expanding waistlines.  They promote slouching and spreading, because slouching and spreading the hips is what you have to do to keep them in place.

The pair of low-rise skinny jeans that caused this epiphany, still has some wear in them, and I like the color and weight.  When I endured the misery yet again of wearing them last week, I resolved to either fix the waist or be content to ruin them trying.

Result:  Waist is fixed!

The jeans before:

  • Low waistband in front;
  • High enough in back;
  • Tiny zipper.

Jeans before--RSR

Here’s how the process went:

  • Unzip the zipper.
  • Detach the front belt loops from the body of the jeans.  (They can probably stay attached to the top of the waistband.)
  • Cut the waistband off, from the center front to the side seam.

Jeans cut waist--RSR

Important:  Do not zip up the zipper.  With the waistband out of the way, there may not be a stop to keep the zipper pull from coming off at the top.  Instead, keep the zipper pulled down, and use pins to position the fly until the insert is sewn in place.

Pin the pockets and zipper to hold them in place.

Jeans cut waist full--RSR

Put the jeans on and identify where the waistband naturally feels right.

Jeans waistband fit--RSR

Cut two pieces of denim to insert in the open space across the front.  The pieces should be roughly the same shape as the open space, but slightly larger than the space on all sides.

Jeans insert--RSR

With the waistband moved out of the way, sew each insert piece to the body of the jeans, right sides together.

Jeans seam--RSR

Flip the insert piece over, and the seam looks like this.

Jeans seam after--RSR

Put the jeans on again, to identify the waistband placement on the insert, and pin the waistband in place.

Topstitch the waistband onto the insert fabric.  (Make sure the belt loops are out of the way of the stitching)

Jeans waistband placement--RSR

Trim the insert fabric even with the top of the waistband.  Fold the center front excess to the inside and topstitch in place.  Inside out, the insert will look like this:

Jeans finished inside--RSR

You will need something to close the gap where the zipper is too short.  I used velcro.  It was easy to place and stitch, and holds the gap closed.  I first added the long velcro shown next to the zipper.  That wasn’t effective.  The short piece above the zipper worked, and was actually easier to put on.

Jeans velcro--RSR

Finished look:

Jeans modeling after--RSR

The insert has a slight indented look, for some reason that I haven’t tried to figure out.  I don’t care.  The waistband feels great.